Better Family Photos

  • Subscribe to our RSS feed.
  • Twitter
  • StumbleUpon
  • Reddit
  • Facebook
  • Digg

Wednesday, 4 July 2012

Thank goodness

Posted on 11:25 by Unknown

That's the top LCD of my Fuji S5 Pro.  Bummer huh?  I don't even know how it happened.  But thank goodness because...

... I had a GGS LCD protector!

I carefully removed the protector using a thin but stiff piece of plastic (from the packaging of another product), sliding it in from the edge.  Just slide it in all the way, instead of trying to lever it upward because doing the latter might press the damaged protector against your camera's LCD and damage it.

The broken GGS protector.  As you can see it's made of glass, not polycarbonate.

The GGS protector left a sticky residue around the edge of the LCD, which I removed with GoofOff.


And voila, the camera's top LCD survived without any scratches.  Needless to say I will be buying I've already ordered another GGS protector.

Read More
Posted in ggs, lcd, protector, screen protector | No comments

Sunday, 1 July 2012

FlashRight Pro as Spinlight 360 Substitute (Part 1)

Posted on 23:38 by Unknown


In this post, we'll discuss the Flashright Pro, a flash modifier by Peter Gregg, who catapulted into fame with A Better Bounce Card.  The Flashright Pro touts several features:
  • lightweight, compact design
  • directional: instead of sending light everywhere (such as in a dome diffuser), it sends light toward a direction 
  • rotates 360 degrees
  • diffuser
The Flashright Pro is intended to serve two primary functions: to direct bounced flash and to illuminate the subject with diffused light.  There is second version of the Flashright Pro, the Flashright Pro Extreme, that has a slot to accommodate 'ratio disks,' which are diffusers with varying sizes of holes.  The idea is to allow the photographer to control the proportion of light used as bounce flash and as diffused light.

The Flashright Pro was recently relaunched with a significant discount.  With its more practical price, I decided to get one, not for its original intended purpose, but as a substitute for Neil van Niekerk's black foamie thing (BFT) and the useful but expensive Spinlight 360.

FLASHRIGHT PRO COMMENTS

The first function of the Flashright Pro is great.  Bouncing flash from a specific direction rather than in all directions is a good idea, in my opinion.  Doing so will get you soft directional light, not just soft light.  Directional light is more interesting than perfectly even, soft light.  Not to mention it will save your batteries as well. 

However, I am less excited about the second function of the Flashright Pro -- sending diffused light to the subject.  Illuminating the subject using a small diffused light source is not particularly useful because as I have repeatedly demonstrated, diffusion DOES NOT soften light.  AT ALL.  See here.  That's why when I saw the Flashright Pro design, I was not the slightest bit interested.  I knew it would create hard shadows.  When I saw the $99 price, I was even less interested.

BLACK FOAMIE THING COMMENTS

My favorite modifier for on-camera flash is still Neil van Niekerk's black foamie thing.  When bouncing flash, I use either the BFT or I use my hand as a flag (to block the direct light from the flash from reaching the subject). 

The problem with the BFT is that it falls off very easily.  Recently, while shooting for a client, I couldn't count the number of times it fell off.  The BFT can't be strapped tightly to the flash either because it needs to be able to rotate around the flash freely.

The BFT has since been updated as the Spinlight 360.  The Spinlight 360 attaches to a speedlight securely, while allowing a flag to be rotated easily.  The only problem with the Spinlight 360 is the cost, which is $129 for the basic version.  Even with Neil's code for a $20 discount, it's still a very high price for a very simple piece of plastic.

Note: Neil did not create the Spinlight 360.  Someone else used the idea for Neil's BFT and turned it into the Spinlight 360.

FLASHRIGHT PRO AND BFT HYBRID

I didn't feel comfortable buying the Spinlight 360 but I really liked the idea and kept thinking of possible substitutes for it.  Then one day, I got an email talking about the relaunch of the Flashright Pro.  There was nothing different in the design as far as I could see, but one thing they changed was the price.  From $99, they dropped it to around $27 + shipping and handling.  That seemed like a very realistic price to me.  As I thought about buying one, I noticed that the Flashright Pro could function as a Spinlight 360 substitute.  The Flashright Pro's head could rotate 360 degrees just like the Spinlight.  If I attached a black foamie thing to it, it might function just like the Spinlight 360, at a far more affordable price.

[As an aside, there is a bit of irony here.  I could be wrong but I sort of recall that Neil conceived of the BFT idea from Peter Gregg's A Better Bounce Card.  So, I found it a little amusing that years later, Peter Gregg's Flashright might be repurposed as a substitute for the Spinlight 360.]

Anyway, I ordered a Flashright Pro, dreams of a cheaper Spinlight dancing in my head.  Ordering the FR was not super smooth.  I didn't get an order confirmation for several days.  And after one week, I called them up - just got voicemail.  I emailed them and it turned out that they hadn't even shipped my order.  Grrrr.  It took another few days before they shipped my order and finally, I got my order.

INITIAL OBSERVATIONS
The Flashright Pro arrived in a padded envelope, without a box or any fancy packaging.  The instructions were printed with inkjet using a very tiny font to occupy only 1/4th of an 8x11.5 page (perhaps to save ink).  I was surprised at how plain the packaging was.  I've seen cheap eBay lighting accessories with fancier packaging. :)

The Flashright Pro itself seemed to have ok build quality.  It looks much more polished than what you might expect from the very plain packaging.  I don't know how exactly to describe the plastic, but it's not the soft, dirt-cheap kind such as those used in some cheap light modifiers.  Neither is it the hard kind of plastic used in speedlights.  It's not fragile, but if dropped on a hard surface, it looks like it would crack.  (Then again, it did survive being mailed from Illinois to California without any damage.)

The Flashright Pro's components
The Flashright Pro is attached to the flash with a supplied velcro strap.  If you look at the above picture closely, you'll see that there is a piece of rubber foam where the velcro strap is attached.  This helps strap the velcro tightly around the flash.

There is only one size of Flashright, so it had to be made large enough to fit a large flash head such as that of the Canon 580EXII.  With a small flash head like that of the SB800, the Flashright is a bit off-center.  In my tests, this off-centered position did not appear to affect the efficiency of the Flashright, producing identical output either off-center or centered (using spacers that I inserted).

FLASHRIGHT PRO TESTS
I started testing the Flashright Pro by testing the light quality of several configurations:
  • Flashright only, with the flash head aimed forward, while the diffuser is rotated to face upward.
  • Flashright only, with the flash head tilted at around a 45 degree angle, while the diffuser is rotated to face upward.
  • Flashright only, with the flash head in vertical position.
  • Flashright with black foamie thing covering the opaque side of the diffuser ("FR + BFT dark").
  • Flashright with black foamie thing covering the diffuser side ("FR + BFT light").
  • Black foamie thing only.

I tested the different configurations by aiming them above the subject, to a corner (camera right), to a wall on camera right, and to the rear camera right corner.  All shots were on TTL.  BTW, if you're wondering how I can aim my SB-800 to the rear right corner, it's because I did the head modification.

Here are the results:

In my opinion, the result that looks best is the black foamie thing.  However, the Flashright with BFT on the opaque side appears similar, except that in the right wall shot and rear corner shot, there is a visible hard shadow cast by the diffuser dome.

The Flashright used by itself is not bad in my view, at least when the flash head is tilted so that most of the light is shielded from directly hitting the subject.  The hard shadow cast by the dome is even more visible compared to the FR with BFT, but the dome is also acting as a fill light, bringing up the shadow detail.  I would not mind using it if I didn't have the BFT with me.

I also tested the efficiency of the configurations by using manual flash.  I aimed the flash above the subject and used 1/2 power (ISO 200, f/2.8, 1/250).


I was surprised to find that the most efficient modifier was the BFT.  I was also surprised that the Flashright with BFT combination was far less efficient than the BFT.

MODIFYING THE FLASHRIGHT
I was not satisfied with using the Flashright with the BFT because it was using too much power, diffusing the flash in all directions, which is really unnecessary when bouncing flash.  After some tinkering, I found that it was pretty easy to remove the dome and the diffuser.  See the video below:


Note that the two halves of the Flashright's frame are held together by tabs.
One of the tabs (note: the small screwdriver is NOT needed to disassemble the flashright)
There are 5 tabs, and they are not evenly spaced.  There is a part where there is a larger gap between tabs.  That part corresponds to the part of the lower frame that is above where the strap is attached.  To reassemble, just align the tabs and snap the frame together.

I tested two modifications of the Flashright Pro.  The first modification I tested was to use the opaque part of the dome.

I just removed the clear dome and the diffusion disk.  With this mod, the partial dome is very loose.  To remedy this looseness, I wound a few loops of twist tie to serve as a kind of gasket between the partial dome and the FR frame.  You can see part of the twist tie in the shot above.  I then attached a BFT to the partial dome (in my case I used velcro tape).


The second modification I tested was to use the clear dome instead of the opaque partial dome.  With this mod, the dome fits the FR frame perfectly just like an unmodified FR.  I attached the BFT to the dome using an elastic band for friction and the infamous Neil van Niekerk hair band, which BFT fans will recognize.

I tested these modifications against the BFT using the same protocol I had done for the earlier tests.


I was pleased to find that both modifications produced lighting patterns that were very similar to those of the BFT.  In terms of efficiency, the BFT was still the most efficient configuration, but both modifications were not far behind from the BFT.

I was a bit surprised that the 2nd modification performed as well as it did both in terms of lighting pattern and efficiency.  I thought that the dome would act as a diffuser that would waste a lot of light.  Now that I knew that it did not have any noticeable disadvantage, I preferred the 2nd mod because it doesn't need any kind of spacer between the dome and the frame to rotate properly.  Moreover, compared to the first mod, the 2nd mod does have one advantage: if I choose to, I can partially expose the diffuser dome to lift shadows (albeit creating a hard shadow of its own).


In the shot on the left, I aimed the flash to the left, and I rotated the BFT to completely block the dome.  The result is that the shadows are very soft, because the subject is illuminated purely by bounced light (a very large light source). 

In the shot on the right, I aimed the flash at the same direction, but this time I rotated the BFT so that the dome would be partially visible to the subject.  In the result, we can see that there are two shadows: a soft shadow from bounced light, and a hard shadow from the dome (most visible below the jawline).  On the other hand, the soft part of the shadow is brighter compared to that of the first shot.

Because the 2nd mod appears to be more versatile, I've decided to keep my Flashright in that configuration.  I have yet to test either mod in real life shots, but so far, the Flashright Pro looks like a promising substitute for the Spinlight 360.  As regular readers of our blog know, we pride ourselves in real world testing of equipment.  I will indeed post real world test results in a followup to this post.

Meanwhile, if you would like to order the Flashright Pro, you can buy it direct from their website.  Try these codes 74PLEASE or GIMME73PLEASE to get the new [lower] pricing.  If you would like to buy a Spinlight 360 instead, check out their website.  Neil's $20 discount code is NEILVN20.   Note: we are not affiliated with Peter Gregg, ColorRight, FlashRight, Neil van Niekerk, or Spinlight 360.  Nor do we get any commission out of those sales (we do have a lilliputian Amazon Affiliates account).  Instead, the best ways you can support our blog are by telling your friends about our blog, sharing our posts in social media (Facebook, Twitter, Google Plus, etc.) and photo-related forums, and subscribing to our feeds or via email.  Links to share and/or subscribe are on the right side of the page and at the bottom of each post.  (If you do subscribe via email, FYI we won't share your email address with 3rd parties.)  We also appreciate feedback via comments or email.  Thanks for your support!

EDIT: 7/20/12 - the current discount code for Flashright is SAVE75
EDIT: 8/7/12 - the link for getting the Flashright for $25.99 is https://www.paypal.com/cgi-bin/webscr?cmd=_s-xclick&hosted_button_id=4YHE2MEHBMMTN

RELATED POSTS:
Testing Neil's Bounce Technique
Black Foamie Thing on Video
Testing the DIY Spinlight
Read More
Posted in abbc, alternative, BFT, black foamie thing, bounce card, directional, flash, flashright, gregg, lighting, Neil VN, niekerk, peter, soft, spinlight, substitute | No comments

Saturday, 30 June 2012

Fayoum Desert Trip - Part 1

Posted on 04:55 by Unknown
Reducing the tires pressure, to conquer the soft sand
 
I went to the desert a few weeks ago on a one day do-it-all trip with some of my old friends, and a lot of new friends that I met for the first time. We went to Al Fayoum, and started our trip from there, it's a known and famous place for tourists, but being Egyptians we don't usually regard our country with a tourist's eye, so this time we decided to go and see what was all the fuss about. Full details after the break.
This will be part one of a three parts series, I won't do a lot of talking and will let the pictures (and captions) tell the story, I divided the post to three parts because of the enormous amount of pictures that I want to share.
 
Before we get to the pictures, here's a quick run down of the trip's program:
 
  • We were 16 men sans the drivers.
  • Gathering at Al Fayoum @ 7 am (we arrived ~ 9 am, lots of people = logistics hassle and delay).
  • Riding the 4x4 vehicles waiting for us and moving to our first destination, Wadi Al-Rayan waterfalls.
  • Moving to one of the lakes for breakfast and a little relaxing.
  • Of course during moving from one point to another, the drivers went through the dunes (soft sand), steep inclines and declines, they showed us real off-roading and the full capabilities of the cars, there were lots of heart-in-the-throat and heart-in-the-stomach moments.
  • Climbing uphill to see the whole lake from above and take pictures.
  • Going to the "Whales Valley" to see fossils of whales and coral reefs that was once their during the olden times, Al Fayoum desert was once totally covered in water.
  • Having a light lunch at the "Whales Valley" and resting until the mid-day sun becomes less brutal.
  • Moving to the dunes to try out sand boarding (yeah, sand boarding).
  • Finally, moving to a safe camp close to the exit point for barbeque, and our final meal, this started around sunset and we stayed there for almost 3 hours, cooking, eating and having fun.
  • Then a quick sprint to the exit point in complete darkness, using only moon light, and GPS like drivers.

 
When I first learned of the program, I didn't think it would fit in one day, but it did, and it was a very fullfilling day, so let's start with our gathering point, we gathered at a place that belonged to a friend of our guide (and one of the drivers as well), we waited there and had some drinks until the 4x4 cars gathered and were ready.
 
The gathering place, see that place on the far right? Check the picture below
A bedouin style seating area, we had our drinks there

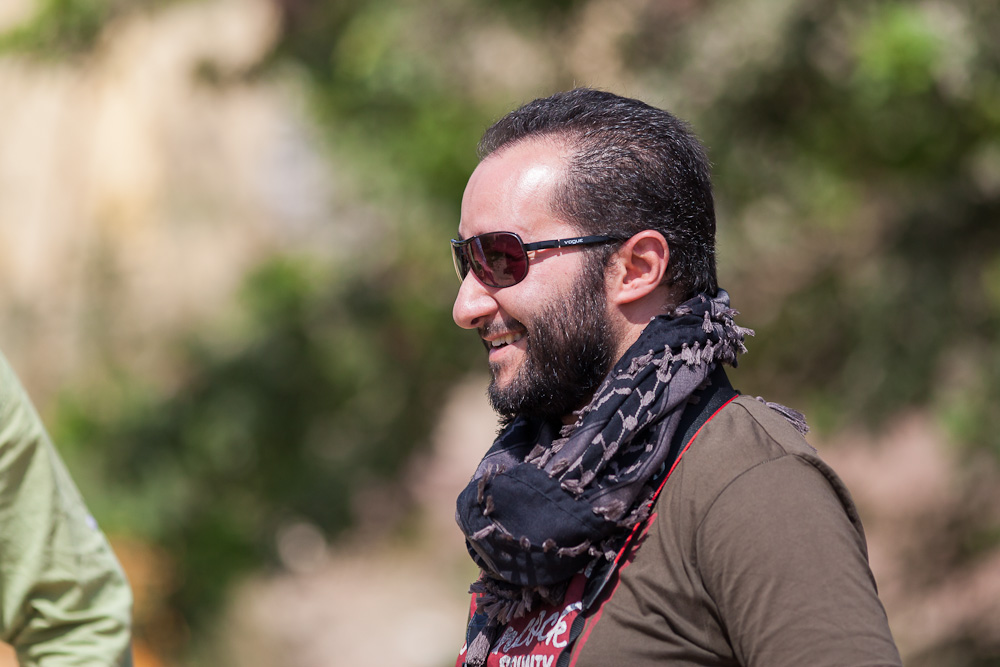
One more 200mm headshot, this my other photographer friend, you can see the Canon strap beneath the scarf
 
I just noticed I hadn't told you about the equipment I had with me, for such trips, the most essential lens to carry is the 24-105 (or the 15-85 during my crop sensor days), this is my workhorse lens, it covers a wide 24mm viewing angle for landscapes and scenery, and long enough for portraits or somewhat far away subjects. I took the 5D Mark II, the 24-105 f/4, the 200mm f/2.8 (only for a few portraits, just love the look) and the 50mm f/1.4 for night shooting, it's three stops faster than the 24-105.
 
I also packed one 580EX II speedlite, my favorite Slik Mini Pro table tripod and of course the circular polarizer, all of these items fit inside my newly acquired and brilliant Vanguard Heralder 28 bag (review coming soon).
 
Moataz, my photographer friend, sporting a Canon 550D
 
Meet Moataz, the guy who gathered all 16 of us to this spectacular trip, he's a Canon shooter and he's the lucky person who bought my much appreciated Canon 60mm f/2.8 Macro, he didn't use any other lenses all day, I will share some of his pictures in this post, any pictures where you can see me, he's the guy who took it, he was shooting JPEGs only with a slightly warm white balance, and gave me a hard time processing the files.
 
Warning sign, DON'T JUMP in the waterfalls
 
Wadi Al-Rayan waterfalls was our first destination, I didn't have high hopes for the waterfalls because I knew they were rather short and that the water in these falls was agricultural water, anyway, once we arrived I saw this huge sign, it says "Jumping from the top of the falls is strictly forbidden, there are rocks at the bottom of the water", my thoughts at the moment were "who in their right mind would jump from such a short waterfall", and then I saw this:
 
Locals competing apparently to see who has bigger balls
 
To my astonishment, I found these locals jumping from the the top of the falls, with such a crowd and in order not to be a chicken in front of their pals, people were gathering all nerves to do the jump, you can clearly see how hesitant this gut with the pink top. In order to give you a sense of the gravity of the situation, it is said there are 5 people who die every year because of the rocks at the bottom, check out these pictures:
 
Lunatics
 
But with balls of steel
 
Jumping straight, notice the next picture
 
Damn, do you see how shallow the water is? These people land on their feet, directly on the rocks
 
I tried to capture the whole waterfalls, but it was incredibly crowded, and I didn't have my ND filter to get a long shutter speed, so I had to do with a handheld picture at the lowest ISO and the smallest aperture, not a good picture, but a reminder of the location.
 
People were only jumping from the top most part of the falls, the lower it gets, the more dangerous it is
 
Before we left we took a couple of environmental portraits, and I have to say something here, after we finished the trip, one of my friends was cross that I didn't take enough pictures of him, in his opinion, the whole idea of taking a camera on a trip is to take photos of yourself in every place you go showing the background as a proof you went there, sorry, but that's not my idea of photography, what is the point of having tens of pictures of the same person standing at the side of the picture smiling while there is a different background each time? Facebook? Screw facebook, I take pictures that I like, pictures that tell a story, not just a proof I went somewhere, oh yes, and he hated pictures that blurred the background! -rant over-.
 
This lake was on the other side of the falls
 
I like spontaneous photos
 
Our next destination was at the side of a huge lake where we had our breakfast.
 
Remember this photo because I will refer to it in my next post
 
Cars parked, notice the tent in the middle
 
With the cars parked, our bedouin drivers stretched a piece of cloth between two cars as a sort of tent to protect us from the sun while we had breakfast, people spread everywhere and started taking photos of each other until the breakfast was ready.
 
Putting the 60 Macro to good use, an amazing portrait lens
 
That guy on the right turned out to be very funny, have a look at some of the faces he made
 
This picture and the one below were taken with the 550D and the 60 macro
 
Evil laughter
 
Sands of time
 
Yours truly, I feel very happy when I find out that someone took pictures of me, so I am posting it celebrate this rare situation
 
Everyone hiding from the harsh sun
 
After breakfast, our drivers told us that the water was nice for a dip, but unfortunately we didn't have swim suits, but this didn't prevent some of us from getting in anyway.
 
The drivers using our breakfast table as a sea recliner
 
Table fun, taken with the 550D
 
Still
 
Wow, I wish I went into the water
 
And I finish this part with this serene picture, I hope you enjoyed this post, in the next part we will see some more action.
 
 
RELATED POSTS
 
Fayoum Desert Trip - Part 2
Fayoum Desert Trip - Part 3
 
 
Posted with BlogsyPosted with Blogsy
Read More
Posted in 200 f2.8, 200 L, 200mm, 200mm f/2.8, 200mm f/2.8 L II, 200mm f2.8, 24-105 f4, 4x4, 5D Mark II, desert, fayoum, wadi rayan | No comments

Wednesday, 27 June 2012

Reflection Portrait

Posted on 04:34 by Unknown

This was a self-portrait that I took on a recent trip to Las Vegas.  It was much harder than I expected to get this shot but it was a useful exercise to practice lighting skills.  In this post, I will discuss the steps I took to get the final result.


Step 1: Concept
I had taken a portrait with the Bellagio fountains before (blogged here) and this time I wanted to try something a little different.
I thought of doing a portrait where the focus was ostensibly on the fountain while my reflection is captured as if unintentionally.

Step 2:  Composing the Shot
Here is what the window looked like:
(BTW, the shot above was made possible by the Fuji S5's incredible dynamic range.  The sun was blazing outside, and lighting in our room was very dim in comparison.  Nonetheless, the S5 was able to capture the relatively dark room, dark furniture, and TV screen while also capturing all the detail outside the window, including the sky.)

I positioned the camera on a tripod and framed the shot of the fountain.  For this shot, I used the Nikon D90 and Tokina 11-16 2.8.  For low light, the D90 is way better than the S5 in terms of noise, plus I don't really need the S5's extreme dynamic range for this shot.

Step 3: Ambient exposure
Next, I set the exposure for the ambient light of the fountain.  In this case, I set the shutter to a speed that was slow enough to capture some of the fountain's movement, but not so slow that the fountain would merely look like undefined mushy blur.  I initially narrowed the aperture to f/5.6 to get both deep enough depth of field and better sharpness (usually, lenses are sharper when stopped down from wide open).  At that aperture, ISO for the desired exposure would have been 800 - a little too high, in my opinion, for a setup shot.  So I changed the aperture to f/4.0 and ISO to 400.  That aperture might seem fairly wide for this kind of shot, but I was using a wide angle lens, so the depth of field would still be deep, and the Tokina 11-16 is sharp anyway at all apertures.

Step 4:  Adding flash
I setup the flash below the window sill, to simulate the light coming from the fountain.  The window sill would also block the reflection of the flash in the window.  I wanted to soften the light but I couldn't use the full umbrella (the reflection of which would be so large that it couldn't be blocked by the low window sill), so I tried a partially collapsed umbrella.

Even collapsed, the umbrella was still showing up in the reflection.  More importantly, it was spreading light everywhere, thus illuminating more of the furniture and floor around me, which were showing up as reflections.

I changed to a bare flash.  I also had to readjust the flash intensity.  I found that with bare flash, even 1/128 was too powerful, so I switched to TTL -3.0 FEC to minimize the flash intensity.  (On some flashes such as the SB-800, TTL can decrease the flash intensity to a lower threshold than manual.)
The flash and umbrella were now gone from the reflection, but the floor, furniture, and tripod's reflection were still quite visible.  The hard light of the flash from a low angle also created a horror-movie look.

To solve the horror-movie issue, I moved the flash off to the side.  It would still look plausibly from the fountain's light.  At the same time, since it was no longer directly under me, it looked less scary.

Step 5: Remove unwanted reflections.
I next wanted to work on minimizing unwanted reflections -- in this case, the furniture and tripod.  Windows are similar to specular surfaces like mirrors and shiny metals.  If you want a reflection to show up, light the object you want to be reflected (not the specular surface itself).  Conversely, if you don't want a reflection to show up, the unwanted object should be in shadow.

Here, I wanted the light from the flash to hit only me.  I didn't have a snoot or grid, so I just used a combination of the curtain and my camera bag to block the flash from illuminating the floor and furniture.  I also turned down the desk lamp at the back.  I also experimented with a higher shutter speed to reduce ambient to see whether any of the unwanted reflections were due to the room's light (as opposed to the flash).

The tripod's reflection was still showing up, so I did a little more experimentation on the flash's positioning and narrowing its beam so that it would illuminate only me.

Step 6: Taking the Shot
When I was satisfied with the reflections, I got ready for the shot.  After some trial and error, I got a decent shot.
This one had some reflections in the upper part of the frame.  The reflections were from the TV (my wife was still watching).  Fortunately, because the reflections were in a relatively uncluttered area of the frame, I knew it would be easy to clone them out.

BTW in the final shot, I also adjusted the exposure for ambient, changing to a faster shutter speed (1/6) to get more definition from the fountain.  I increased the ISO to 640 to compensate.

Step 7:  Post-processing.
In Lightroom, I did the usual adjustments to the tone curve and such.  I also brightened my reflection and warmed it up to make it look more similar to the color temperature of the fountain light.

Finally, I took the image to Photoshop Elements to clone out the the reflections from the TV.  Voila.  Here is the final result again.


Read More
Posted in bellagio, flash, fountain, glass, las vegas, lighting, mirror, portrait, reflection, specular, window | No comments

Monday, 25 June 2012

Update

Posted on 14:58 by Unknown
Hi all. Sorry for the absence of posts this past week.  I caught a fever but now I'm ok.  Anyway, here are some of the upcoming posts
1. A lighting-based BTS post.
2. YongNuo RF603 radio trigger review.
3. The danger of shooting at the Golden Hour.
4. FlashRight Pro at lower price = Spinlight 360 substitute?
You might know about Peter Gregg's new modifier called the FlashRight Pro.  It was initially priced at $100 but is now available for a far lower price. Here is a link to get the FlashRight Pro for $25.99 + shipping/handling
https://www.paypal.com/cgi-bin/webscr?cmd=_s-xclick&hosted_button_id=4YHE2MEHBMMTN
I'm not sure how long this offer will last nor do I know how good this modifier actually is.  I ordered one more than a week ago in order to test it as a substitute for the awesome but expensive Spinlight 360.  Hopefully I can get the order soon so I can post about the results.

6/28/12 update: you can use the discount code 74PLEASE to get Flashright at the reduced price at colorright.com.  I'm supposed to receive my order by today, so I will be reviewing this soon.
5. A comparison between the Nikon 70-200 VR and the Sigma 50-150 non-OS.
Read More
Posted in | No comments
Newer Posts Older Posts Home
Subscribe to: Posts (Atom)

Popular Posts

  • Samyang 24 f/3.5 Tilt Shift Lens Now Available
    A seller on ebay ( bestpriceoptics ) is now selling the Samyang 24 f/3.5 tilt shift lens, in Canon and Nikon mounts, for $999 shipped.  This...
  • Nikon 28 1.8G: Moody Artist?
    When Nikon had its recently-finished sale (now extended to end of March), the one lens that I considered buying was the Nikkor 28 1.8G.  To...
  • Olympus E-PL3 with 14-42 Lens $199; Moving from Nikon to MFT?
    I saw on 43rumors.com that the Olympus E-PL3 was being sold at Newegg for just $199 with the 14-42 kit lens included.  I checked it out and...
  • Double Camera Strap & BlackRapid RS-5 Review
    This is a review of two camera straps: - The first is a double camera strap that's -- let's be blunt -- a knockoff of the BlackRapid...
  • Price drops!!! Olympus XZ-2, Pentax MX-1. And about the Casio EX-10
    I just noticed a huge price drop on the Olympus XZ-2 (previously $500 now under $400) and Pentax MX-1 (previously $500 now under $300 ).  Pe...
  • Best Alternative to Nikon 24-70 2.8G: the Nikon 28-70 2.8D
    Every Nikon shooter knows that the Nikkor 24-70 2.8G is the best standard zoom for Nikon's full frame cameras.  However, at around $1900...
  • Abstract Fun
    In one of the rare times I put effort and setup a light stand and an umbrella to shoot my girls, I decided to make use of this burst of ener...
  • Coco Ring Flash - First Impressions
    A few weeks ago, after much deliberation, I finally decided to get a ring flash adapter.  My purpose was to use it as on-axis fill, much lik...
  • Nikon D7000 vs. Nikon D7100
    D7000 + Tokina 11-16 I've been using the Nikon D7000 for a couple of months now, and in this post I'd like to share my thoughts on t...
  • Sigma 18-35 1.8 Revisited; Where to Get It
    Back in April of this year, Sigma surprised everyone by announcing the Sigma 18-35 f/1.8 , the first zoom lens for a large sensor that had s...

Categories

  • "alien bee"
  • "april fool's"
  • "ring flash"
  • "yong nuo"
  • 1"
  • 1/1.7"
  • 10-17
  • 10-20
  • 11-16
  • 15-85mm
  • 15z
  • 17-50 vc
  • 190cx pro3
  • 2.8
  • 2.8G
  • 2/3"
  • 200 f2.8
  • 200 L
  • 200mm
  • 200mm f/2.8
  • 200mm f/2.8 L II
  • 200mm f2.8
  • 200mm f28
  • 200mm f28 L II
  • 2012
  • 2013
  • 23 Samsung led
  • 24-105 f4
  • 24-70
  • 25 1.4
  • 28-105
  • 28-70
  • 35mm
  • 35mm f/2
  • 35mm f2
  • 360
  • 3rd party
  • 4.1
  • 4/3
  • 40 pancake
  • 40 panckae
  • 40 stm
  • 40-150R
  • 40mm f/2.8
  • 430EX
  • 43rumors
  • 45 18
  • 45 AW
  • 4x4
  • 50 14
  • 50 f14
  • 50-150
  • 50mm
  • 50mm f/1.4
  • 55 AW
  • 55-250
  • 550D
  • 55aw
  • 560ex
  • 580 ex ii
  • 580EX
  • 580EX II
  • 5d
  • 5d mark 2
  • 5d mark 3
  • 5D Mark II
  • 5d mark iii
  • 5d2
  • 600d
  • 600ex-rt
  • 60d
  • 60fps
  • 60mm macro
  • 650d
  • 6d
  • 7.5mm
  • 720p
  • 75 f1.8
  • 85mm f1.8
  • 8x12
  • abbc
  • abstract
  • accuracy
  • active d-lighting
  • adjustment
  • adl
  • AF
  • af point
  • AF Point Expansion
  • aftermarket
  • airport
  • alexandria
  • alien bee
  • alien bees
  • alienbee
  • alienbees
  • alternative
  • ambient
  • ambient light
  • angle
  • aperture priority
  • APS-C
  • apsc
  • assignment
  • auto focus
  • auto white balance
  • autofocus
  • AWB
  • awl
  • back button focus
  • background
  • background blur
  • backlight
  • backlighting
  • backlit
  • bad behavior
  • bad photography
  • balance
  • bare flash
  • battery
  • BBF
  • beach
  • beams
  • beauty dish
  • bellagio
  • BFT
  • birthday
  • black
  • black foamie thing
  • black rapid
  • blackrapid
  • blogs
  • blower
  • blown
  • blur
  • bokeh
  • bounce
  • bounce card
  • bounce flash
  • bower
  • bracket
  • brightness
  • brilliance
  • brolly grip
  • brother
  • build
  • burst mode
  • butterflies
  • butterfly
  • C.Fn
  • cable
  • cake
  • camera
  • camera bag
  • camera releases
  • camera settings
  • candle
  • candlelight
  • canon
  • Canon 100mm Macro L IS
  • canon 200mm f28L
  • canon 24-105
  • canon 40 stm
  • canon 40mm f28 pancake
  • canon 50
  • canon 50 1.4
  • canon 55-250
  • canon 5d mark 2
  • canon 5d mark ii
  • canon 5d mark iii
  • canon 5d2
  • canon 5d3
  • Canon 60d
  • canon 6d
  • canon g11
  • canon speedlite
  • car
  • carbon fiber
  • catch lights
  • cheap
  • christmas
  • clean
  • cleaning
  • clipped
  • clipping
  • close up
  • clouds
  • cls
  • clustered
  • color
  • compact
  • comparison
  • composition
  • compositional aid
  • construction
  • contrast
  • cooler master
  • copyright
  • core i7
  • cowboy
  • cowboystudio
  • cpl
  • creepy
  • crop factor
  • crop sensor
  • cyber commander
  • cybersync
  • d-lux
  • d-lux5
  • d3
  • d300
  • D5100
  • D600
  • d70
  • d700
  • D7100
  • d90
  • dark background
  • david hobby
  • daylight
  • dell 24 inch
  • depth of field
  • desert
  • diamond
  • digital
  • directional
  • distance
  • diy
  • dlux
  • dlux5
  • dng
  • double
  • dslr
  • DSLR bag
  • dual
  • dust
  • dx
  • dynamic range
  • earthquake
  • ebay
  • ebay trigger
  • eclipse
  • editing
  • EF 40mm f/2.8
  • ef-s 60mm
  • einstein
  • Electro GN
  • engagement
  • environmental portrait
  • ep5
  • equipment
  • ETTL
  • ettr
  • europe
  • events
  • evf
  • ex600
  • existing light
  • expensive
  • exposing to the right
  • exposure
  • f/3.5
  • family
  • faq
  • fasten-r3
  • favorite
  • fayoum
  • Fayoum desert
  • fill
  • fill light
  • film
  • filter
  • finepix
  • fire
  • fireplace
  • first impressions
  • fish-eye
  • fisheye
  • fix
  • FL600R
  • flash
  • flash bounce
  • flash sync
  • flash trigger
  • flashmeter
  • flashright
  • focal length
  • focus
  • food
  • football
  • fotodiox
  • fountain
  • freexwire
  • fuji
  • fujifilm
  • Full Frame
  • fun
  • fx
  • galaxy s 3
  • galaxy s4
  • gecko
  • GeForce gtx570 OC
  • gel
  • geomag
  • ggs
  • ghost
  • gigabyte z77 ud3h
  • glass
  • gn
  • Goodbye
  • gorillapod
  • gregg
  • grid
  • grip
  • group shot
  • gskill ripjaws
  • guide
  • guide number
  • gx7
  • haf 912
  • handheld
  • hands on
  • hands-on
  • hdr
  • head shot
  • hiatus
  • high dynamic range
  • high iso
  • high speed sync
  • highlight
  • highlights
  • histogram
  • holder
  • holiday
  • home
  • home made
  • Honda civic
  • honeycomb
  • hotshoe
  • hoya
  • humor
  • i9500
  • id
  • image quality
  • impressions
  • indoor flash
  • infrared
  • infringement
  • insects
  • inverse square law
  • japan
  • jewel
  • jewelry
  • joby head
  • jpeg
  • Kingston hyperX SSD
  • kirk tuck
  • kl bird park
  • krakow
  • kuala lumpur
  • las vegas
  • lastolite
  • laurence kim
  • lax
  • lcd
  • leica
  • lens
  • lens cap
  • lens compression
  • lens review
  • lenses
  • lenspen
  • lensrentals
  • light
  • light painting
  • lighting
  • lightroom
  • lightroom 4
  • lightroom 5
  • location
  • long
  • long exposure
  • los angeles
  • low key
  • low light
  • Lowepro
  • Lowepro 45aw
  • Lowepro 55aw
  • lr4
  • lumiquest softbox III
  • lumix
  • lx-5
  • lx5
  • m4/3
  • m43
  • macro
  • macro adapter
  • makernotes
  • malaysia
  • manfrotto
  • manfrotto tripod
  • manual
  • mark ii
  • mark iii
  • MFT
  • mft. micro four thirds
  • micro four thirds
  • mielec
  • migration
  • mini review
  • mirror
  • mirror-less
  • mirrorless
  • mobile
  • modification
  • modifier
  • monobloc
  • monoblock
  • monolight
  • motion
  • motion blur
  • multi function printer
  • multiple
  • nano crystal
  • natural light
  • neil
  • Neil VN
  • niekerk
  • nikkor
  • nikon
  • nikon d600
  • noise
  • off camera
  • oil
  • olympus
  • olympus 12-50
  • Olympus 40-150
  • olympus 45
  • olympus 45 18
  • olympus om-d em-5
  • om-d
  • omd
  • omd em1
  • omd em5
  • omd em6
  • on-camera
  • one inch
  • overexposure
  • overpowering sun
  • panasonic
  • panasonic leica 25 14
  • pancake
  • party
  • passport
  • pastries
  • pastry
  • pc
  • pentax
  • peter
  • phone
  • phone photography
  • photo
  • photo tips
  • photography
  • photokina
  • photomerge
  • photoshop
  • photoshop elements
  • planning
  • pocketwizard
  • point and shoot
  • poland
  • polarizer
  • popup
  • popup flash
  • portrait
  • post processing
  • post-processing
  • postprocessing
  • product
  • product shots
  • profile
  • protection
  • protector
  • quad-flash
  • quantum
  • radiopopper
  • raid 0
  • Range finder
  • raw
  • raw editing
  • raw+jpeg
  • rays
  • real
  • recovery
  • reflection
  • reflector
  • resources
  • restaurant
  • review
  • rf-603
  • rf603
  • ricoh
  • ring
  • ringflash
  • robin wong
  • roger cicala
  • rogue
  • rokinon
  • roll off
  • roll-off
  • rolloff
  • rs-5
  • rs-7
  • rumors
  • s5
  • s5 pro
  • s5pro
  • samples
  • samsung
  • samyang
  • sb-26
  • sb-80
  • sb26
  • sb800
  • screen protector
  • sensor
  • sensor swab
  • sensorclear
  • sensorklean
  • sensorklear
  • separation
  • shadow
  • shadow pulling
  • shadows
  • shards
  • sharpening
  • sharpness
  • shoot through
  • shoot-through
  • shoot-thru
  • shooting technique
  • shootout
  • short
  • sigma
  • sigma 50-150
  • skin tones
  • skylight
  • Slik Mini Tripod
  • slingshot
  • slow
  • small
  • smooth
  • soft
  • softbox
  • sony
  • sony a99
  • sony rx100
  • sony t10
  • specular
  • speed
  • speedlight
  • speedlite
  • spinlight
  • spots
  • standard
  • stockholm
  • story
  • strap
  • strobe
  • strobist
  • studio
  • studio strobe
  • subject
  • substitute
  • sudden
  • summilux
  • sunrise
  • sunset
  • sweden
  • swivel
  • sync speed
  • t2i
  • t3i
  • Table top tripod
  • tamron
  • technique
  • techniques
  • tele
  • telephoto
  • thinktank retrospective 5
  • third party
  • tips
  • tokina
  • tonal
  • tonality
  • tone curve
  • toploader
  • toys
  • translucent
  • travel photography
  • tri-flash
  • Tribute
  • trifold
  • trigger
  • tripod
  • truth
  • ttl
  • TTL Cord
  • u43
  • ultra-wide
  • ultrawide
  • umbrella
  • underexposure
  • unlimited sync speed
  • up-rise
  • up-rise 15z
  • update
  • uprise
  • USM
  • uv
  • uwa
  • vanguard
  • versus
  • vertical
  • video
  • view nx2
  • visual science lab
  • vs
  • wadi rayan
  • wd caviar black
  • web
  • weekend
  • westin
  • white balance
  • white lightning
  • wide
  • wide angle
  • window
  • wireless
  • wireless flash
  • wireless release
  • wireless trigger
  • workflow
  • Yashica
  • yashica gtn
  • yashica st-7
  • yn-560
  • yn-560ex
  • yn-ex600
  • yn560
  • yong nuo
  • yongnuo
  • zack arias
  • zoom
  • zoom toploader
  • zuiko

Blog Archive

  • ▼  2013 (165)
    • ▼  December (5)
      • Olympus E-PL3 with 14-42 Lens $199; Moving from Ni...
      • Sigma 18-35 1.8 Revisited; Where to Get It
      • Speedlight Modifiers - 50% discount at Fotodiox
      • Olympus M.Zuiko 45mm f/1.8 Mini Review
      • Evening Portraits with Flash
    • ►  November (10)
    • ►  October (8)
    • ►  September (7)
    • ►  August (3)
    • ►  July (11)
    • ►  June (10)
    • ►  May (15)
    • ►  April (19)
    • ►  March (33)
    • ►  February (24)
    • ►  January (20)
  • ►  2012 (193)
    • ►  December (17)
    • ►  November (22)
    • ►  October (34)
    • ►  September (47)
    • ►  August (12)
    • ►  July (11)
    • ►  June (10)
    • ►  May (13)
    • ►  April (13)
    • ►  March (8)
    • ►  February (1)
    • ►  January (5)
  • ►  2011 (141)
    • ►  December (8)
    • ►  November (8)
    • ►  October (7)
    • ►  September (9)
    • ►  August (13)
    • ►  July (13)
    • ►  June (19)
    • ►  May (17)
    • ►  April (25)
    • ►  March (22)
Powered by Blogger.

About Me

Unknown
View my complete profile