Better Family Photos

  • Subscribe to our RSS feed.
  • Twitter
  • StumbleUpon
  • Reddit
  • Facebook
  • Digg
Showing posts with label macro. Show all posts

Friday, 11 October 2013

The Dead Gecko

Posted on 12:51 by Unknown

Remember my recent Abstracts post? It was during the same day that me and my friend found a dead gecko on the bathroom floor. It was tiny, but it presented a good photographic opportunity and allowed us to occupy some of the long free boring time we had on hand, hit the jump for the full story.


Before I start, I want to show you how tiny this gecko is, the camera in the picture is a Canon 60D and that's my very own Canon 60mm Macro f/2.8. The tripod is my Manfrotto 190CX Pro3.

My friend is still learning about lighting, so I let him lead to see what he would do, and every now and then I gave some pointers and suggestions. So, he started with the obvious, a slightly high angle, shooting directly on the same table where we put the gecko, and shooting from the same direction where the light came from (a large door-sized window with sunset light, which you can see from the shadow).


Here is what came out:


Not the best background, lots of dust specks (we really didn't notice it with our eyes), and it turns out the gecko had some string attached to its front left leg. And more importantly, the light didn't look good. I did a few spot removal in lightroom, and this is what I was able to get, still not good enough.


For the next attempt, I suggested that we should get rid of the brown background, and use something black instead. The only thing we had that worked was my friend's leather tablet cover.

As for lighting, I suggested shooting through the gecko with the sun coming from behind and opposite to the lens (backlighting). We also improved the composition, and shot from a much lower angle, almost from the eye-level of the gecko. Here's the setup shot, but after the sunset light went away (notice the useful tilting LCD, and the extremely useful tripod's extending center column):


And here's how it looked like with just the sunset backlighting the gecko, you'll notice we cleaned the tablet cover thoroughly, yet I had to do a little bit of spot removal.


We were shooting at f/6.3, with the lowest ISO, and the sun was setting down quickly, consecutive shots looked slightly different because of moving light. For the next iteration, I decided we should use flash, and have complete control over our lighting.

The 60D had a commander pop-up flash that triggered a remote 580EX (also my very own) in TTL mode, we were able to adjust the flash compensation either from the camera or the flash itself (which I held in my hand).

For the lighting setup, I decided to mimic the backlight as in the shot above, but with some fill from the front. To diffuse the light, and in the same spirit of the place we were staying at, I used a large (1m x 1.5m) plastic bag to diffuse the flash light and soften it. It is transparent with some writing on it that didn't affect the color of the light. I held the bag behind the gecko, and held the flash almost one meter away from the bag. It acted as a huge (compared to the gecko's size) diffuser, and gave some very soft light. For fill, I used an idea that I used previously with great results. I used a yellow piece of paper in front of the gecko to reflect the diffused light on his eye, and open up the shadows. The benefit of the yellow paper is that it reflect the light with a golden tint. Here's how it came out:


You can see the effect of the yellow reflection on his eye. And to show you the difference, here is the same shot with a normal white paper, and without the vignetting. Much less appealing in my opinion.


At that stage, we were quite satisfied with what we got, but we decided to play with the position of the backlight and the diffuser a bit, sometimes raising the light and sometimes lowering it. It resulted in different pictures for the same subject, especially for the background, and the rim light.

Finally, here's the opening picture (my favorite) again:


RELATED POSTS

Sharing Some Macros
Macro Talk: Canon EF-S 60mm f/2.8 Macro USM
Macro Fun @ Home
Abstracts With The Olympus 40-150R
Flash Series - Part 1: Canon Speedlites Chat (580EX II vs 580EX vs 430EX)


Read More
Posted in 190cx pro3, 580EX, 60d, 60mm macro, flash, gecko, lighting, macro, manfrotto | No comments

Saturday, 9 February 2013

Macro Fun @ Home

Posted on 15:40 by Unknown
 

I have been sick for a few days now, and I had to spend the weekend at home, so yesterday I decided to have some quick macro fun, I didn't expect to get great pictures, but the purpose was to have fun and to experiment with some of my less used equipment.


I didn't want to spend time setting up complicated lighting setups, so I went with available light, a white piece of cardboard for the background, the GorillaPod SLR Zoom with the Joby Ball Head as my tripod and finally the OMD with the 12-50 kit lens, now the kit lens has an interesting macro mode where you push a dedicated macro button on the side of the lens and move the zoom ring to a dedicated macro position, and all of a sudden, you have a 0.72x 86mm eq. macro lens with a reasonable working distance.


GorillPod SLR Zoom + Joby Ball Head
 

Back to the GorillaPod for a second, I bought one a while ago when I had the 5D Mark III to be able to get interesting low angles, besides, I could use it's flexible legs to mount my flashes in creative positions. I bought the baddest, heaviest SLR Zoom version (without the ball head) that could hold my 5D3, which it only can in very limited positions, not what I expected. And mounting it to the camera is done via a screw, something you can't just do by hand, you have to use a coin to screw it to your camera, and even then, the angles I could get were very limited because I was cheap and skipped on the ball head. The tripod was never used except to hold my Zoom H1 mic in unnatural positions.


So with the 5D3 sold and a new smaller camera took its place, I decided to invest in the ball head because it will make it more flexible, so here I decided to give it a try with this macro project, it works really well with the smaller and lighter OMD in all positions, and the ball head is very good and smooth, provided you get past attaching the quick release plate to the camera via a similar screw and a coin.


Now that I had my camera and background ready, what do I shoot? I went hunting around the house for tiny stuff to shoot, and here's what I found:


Macro Subjects


I didn't bother with a remote shutter release and I used the 12 second timer on the OMD, I used aperture priority mode set at ISO 200 and f/11 to get as much DOF as I can, but any smaller aperture and I started losing sharpness because of diffraction, good thing the OMD has a smaller sensor with more DOF than a full frame sensor (my 5D2 gave me a real hard time when I was shooting water drops), the other settings involved a custom white balance and turning off the image stabilization. I was using the rear screen for composition and exposure adjustment, I had a live histogram which enabled me to adjust the exposure compensation for each picture on the fly, I did it by adding positive exposure compensation until the histogram almost reached the right side since I knew the background is white and should appear so in the final image. Finally, for focusing I used manual focus and 14x magnification. Here's how the final setup looked like.


The Setup
 

Here is the resulting image from the setup you see above:


Alan Keys, this is a Serfas branded kit that I use to fix my Orbea bike
 

Just before I continue with the rest of the images and the post processing, I want to discuss another gadget, I received a couple of weird lens adapters with my OMD kit (Amazon included a zillion things for free), one promised to give a 0.45x wide angle conversion (and can double work as macro) and the other one promised 2.5x telephoto conversion, I tried both and they sucked, I was wary of adding 3rd party unbranded glass in front of my lens, the wide angle converter caused a huge loss of sharpness and caused lots of flare, the telephoto converter didn't even work, but I never tried the macro bit before. Below are some photos of the adapter itself, it uses a 58mm filter thread, and I have step-down rings with all the possible combinations, down to 37mm:


Wide angle adapter with the covers on
 

Covers removed
 

Macro piece un-screwed
 

It comes with a carrying case
 

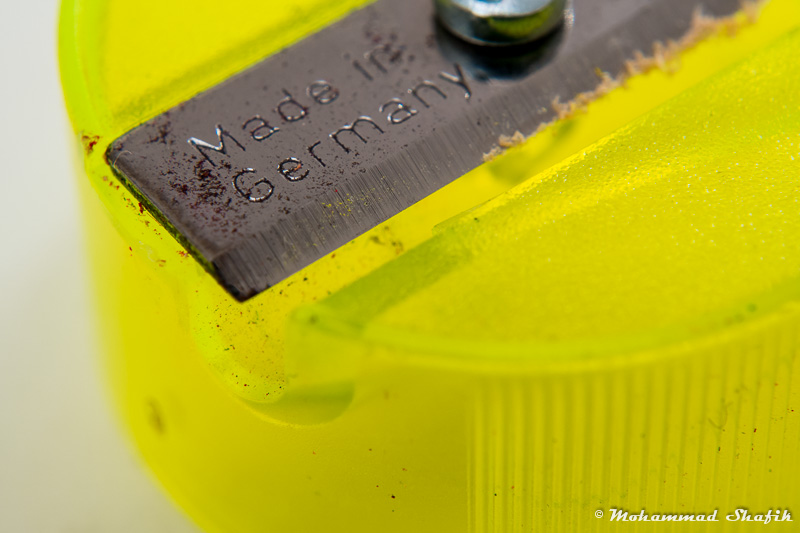
As you have seen, it comes in one piece which when un-screwed, you get a small macro adapter, having tested the wide angle and telephoto adapters before, I seriously doubted the macro bit, but to my surprise it worked really well and really sharp, and I believe I was able to get slightly more than 1x magnification, below are two pictures of a pencil sharpener, the first one is taken with the 12-50 alone at maximum magnification, then the second one with the macro adapter:


12-50 @ maximum magnification (0.72x)
 

With the macro adapter, probably past 1x magnification
 

100% Crop
 

And this is how the camera looked like, by the way all the pictures including the OMD were taken with the Sony RX100 hand held.


I decided to go for black and white pictures (except for a couple) and a 16:9 aspect ratio for this shoot, all pictures taken at f/11, here's what I came up with:


Sphinx Coin
 

Medal
 

Alan Key Family
 

German Sharpener
 

Shrapnel
 

Quarter Pound
 

RX100 Aperture Priority
 

The Stiff Ring
 

Fiber Cleaning Cloth
 

Unthreaded Necklace
 

As you can see, I didn't spend any effort in lighting or using a remote shutter, I picked a few elements found around the house and enjoyed myself. I used focus stacking for the last picture, I have always wanted to try it and I had the chance, I used 5 images starting by focus on the near violet pebble to the top green one.


For processing I had to increase the blacks a lot, sometimes up to -100, I didn't worry about the whites since I already made sure the histogram was already near the right side, then I clicked the B&W button and used the targeted adjustment tool to adjust the shades of the different elements, and finally added a little bit of clarity and contrast, that's it.


I hope you've enjoyed the post, my next post will be soon, and will be about post-processing, I will pick a certain image every couple of weeks and show you the steps I use for processing this image.

Posted with BlogsyPosted with Blogsy
Read More
Posted in fun, gorillapod, home, joby head, macro, macro adapter, olympus 12-50, olympus om-d em-5 | No comments

Thursday, 24 May 2012

Food Photography Assignment

Posted on 05:57 by Unknown


I was asked by one of my friends to shoot a couple of dishes for his cousin's restaurant, and since I wanted to experiment with shooting food, I readily agreed. Click through for the details.


It's no secret that I never shot a paid assignment before. Although 95% of my photos are of people (mainly family and friends), I never warmed up to the idea of shooting other people for money, whether it's portraiture, weddings, etc... However, I am fine with shooting non-animate objects, I shoot some female dresses & accessories for a project run by family members, and very recently one of my friends convinced me to start a business out of food photography, fine by me, so I used this opportunity as a test to see how the experience and the photos turn out.


Before going, I asked my friend (who went there before) about the location, the lighting used there, the colors of the walls (for bounce flash), and what did the client want to shoot and for what reason. Turns out the client was offering a very competitive price on one of their cheese burgers, and he wanted a close up of the sandwich to show its size and components for the ad. I was also told that the restaurant walls were beige, and the lighting there is very dim.


Being my first assignment in front of a client I don't know, I was worried I'd miss some piece of equipment that I left at home, originally, I knew I'd be using the 100mm Macro and bounce flash, but I brought along the lightstands and umbrellas, just in case. My equipment included the 5D Mark II, the 100 Macro L, the 24-105 in case I needed some wide angle shots and a couple of 580EX speedlites.


This was the main course I came to take photos of, but as you see, it was not very well presented, especially the bread, but that's what I had to photograph, in the next photo you will see a closeup where I tried to hide the bread's defects.


Simple as it is, taste wise, I certify that this is one delicious burger, the restaurant makes their own beef burgers, they don't buy frozen burgers and just fry it. Lighting wise, I was using on camera flash, usually bounced upwards and to my right in most of the shots, I varied the FEC based on what the histogram told me, I was working between +2 2/3 and +3 FEC, for some reason the camera decided that the correct exposure was way less than what I wanted. Before I shot any dishes, I used a grey card to adjust my white balance.


Next dish was a vegetarian pizza, using the same setup I took the obligatory full dish photo, and then I started trying to get more interesting angles (to hide the fact the pizza's edges are not a perfect circle like the dish) and imagining how they would look in the menu. Since I was shooting close, with a long lens and a full frame sensor, sometimes the DoF was plain shallow, so I varied my aperture based on the look I wanted, I was working between f/4 and f/8.


I think the photo above works better than the full dish. The last dish to shoot was a Fettucini pasta, this was the best prepared dish and easily looked good in photos without trying to get different angles to hide defects.


When I finished shooting, I uploaded the pictures from the camera to the iPad using the camera connection kit (iPad displays RAW photos) as a backup and to show them to the client, then we went through the pictures (~ 70) quickly, then we selected the photos the client wanted and deleted the rejected ones. This way when I got home, I plugged the iPad to my PC, and imported the photos directly into lightroom, no need for selecting or rating photos.


I learned a lot from that day, and we all agreed (me, my friend and the client) that the dishes needed better presentation next time we do a shoot. I am also looking online for more tips on how to make the dishes look better (using oil, etc...), so if you have any advice, please tell me in the comments.

Read More
Posted in assignment, food, macro, photography, restaurant | No comments

Monday, 21 March 2011

Macro Talk: Canon EF-S 60mm f/2.8 Macro USM

Posted on 09:09 by Unknown

What is a macro lens? What if my zoom lens has a "Macro" designation, are they the same?

Today I am going to chat a little about my experience with a macro lens, and what other situations it can be used for. This is not going to be a macro photography tutorial, but more of a chit chat about macro lenses regardless of the brand. Hit the jump for more.

MAGNIFICATION 

Macro photography can be defined as close-up photography of usually very small subjects. If you ever try shooting objects from a close distance using your non-macro zoom or prime lens, you will find that after getting close for a certain distance, the lens would refuse to focus any closer, this is what defines the magnification factor.

A lens' magnification factor is defined by the physical size of the subject in focus in relation to the sensor size, in other terms, if we assume a 1:1 magnification ratio for a certain lens, this means that it can focus on a subject that would fill the same area of the sensor as its physical size in real life. Imagine a metal coin, now imagine taking a picture of it so close that the coin's image on the sensor is physically the same size as the coin itself. This is called 1:1 magnification, sometimes it is referred to as 1x magnification. True macro lenses can usually achieve 1x magnification, and there are unique macro lenses that can go to as close as 5x magnification.

MACRO LENSES

Now back to the opening question, can your zoom lens (that says "Macro") be a true macro lens? It depends, if we take the saying that true macro lenses are of 1x or greater magnification, then the answer is no, they are not true macros. However, there are some zoom lenses that can focus quite close to the subjects, they usually have around 0.3x to 0.5x magnification at the long end of the zoom, this is actually pretty respectable, check this picture taken with the Canon EF-S 55-250 lens at 0.31x magnification. This picture was taken by dpreview member Charles Durrant, you can see his full gallery here.

0.31x Magnification, Uncropped Image - Click to see a larger version.

Most manufacturers offer macro lenses that are primes (i.e. no zoom), they feature something called a floating lens element that helps them focus at close distances. You will find that Canon and Nikon offer very similar macro lenses, both have 60mm f/2.8 macro (Nikon calls it Micro) lenses, they also both have 100mm f/2.8 macro lenses (Nikon is 105mm). They all offer 1x or 1:1 magnification ratios. Canon also has a less known 50mm f/2.8 macro lens that offers only 0.5x magnification.

WHY DID I GET ONE?

I bought the Canon EF-S 60mm f/2.8 Macro USM for several reasons:
  • When I decided to upgrade my standard zoom lens and I decided to buy the Canon EF-S 15-85 f/3.5-5.6 IS USM instead of the Canon EF-S 17-55 f/2.8 IS USM, that saved me a difference of almost $400, so when I started looking for lenses that cost this amount of money I found this lens.
  • I was also looking for a better replacement for my cheap EF 50mm f/1.8 II, so I thought that since the focal lengths are close, and that I never use my 50mm wider than f/2.8 I might as well replace it with a lens that is/has:
    • Eextremely sharp.
    • Can focus much closer.
    • Internal focusing (i.e. the front element doesn't move or rotate).
    • Much faster/silent USM focusing.
    • Better colors and contrast.
    • Better bokeh.
The Canon EF 100mm f/2.8 Macro USM was an attractive alternative that is around $100 more expensive, but I chose the 60mm instead because of it's smaller size (it is the same size as the 18-55 kit lens) and faster focus (macro lenses usually have slow focus, especially close to the minimum focusing distance), and not only that, but since I have a 1.6x crop sensor, the 100mm would be 160mm equivalent on my camera which is too long for general usage to a certain extent; unlike the 60mm (96 mm equivalent).

The benefit of the longer focal lengths in macro lenses is the MWD (minimum working distance), if we take my 60mm lens, the MWD is 9cm from the front of the lens, this means that in order to get 1:1 magnification I need to bring the front element of the lens just 9cm close to my subject, imagine trying to get this close to a skittish or a dangerous insect, in contrast the 100mm macro lens has a MWD of 15cm and the 180mm has a MWD of 24cm, I know that these numbers all sound tiny but the difference between 9cm and 15cm while shooting insects could make all the difference.

On the other hand, the side effect of the longer focal lengths is that you need higher shutter speeds to get a blur-free image. Canon has another version of the 100mm f/2.8 macro lens with built-in image stabilization (not usual in primes with this focal length) and the "L" designation, but it is quite expensive.

MACRO LIGHTING

You would imagine that using a macro lens is the same as using a normal lens, and you would be right except that with a macro lens when you get close to 1x magnification, you start losing light. My 60mm for example starts losing light at close ranges until it reaches 2 stops of light loss at 1x magnification, this means that the effective aperture is f/5.6 instead of f/2.8 (regarding light quantity entering, not DoF). If you are using auto modes on the camera like aperture priority or using flash in TTL mode then the camera will auto compensate for the light loss, but if you're metering light manually you need to take it into account, Canon has included a table in the user manual with the light loss values at each magnification level.

There are several ways to light your subjects, available light is always there if you can get acceptable shutter speeds or use a tripod. You can also use the camera's flash or an external flash to light your subject, but sometimes they are not good because you are so close to the subject that the flash has no direct line of sight between it and the subject, that's why there are dedicated macro flashes that are mounted very close to your subject.

A good way to light your subject is by using soft diffused light, this can be achieved using a light source that is larger than your subject, and since we are talking very small subjects, this light source doesn't need to be an octabank or an umbrella, check cheap ways of getting diffused light here and here. You can also go sophisticated with studio strobes like Alex Kolskov here, he's one of my favorite product photographers.

I use myself two different methods, either a flash diffuser mounted on my lens using the camera's pop-up flash (when I need to be discrete) or I use one or two external flashes with very small inflatable softboxes.

P.S. Excuse the quality of the first photo, I had to use my mobile phone.

Cheap Flash Diffuser - Click to see a larger version

Inflatable Softbox - Click to see a larger version

MACRO SHOOTING

Now we come to the fun part, shooting macro with this lens, I will show you some examples and talk a little about each one, you have to keep in mind that at close focusing distances the depth of field becomes in the order of millimeters, here's an example, at 1x magnification using the 60mm lens, the DoF at f/22 is 6.7 millimeters! So you will occasionally find yourself shooting at small apertures to get as much DoF as you can. Add the 2 light loss stops to that and you will see how it quickly becomes hard to light your subject, I once had my 580EX firing at full power in the inflatable softbox and not producing enough light.

The picture below is shot hand held at f/11 using the pop-up flash and the diffuser, there was good ambient light and the flash was used as a fill.

Climbing Ant - Click to see a larger version (f/11 - 1/60 sec - ISO 200)

The following pictures are all shot using room lights and long shutter speeds, I used a mini tripod for stabilization, check the 100% crops in the first two pictures by clicking on them to see how much detail is available at 1:1 magnification.

Needle & Thread - Click to see a 100% crop (f/4.5 - 4 sec - ISO 100)

Pen - Click to see a 100% crop (f/4.5 - 5 sec - ISO 100)

Lock - Click to see a larger version (f/5.6 - 13 sec - ISO 100)

Carpet - Click to see a larger version (f/2.8 - 1.3 sec - ISO 100)

This last example shows you what can be done hand held in dim light, you have to use a high ISO.

Curtains - Click to see a larger version (f/2.8 - 1/50 sec - ISO 1600)


PORTRAIT & GENERAL SHOOTING

I told you that I bought this lens to replace my 50mm f/1.8 II, which is one of my most used lenses, it is a little long (85mm equivalent) for indoor use or for shooting groups but I use it a lot because of it's size and weight and that it is the perfect focal length for portraits. All the coming pictures are shot hand held using available light except the last one with the white seamless background.

Baby in Her Chair - Click to see a larger version (f/2.8 - 1/100 sec - ISO 1600)

Crayons - Click to see a larger version (f/2.8 - 1/250 sec - ISO 400)

Colored Slides - Click to see a larger version (f/4 - 1/2000 sec - ISO 400)

Indoors Portrait - Click to see a larger version (f/2.8 - 1/80 sec - ISO 200)

Outdoors Portrait - Click to see a larger version (f/2.8 - 1/1250 sec - ISO 100)

White Seamless Portrait - Click to see a larger version (f/6.3 - 1/160 sec - ISO 400)

As you can see, the sharpness wide open is just staggering, and by stopping down a little it becomes crazy sharp, this is my favorite go to lens when I'm shooting portraits or product shots.

I hope you have enjoyed the article, if you have any feedback please let me know.

RELATED POSTS:

Canon Lenses Chat - Part 1: Standard Zoom Lenses
Canon Lenses Chat - Part 2: Telephoto Zoom Lenses
Canon Lenses Chat - Part 3: Prime Lenses
Canon EF 35mm f/2 Review
Quick Review: Canon 85mm f/1.8
Canon EF Lenses Chat: Canon EF 200mm f/2.8L II USM Review
Canon EF Lenses Chat: Canon EF 50mm f/1.4 USM Review
Read More
Posted in close up, ef-s 60mm, macro | No comments
Older Posts Home
Subscribe to: Posts (Atom)

Popular Posts

  • Olympus E-PL3 with 14-42 Lens $199; Moving from Nikon to MFT?
    I saw on 43rumors.com that the Olympus E-PL3 was being sold at Newegg for just $199 with the 14-42 kit lens included.  I checked it out and...
  • Samyang 24 f/3.5 Tilt Shift Lens Now Available
    A seller on ebay ( bestpriceoptics ) is now selling the Samyang 24 f/3.5 tilt shift lens, in Canon and Nikon mounts, for $999 shipped.  This...
  • Double Camera Strap & BlackRapid RS-5 Review
    This is a review of two camera straps: - The first is a double camera strap that's -- let's be blunt -- a knockoff of the BlackRapid...
  • Exploring 3D Photography with the Loreo 3D Lens in a Cap
    When I hear of 3D photos or videos, my first impression is that it's gimmicky.  Interesting for one or two shots maybe and then after th...
  • Toys for the Big Kids: Speedlight Softbox
    In this post, we will have a look at a softbox for speedlights.  This post is part of a series that will cover equipment reviews for committ...
  • Going Crazy With Tripods
    My Tabletop Tripod Trio I love tripods, I go all soft and wobbly when I see attractive looking ones, so here is my story with tripods, inclu...
  • 2x Lowepro Review: Toploader Zoom 45 AW & 55 AW + Unraveling The SlipLock™ Mystery
    Left: Lowepro Toploader Zoom 55AW, Right: 45AW, Middle: Canon 60D + 15-85 Welcome to a new rare photography accessory review as I'd lik...
  • Canon Professional Network
    I didn't know about Canon Professional Network until Syl Arena recently blogged about his 4-part article on speedlites.  I took a look ...
  • Minimizing Nikon D5200 and D7100 banding; Mysteries Remain
    Many people have noted that the Nikon D5200 and Nikon D7100 have banding in the shadows when the exposure is pushed.  In this post I'll ...
  • Nikon 28 1.8G: Moody Artist?
    When Nikon had its recently-finished sale (now extended to end of March), the one lens that I considered buying was the Nikkor 28 1.8G.  To...

Categories

  • "alien bee"
  • "april fool's"
  • "ring flash"
  • "yong nuo"
  • 1"
  • 1/1.7"
  • 10-17
  • 10-20
  • 11-16
  • 15-85mm
  • 15z
  • 17-50 vc
  • 190cx pro3
  • 2.8
  • 2.8G
  • 2/3"
  • 200 f2.8
  • 200 L
  • 200mm
  • 200mm f/2.8
  • 200mm f/2.8 L II
  • 200mm f2.8
  • 200mm f28
  • 200mm f28 L II
  • 2012
  • 2013
  • 23 Samsung led
  • 24-105 f4
  • 24-70
  • 25 1.4
  • 28-105
  • 28-70
  • 35mm
  • 35mm f/2
  • 35mm f2
  • 360
  • 3rd party
  • 4.1
  • 4/3
  • 40 pancake
  • 40 panckae
  • 40 stm
  • 40-150R
  • 40mm f/2.8
  • 430EX
  • 43rumors
  • 45 18
  • 45 AW
  • 4x4
  • 50 14
  • 50 f14
  • 50-150
  • 50mm
  • 50mm f/1.4
  • 55 AW
  • 55-250
  • 550D
  • 55aw
  • 560ex
  • 580 ex ii
  • 580EX
  • 580EX II
  • 5d
  • 5d mark 2
  • 5d mark 3
  • 5D Mark II
  • 5d mark iii
  • 5d2
  • 600d
  • 600ex-rt
  • 60d
  • 60fps
  • 60mm macro
  • 650d
  • 6d
  • 7.5mm
  • 720p
  • 75 f1.8
  • 85mm f1.8
  • 8x12
  • abbc
  • abstract
  • accuracy
  • active d-lighting
  • adjustment
  • adl
  • AF
  • af point
  • AF Point Expansion
  • aftermarket
  • airport
  • alexandria
  • alien bee
  • alien bees
  • alienbee
  • alienbees
  • alternative
  • ambient
  • ambient light
  • angle
  • aperture priority
  • APS-C
  • apsc
  • assignment
  • auto focus
  • auto white balance
  • autofocus
  • AWB
  • awl
  • back button focus
  • background
  • background blur
  • backlight
  • backlighting
  • backlit
  • bad behavior
  • bad photography
  • balance
  • bare flash
  • battery
  • BBF
  • beach
  • beams
  • beauty dish
  • bellagio
  • BFT
  • birthday
  • black
  • black foamie thing
  • black rapid
  • blackrapid
  • blogs
  • blower
  • blown
  • blur
  • bokeh
  • bounce
  • bounce card
  • bounce flash
  • bower
  • bracket
  • brightness
  • brilliance
  • brolly grip
  • brother
  • build
  • burst mode
  • butterflies
  • butterfly
  • C.Fn
  • cable
  • cake
  • camera
  • camera bag
  • camera releases
  • camera settings
  • candle
  • candlelight
  • canon
  • Canon 100mm Macro L IS
  • canon 200mm f28L
  • canon 24-105
  • canon 40 stm
  • canon 40mm f28 pancake
  • canon 50
  • canon 50 1.4
  • canon 55-250
  • canon 5d mark 2
  • canon 5d mark ii
  • canon 5d mark iii
  • canon 5d2
  • canon 5d3
  • Canon 60d
  • canon 6d
  • canon g11
  • canon speedlite
  • car
  • carbon fiber
  • catch lights
  • cheap
  • christmas
  • clean
  • cleaning
  • clipped
  • clipping
  • close up
  • clouds
  • cls
  • clustered
  • color
  • compact
  • comparison
  • composition
  • compositional aid
  • construction
  • contrast
  • cooler master
  • copyright
  • core i7
  • cowboy
  • cowboystudio
  • cpl
  • creepy
  • crop factor
  • crop sensor
  • cyber commander
  • cybersync
  • d-lux
  • d-lux5
  • d3
  • d300
  • D5100
  • D600
  • d70
  • d700
  • D7100
  • d90
  • dark background
  • david hobby
  • daylight
  • dell 24 inch
  • depth of field
  • desert
  • diamond
  • digital
  • directional
  • distance
  • diy
  • dlux
  • dlux5
  • dng
  • double
  • dslr
  • DSLR bag
  • dual
  • dust
  • dx
  • dynamic range
  • earthquake
  • ebay
  • ebay trigger
  • eclipse
  • editing
  • EF 40mm f/2.8
  • ef-s 60mm
  • einstein
  • Electro GN
  • engagement
  • environmental portrait
  • ep5
  • equipment
  • ETTL
  • ettr
  • europe
  • events
  • evf
  • ex600
  • existing light
  • expensive
  • exposing to the right
  • exposure
  • f/3.5
  • family
  • faq
  • fasten-r3
  • favorite
  • fayoum
  • Fayoum desert
  • fill
  • fill light
  • film
  • filter
  • finepix
  • fire
  • fireplace
  • first impressions
  • fish-eye
  • fisheye
  • fix
  • FL600R
  • flash
  • flash bounce
  • flash sync
  • flash trigger
  • flashmeter
  • flashright
  • focal length
  • focus
  • food
  • football
  • fotodiox
  • fountain
  • freexwire
  • fuji
  • fujifilm
  • Full Frame
  • fun
  • fx
  • galaxy s 3
  • galaxy s4
  • gecko
  • GeForce gtx570 OC
  • gel
  • geomag
  • ggs
  • ghost
  • gigabyte z77 ud3h
  • glass
  • gn
  • Goodbye
  • gorillapod
  • gregg
  • grid
  • grip
  • group shot
  • gskill ripjaws
  • guide
  • guide number
  • gx7
  • haf 912
  • handheld
  • hands on
  • hands-on
  • hdr
  • head shot
  • hiatus
  • high dynamic range
  • high iso
  • high speed sync
  • highlight
  • highlights
  • histogram
  • holder
  • holiday
  • home
  • home made
  • Honda civic
  • honeycomb
  • hotshoe
  • hoya
  • humor
  • i9500
  • id
  • image quality
  • impressions
  • indoor flash
  • infrared
  • infringement
  • insects
  • inverse square law
  • japan
  • jewel
  • jewelry
  • joby head
  • jpeg
  • Kingston hyperX SSD
  • kirk tuck
  • kl bird park
  • krakow
  • kuala lumpur
  • las vegas
  • lastolite
  • laurence kim
  • lax
  • lcd
  • leica
  • lens
  • lens cap
  • lens compression
  • lens review
  • lenses
  • lenspen
  • lensrentals
  • light
  • light painting
  • lighting
  • lightroom
  • lightroom 4
  • lightroom 5
  • location
  • long
  • long exposure
  • los angeles
  • low key
  • low light
  • Lowepro
  • Lowepro 45aw
  • Lowepro 55aw
  • lr4
  • lumiquest softbox III
  • lumix
  • lx-5
  • lx5
  • m4/3
  • m43
  • macro
  • macro adapter
  • makernotes
  • malaysia
  • manfrotto
  • manfrotto tripod
  • manual
  • mark ii
  • mark iii
  • MFT
  • mft. micro four thirds
  • micro four thirds
  • mielec
  • migration
  • mini review
  • mirror
  • mirror-less
  • mirrorless
  • mobile
  • modification
  • modifier
  • monobloc
  • monoblock
  • monolight
  • motion
  • motion blur
  • multi function printer
  • multiple
  • nano crystal
  • natural light
  • neil
  • Neil VN
  • niekerk
  • nikkor
  • nikon
  • nikon d600
  • noise
  • off camera
  • oil
  • olympus
  • olympus 12-50
  • Olympus 40-150
  • olympus 45
  • olympus 45 18
  • olympus om-d em-5
  • om-d
  • omd
  • omd em1
  • omd em5
  • omd em6
  • on-camera
  • one inch
  • overexposure
  • overpowering sun
  • panasonic
  • panasonic leica 25 14
  • pancake
  • party
  • passport
  • pastries
  • pastry
  • pc
  • pentax
  • peter
  • phone
  • phone photography
  • photo
  • photo tips
  • photography
  • photokina
  • photomerge
  • photoshop
  • photoshop elements
  • planning
  • pocketwizard
  • point and shoot
  • poland
  • polarizer
  • popup
  • popup flash
  • portrait
  • post processing
  • post-processing
  • postprocessing
  • product
  • product shots
  • profile
  • protection
  • protector
  • quad-flash
  • quantum
  • radiopopper
  • raid 0
  • Range finder
  • raw
  • raw editing
  • raw+jpeg
  • rays
  • real
  • recovery
  • reflection
  • reflector
  • resources
  • restaurant
  • review
  • rf-603
  • rf603
  • ricoh
  • ring
  • ringflash
  • robin wong
  • roger cicala
  • rogue
  • rokinon
  • roll off
  • roll-off
  • rolloff
  • rs-5
  • rs-7
  • rumors
  • s5
  • s5 pro
  • s5pro
  • samples
  • samsung
  • samyang
  • sb-26
  • sb-80
  • sb26
  • sb800
  • screen protector
  • sensor
  • sensor swab
  • sensorclear
  • sensorklean
  • sensorklear
  • separation
  • shadow
  • shadow pulling
  • shadows
  • shards
  • sharpening
  • sharpness
  • shoot through
  • shoot-through
  • shoot-thru
  • shooting technique
  • shootout
  • short
  • sigma
  • sigma 50-150
  • skin tones
  • skylight
  • Slik Mini Tripod
  • slingshot
  • slow
  • small
  • smooth
  • soft
  • softbox
  • sony
  • sony a99
  • sony rx100
  • sony t10
  • specular
  • speed
  • speedlight
  • speedlite
  • spinlight
  • spots
  • standard
  • stockholm
  • story
  • strap
  • strobe
  • strobist
  • studio
  • studio strobe
  • subject
  • substitute
  • sudden
  • summilux
  • sunrise
  • sunset
  • sweden
  • swivel
  • sync speed
  • t2i
  • t3i
  • Table top tripod
  • tamron
  • technique
  • techniques
  • tele
  • telephoto
  • thinktank retrospective 5
  • third party
  • tips
  • tokina
  • tonal
  • tonality
  • tone curve
  • toploader
  • toys
  • translucent
  • travel photography
  • tri-flash
  • Tribute
  • trifold
  • trigger
  • tripod
  • truth
  • ttl
  • TTL Cord
  • u43
  • ultra-wide
  • ultrawide
  • umbrella
  • underexposure
  • unlimited sync speed
  • up-rise
  • up-rise 15z
  • update
  • uprise
  • USM
  • uv
  • uwa
  • vanguard
  • versus
  • vertical
  • video
  • view nx2
  • visual science lab
  • vs
  • wadi rayan
  • wd caviar black
  • web
  • weekend
  • westin
  • white balance
  • white lightning
  • wide
  • wide angle
  • window
  • wireless
  • wireless flash
  • wireless release
  • wireless trigger
  • workflow
  • Yashica
  • yashica gtn
  • yashica st-7
  • yn-560
  • yn-560ex
  • yn-ex600
  • yn560
  • yong nuo
  • yongnuo
  • zack arias
  • zoom
  • zoom toploader
  • zuiko

Blog Archive

  • ▼  2013 (165)
    • ▼  December (5)
      • Olympus E-PL3 with 14-42 Lens $199; Moving from Ni...
      • Sigma 18-35 1.8 Revisited; Where to Get It
      • Speedlight Modifiers - 50% discount at Fotodiox
      • Olympus M.Zuiko 45mm f/1.8 Mini Review
      • Evening Portraits with Flash
    • ►  November (10)
    • ►  October (8)
    • ►  September (7)
    • ►  August (3)
    • ►  July (11)
    • ►  June (10)
    • ►  May (15)
    • ►  April (19)
    • ►  March (33)
    • ►  February (24)
    • ►  January (20)
  • ►  2012 (193)
    • ►  December (17)
    • ►  November (22)
    • ►  October (34)
    • ►  September (47)
    • ►  August (12)
    • ►  July (11)
    • ►  June (10)
    • ►  May (13)
    • ►  April (13)
    • ►  March (8)
    • ►  February (1)
    • ►  January (5)
  • ►  2011 (141)
    • ►  December (8)
    • ►  November (8)
    • ►  October (7)
    • ►  September (9)
    • ►  August (13)
    • ►  July (13)
    • ►  June (19)
    • ►  May (17)
    • ►  April (25)
    • ►  March (22)
Powered by Blogger.

About Me

Unknown
View my complete profile