


This post is a follow up to my earlier post about experiments on the Nikon D600's exposure. In that post my observation was that the Nikon D600 appeared to have a tendency to not give importance to highlights. For some shooters, the resulting image looks fine. For me, I like to protect highlights and there were way too many blown highlights even with ADL (i.e. the exposure is too "aggressive").
I posted about this observation on DPReview. Here is the thread. I received many helpful suggestions. I tried out the suggestions, and I will discuss the results in this post, learning a few things in the process.
METERING METHOD
One suggestion is that I ought to meter a midtone then check the highlights. That means I find an object in the scene that is in Zone V (middle gray tone, such as grass and dark-toned skin). I spot meter that object and use manual exposure to adjust the exposure to 0. Alternatively, in matrix mode, I focus on that object using single point AF. The camera will attempt to render that object as a middle gray tone.
If a middle gray object is rendered as middle gray then the exposure will indeed be accurate for that object, and every other object in the scene will also fall into the right place. However, sometimes the scene's dynamic range is outside the range of the sensor, so to avoid losing highlights, I should also spot meter any relevant highlights in the scene to see how far above Zone V they are, and adjust exposure downward as necessary to protect the highlight. (If I do this, I need to alter the tone curve in post-processing to bring the midtones back up.)
If this method works for you, then it is a fairly accurate method and you don't need to read any further. In my case, I usually shoot candid portraits of my family (wife and two kids). They don't usually stay put in one place, making this method hard for me to implement.
PERILS OF AUTO AF
In the previous experiment, I used Auto-Area AF. That means the camera automatically selects the object to focus on. The potential problem with this is that the camera may choose an object that is dark-toned or bright-toned and the matrix metering would be influenced by the tone of that object. So, blindly trusting the Auto AF may result in an unexpected exposure.
However, in my case, when I use Auto AF I don't just accept whatever AF point the camera gives me. Rather, I have an area that I want to focus on, even before I half-press the shutter. When I half-press the shutter and the camera chooses the area to focus on, I see whether it is what I intended or not. If it is as I intended, then I go ahead and shoot. If it is not as I intended, I refocus. I do that until the camera chooses the area I want, not some random area. I find that, with practice, this method can be faster than single point AF. I will post about that next time.
For purposes of this experiment, the fact that I used Auto AF as opposed to single point AF does not have an impact because I made sure the camera chose an AF point that would be the same as if I had chosen single point AF anyway. It's just a different way to get to the same end result.
AF POINT POSITION
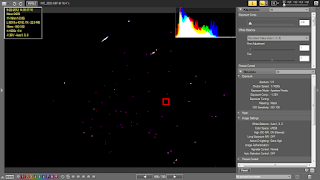
Another suggestion was that the reason the previous experiment showed exposure is because the AF point was positioned on the black Ferrari, which is of course a dark-toned subject. It is well known that Nikon's Matrix Metering takes into account the entire scene but gives more weight to the object that is focused upon (because it is likely to be the subject). In the case of the Ferrari, the AF point was indeed on the car, as I intended. Here it is (the AF points for the other shots were similar).

One explanation to the overexposure is that because the Ferrari is dark-toned and the AF points were on the Ferrari, therefore the camera tried to make the Ferrari a midtone instead of a shadow.
I tried to take a shot of a scene yesterday to see how much the scene metering would be influenced my the selection of the object to be in focus.
I tried a yellow pipe in shade...

dark green bushes in shade...

a sunlit gray wall (I focused and recomposed a bit because the AF point couldn't reach it)

I chose Program exposure. The exposure was the same in each case: f/7.1, 1/200, ISO 100. This was unexpected for me. I thought the exposure would be influenced by the focal point, so I ran more tests. This time I used a Fotodiox Trifold Reflector as a target. It has a gray card, black card, and white card (as well as silver reflectors on the other side).
I first ran the test with just the trifold reflector, but the camera couldn't focus on the black or gray sides. I added a black leather jacket and a white undershirt. With the AF Point on the gray card, the exposure was 1600 ISO, f/5.6, 1/30:

With the AF Point on the black leather jacket, the exposure was still 1600 ISO, f/5.6, 1/30:

However, with the AF Point on the white shirt, the exposure did change 1 stop to 1600 ISO, f/5.6, 1/60:

Looking back at these tests, I did not observe a change in exposure when the AF point was on a dark-toned object (doesn't mean it doesn't ever happen; just that I didn't observe it on these tests). I did observe a change in exposure when the AF point was on a light-toned object. Therefore we ought to pay attention to the AF point location because it may affect the exposure.
As an aside, in case you're wondering, what if instead of autofocusing, I just used manual focus override (I was using the 24-70 with M/A mode) but kept the AF point over the black or white card? I did try that and in that case: 1) the camera did not record the AF point - as though I had used manual exposure; 2) there was no change in exposure no matter where the overriden AF point was.


TRYING OUT THE SUGGESTIONS
So anyway I had taken more shots yesterday, this time using some of the suggestions from the DPReview forum. My subject was my son, whose complexion probably falls into Zone V and I used single AF point. Here are three test shots where I was able to focus on a midtoned subject. And a screen capture showing the clipped highlights.
Test shot 1:


Test shot 2:


Test shot 3:


As we can see there are still plenty of clipped highlights. In the previous post where the subject was a black Ferrari, one hypothesis was that the exposure was weighted toward the black Ferrari, which fooled the camera into overexposure, thus the abundance of blown highlights. In these examples, the focal point was on a midtone, but there are still many blown highlights.
The exposures above are not necessarily wrong. Like I said in the last post, if you don't postprocess at all, the images look fine (lacking in contrast because I intentionally chose the Neutral picture style, but the exposure of the subject is more or less correct).
However, it appears that the camera doesn't care much about protecting highlights. That is a concern for shooters like me who postprocess their images and who care about highlights (some shooters don't). For shooters like me, I would describe this kind of exposure as "aggressive."
NOT ALL IS LOST
When I looked at the images above and their clipped highlights, it seemed disappointing because of the amount of clipping, even in relevant areas like the skin (the red channel was clipped). But what I found is that the clipping display is not accurate and that there is indeed more recoverable information than is shown by the clipping display.
Sample 1:


Sample 2:


Sample 3:

Initial clipped highlights from Raw:

Clipped highlights from JPEG for comparison:

With -2EV exposure compensation applied - virtually no clipped highlights.

Exposure compensation undone.

So, after all, the D600 wasn't losing anywhere near as much info as I previously thought. Indeed, it was great that the camera appeared to be maximizing the amount of light, short of blowing relevant highlights, i.e., exposing to the right. This could be awesome for minimizing noise.
However, in low-contrast scenes, it appears that the histogram is not biased to the right. In the test shot below, you can see that the camera placed the tones toward the left side of the histogram even though there was plenty of room for highlights.

To my eyes, this was close to the actual amount of light in the scene. If the camera were exposing to the right, then the histogram would be bunched toward the right side but it is not. So, rather than ETTR, I think the camera is attempting to get the 'correct' exposure of the subject.
In high-contrast situations, the D600's attempt to get the "correct" exposure of the subject may result in the loss of some highlights (even with Active D-Lighting). Nonetheless, you could say that the D600's exposure is correct in the sense that the subject will be "correctly" exposed. For shooters with that perspective, the D600's metering algorithm is perfectly fine.
AN ALTERNATIVE APPROACH
On the other hand, because I typically postprocess shots, then my preferred type of exposure is the one that maximizes the amount of information on the sensor. For shooters like me, you need to be aware that it appears the D600 will prefer to get the "correct" exposure of the subject rather than try to fit the dynamic range of the scene within the sensor's range. Fortunately, the D600 appears to have more highlight range than was previously apparent, and therefore it is actually able to preserve much of the highlights.
However, if I truly want to fit the scene's range into the sensor's range, a more conservative method would be to just avoid blown highlights, and let the rest of the tones fall where they may.
Here is a shot with the D600's automatic exposure:

Here are the clipped highlights after -2EV exposure compensation applied in ViewNX2:

Here is another shot of the same scene. This one had -1.3EV dialed in at the time of shooting.

Here are the clipped highlights - without any digital exposure compensation applied.

With further exposure compensation in post, all but the brightest specular highlights were recovered, i.e., the scene's range was able to fit in the sensor's range.
I could even reduce the exposure compensation adjustment and still retain every relevant detail. This is at -1.5 exposure comp:

Using this method in a low-contrast scene, the image would appear overexposed but that is fine because the sensor was exposed to the maximum amount of light possible. Bringing down the exposure would result in a lower-noise image than a normally-exposed image. In a high-contrast scene, this method may make the subject look underexposed but the D600 appears to have exceptional shadow recovery abilities, therefore bringing the exposure back up would not be difficult for a D600 image. I would also prefer to have a little more noise than to lose highlights that would otherwise be within the sensor's range.
I posted about this observation on DPReview. Here is the thread. I received many helpful suggestions. I tried out the suggestions, and I will discuss the results in this post, learning a few things in the process.
METERING METHOD
One suggestion is that I ought to meter a midtone then check the highlights. That means I find an object in the scene that is in Zone V (middle gray tone, such as grass and dark-toned skin). I spot meter that object and use manual exposure to adjust the exposure to 0. Alternatively, in matrix mode, I focus on that object using single point AF. The camera will attempt to render that object as a middle gray tone.
If a middle gray object is rendered as middle gray then the exposure will indeed be accurate for that object, and every other object in the scene will also fall into the right place. However, sometimes the scene's dynamic range is outside the range of the sensor, so to avoid losing highlights, I should also spot meter any relevant highlights in the scene to see how far above Zone V they are, and adjust exposure downward as necessary to protect the highlight. (If I do this, I need to alter the tone curve in post-processing to bring the midtones back up.)
If this method works for you, then it is a fairly accurate method and you don't need to read any further. In my case, I usually shoot candid portraits of my family (wife and two kids). They don't usually stay put in one place, making this method hard for me to implement.
PERILS OF AUTO AF
In the previous experiment, I used Auto-Area AF. That means the camera automatically selects the object to focus on. The potential problem with this is that the camera may choose an object that is dark-toned or bright-toned and the matrix metering would be influenced by the tone of that object. So, blindly trusting the Auto AF may result in an unexpected exposure.
However, in my case, when I use Auto AF I don't just accept whatever AF point the camera gives me. Rather, I have an area that I want to focus on, even before I half-press the shutter. When I half-press the shutter and the camera chooses the area to focus on, I see whether it is what I intended or not. If it is as I intended, then I go ahead and shoot. If it is not as I intended, I refocus. I do that until the camera chooses the area I want, not some random area. I find that, with practice, this method can be faster than single point AF. I will post about that next time.
For purposes of this experiment, the fact that I used Auto AF as opposed to single point AF does not have an impact because I made sure the camera chose an AF point that would be the same as if I had chosen single point AF anyway. It's just a different way to get to the same end result.
AF POINT POSITION
Another suggestion was that the reason the previous experiment showed exposure is because the AF point was positioned on the black Ferrari, which is of course a dark-toned subject. It is well known that Nikon's Matrix Metering takes into account the entire scene but gives more weight to the object that is focused upon (because it is likely to be the subject). In the case of the Ferrari, the AF point was indeed on the car, as I intended. Here it is (the AF points for the other shots were similar).

One explanation to the overexposure is that because the Ferrari is dark-toned and the AF points were on the Ferrari, therefore the camera tried to make the Ferrari a midtone instead of a shadow.
I tried to take a shot of a scene yesterday to see how much the scene metering would be influenced my the selection of the object to be in focus.
I tried a yellow pipe in shade...

dark green bushes in shade...

a sunlit gray wall (I focused and recomposed a bit because the AF point couldn't reach it)

I chose Program exposure. The exposure was the same in each case: f/7.1, 1/200, ISO 100. This was unexpected for me. I thought the exposure would be influenced by the focal point, so I ran more tests. This time I used a Fotodiox Trifold Reflector as a target. It has a gray card, black card, and white card (as well as silver reflectors on the other side).
I first ran the test with just the trifold reflector, but the camera couldn't focus on the black or gray sides. I added a black leather jacket and a white undershirt. With the AF Point on the gray card, the exposure was 1600 ISO, f/5.6, 1/30:

With the AF Point on the black leather jacket, the exposure was still 1600 ISO, f/5.6, 1/30:

However, with the AF Point on the white shirt, the exposure did change 1 stop to 1600 ISO, f/5.6, 1/60:

Looking back at these tests, I did not observe a change in exposure when the AF point was on a dark-toned object (doesn't mean it doesn't ever happen; just that I didn't observe it on these tests). I did observe a change in exposure when the AF point was on a light-toned object. Therefore we ought to pay attention to the AF point location because it may affect the exposure.
As an aside, in case you're wondering, what if instead of autofocusing, I just used manual focus override (I was using the 24-70 with M/A mode) but kept the AF point over the black or white card? I did try that and in that case: 1) the camera did not record the AF point - as though I had used manual exposure; 2) there was no change in exposure no matter where the overriden AF point was.


TRYING OUT THE SUGGESTIONS
So anyway I had taken more shots yesterday, this time using some of the suggestions from the DPReview forum. My subject was my son, whose complexion probably falls into Zone V and I used single AF point. Here are three test shots where I was able to focus on a midtoned subject. And a screen capture showing the clipped highlights.
Test shot 1:


Test shot 2:


Test shot 3:


As we can see there are still plenty of clipped highlights. In the previous post where the subject was a black Ferrari, one hypothesis was that the exposure was weighted toward the black Ferrari, which fooled the camera into overexposure, thus the abundance of blown highlights. In these examples, the focal point was on a midtone, but there are still many blown highlights.
The exposures above are not necessarily wrong. Like I said in the last post, if you don't postprocess at all, the images look fine (lacking in contrast because I intentionally chose the Neutral picture style, but the exposure of the subject is more or less correct).
However, it appears that the camera doesn't care much about protecting highlights. That is a concern for shooters like me who postprocess their images and who care about highlights (some shooters don't). For shooters like me, I would describe this kind of exposure as "aggressive."
NOT ALL IS LOST
When I looked at the images above and their clipped highlights, it seemed disappointing because of the amount of clipping, even in relevant areas like the skin (the red channel was clipped). But what I found is that the clipping display is not accurate and that there is indeed more recoverable information than is shown by the clipping display.
Sample 1:

Clipped highlights:

But if instead of highlight recovery I use digital exposure compensation, here's what I get (in this case -1 EC).

No clipped highlights at all.
And what's strange is if I undo the digital exposure compensation, here are the clipped highlights:


Clipped highlights:

Digital exposure comp -2 [barely any clipped highlights :) ]:

Undoing the digital exposure compensation:

I found out that what ViewNX2 was doing was to take the initial display of the clipped highlights and histogram from the JPEG image (!). Here's the JPEG's clipped highlights - identical to that of the initial display of clipped highlights and histogram:


Initial clipped highlights from Raw:

Clipped highlights from JPEG for comparison:

With -2EV exposure compensation applied - virtually no clipped highlights.

Exposure compensation undone.

So, after all, the D600 wasn't losing anywhere near as much info as I previously thought. Indeed, it was great that the camera appeared to be maximizing the amount of light, short of blowing relevant highlights, i.e., exposing to the right. This could be awesome for minimizing noise.
However, in low-contrast scenes, it appears that the histogram is not biased to the right. In the test shot below, you can see that the camera placed the tones toward the left side of the histogram even though there was plenty of room for highlights.

To my eyes, this was close to the actual amount of light in the scene. If the camera were exposing to the right, then the histogram would be bunched toward the right side but it is not. So, rather than ETTR, I think the camera is attempting to get the 'correct' exposure of the subject.
In high-contrast situations, the D600's attempt to get the "correct" exposure of the subject may result in the loss of some highlights (even with Active D-Lighting). Nonetheless, you could say that the D600's exposure is correct in the sense that the subject will be "correctly" exposed. For shooters with that perspective, the D600's metering algorithm is perfectly fine.
AN ALTERNATIVE APPROACH
On the other hand, because I typically postprocess shots, then my preferred type of exposure is the one that maximizes the amount of information on the sensor. For shooters like me, you need to be aware that it appears the D600 will prefer to get the "correct" exposure of the subject rather than try to fit the dynamic range of the scene within the sensor's range. Fortunately, the D600 appears to have more highlight range than was previously apparent, and therefore it is actually able to preserve much of the highlights.
However, if I truly want to fit the scene's range into the sensor's range, a more conservative method would be to just avoid blown highlights, and let the rest of the tones fall where they may.
Here is a shot with the D600's automatic exposure:

Here are the clipped highlights after -2EV exposure compensation applied in ViewNX2:

Here is another shot of the same scene. This one had -1.3EV dialed in at the time of shooting.

Here are the clipped highlights - without any digital exposure compensation applied.

With further exposure compensation in post, all but the brightest specular highlights were recovered, i.e., the scene's range was able to fit in the sensor's range.

I could even reduce the exposure compensation adjustment and still retain every relevant detail. This is at -1.5 exposure comp:

Using this method in a low-contrast scene, the image would appear overexposed but that is fine because the sensor was exposed to the maximum amount of light possible. Bringing down the exposure would result in a lower-noise image than a normally-exposed image. In a high-contrast scene, this method may make the subject look underexposed but the D600 appears to have exceptional shadow recovery abilities, therefore bringing the exposure back up would not be difficult for a D600 image. I would also prefer to have a little more noise than to lose highlights that would otherwise be within the sensor's range.


