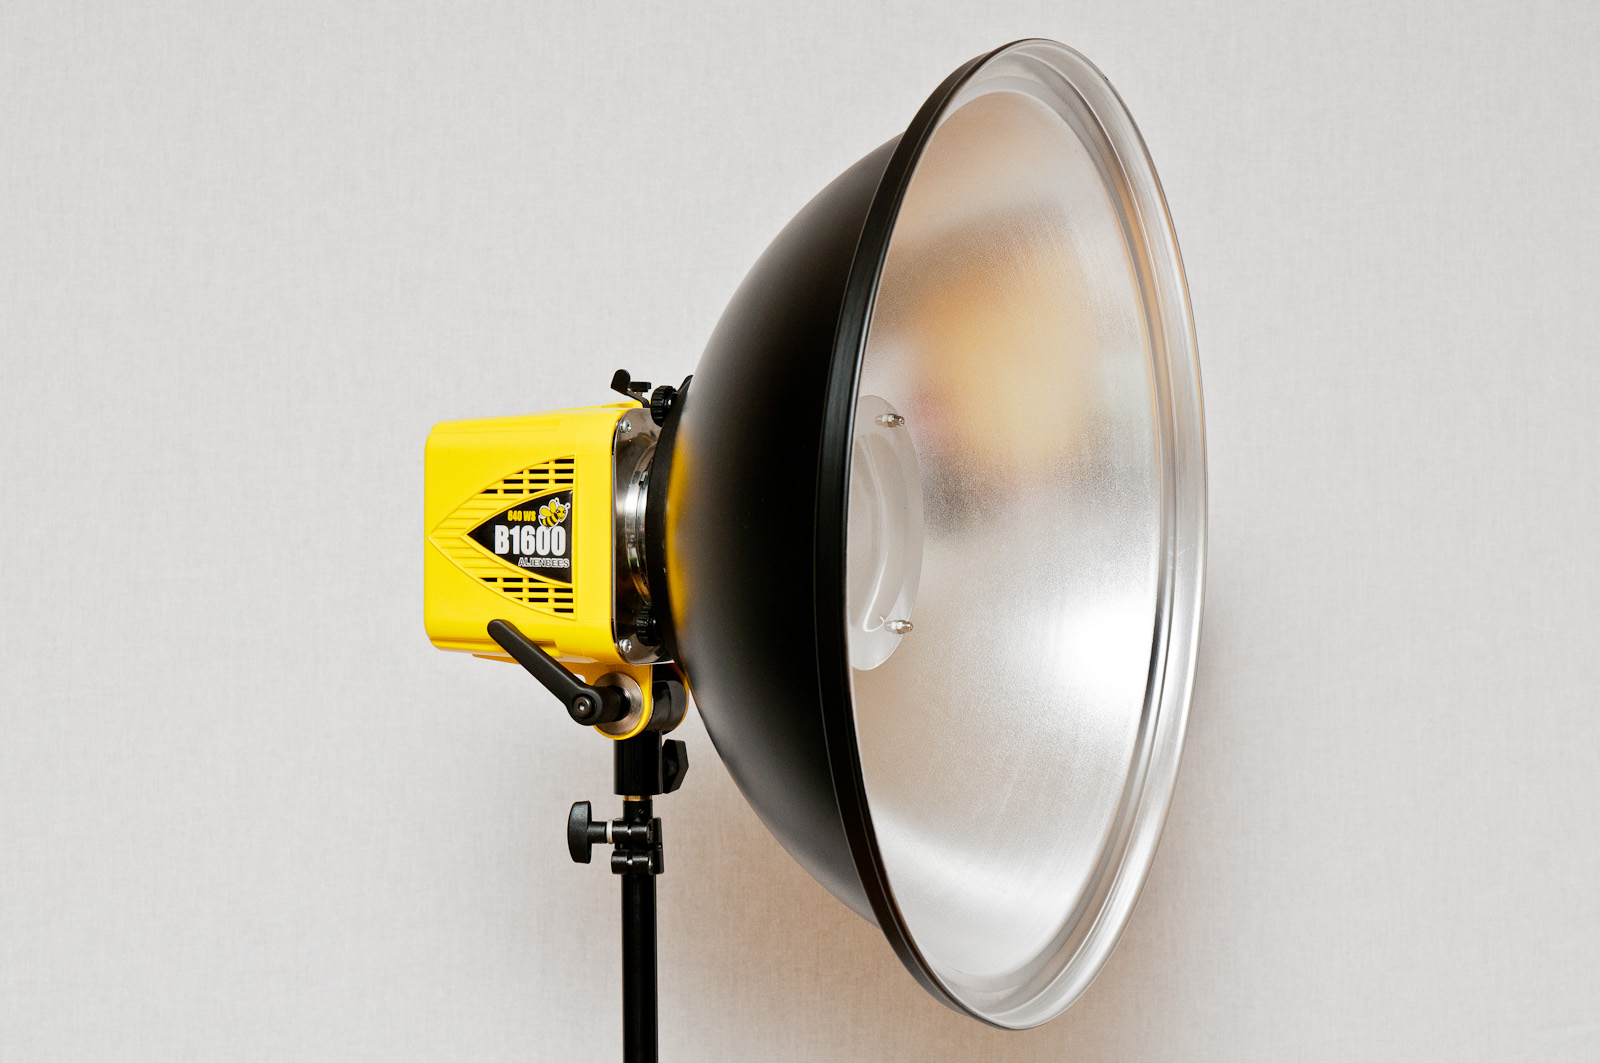
Better Family Photos

  • Subscribe to our RSS feed.
  • Twitter
  • StumbleUpon
  • Reddit
  • Facebook
  • Digg

Sunday, 11 September 2011

Step-by-Step Analysis of Speedring Shot

Posted on 10:25 by Unknown
Here's a quick post analyzing a recent shot that I did.  I think the thought process would be helpful for learning lighting.  


I recently made a post about using a single set of modifiers for speedlights and strobes.  The shot I used for the start of the story was this:


Th first step was to compose the shot.  The speedring is not very large.  To have the lights appear to fit within the hole of the speedring, I used a wide angle lens.  Using a wide lens, I could shoot the speedring fairly close to the camera while shooting the strobes at a distance away, thus making the speedring appear larger relative to the strobes.

For a clean-looking background, I used the Fotodiox 5x7 popup background behind the strobes.  In retrospect, white would have been a better choice to make the black bodies of the speedlight and Quantum more visible.

In terms of exposure, I wanted to keep both the strobes and speedlights in focus, therefore I had to use a small aperture (to increase the depth of field).

To light the strobes themselves, I had several options.  The first option was for the strobes themselves to flash in sync with the shot.  The problem with this is that even at the lowest setting from the monolight, I would have gotten a lot of glare.  When all three are firing, the glare is even worse.

Instead, I tried to make the strobes come alive through the lighting of the reflectors.  The reflectors are shiny surfaces.  When lighting a reflective surface, you don't light the surface directly -- all you'll see is the tiny specular reflection of the flash.  Rather you light the objects being reflected in the reflective surface.  Here I opted to light the ceiling in front of (not directly above) the strobes.  Since I was forced to use a small aperture (f/22) to increase the depth of field, and I was using bounce flash, I needed a lot of power.  I used an optically-triggered SB-26 speedlight at full manual power aimed directly at the ceiling.

The speedring is also a reflective surface.  To light it, I chose to light the ceiling and wall in front of it (behind the camera) using an on-camera SB-800.
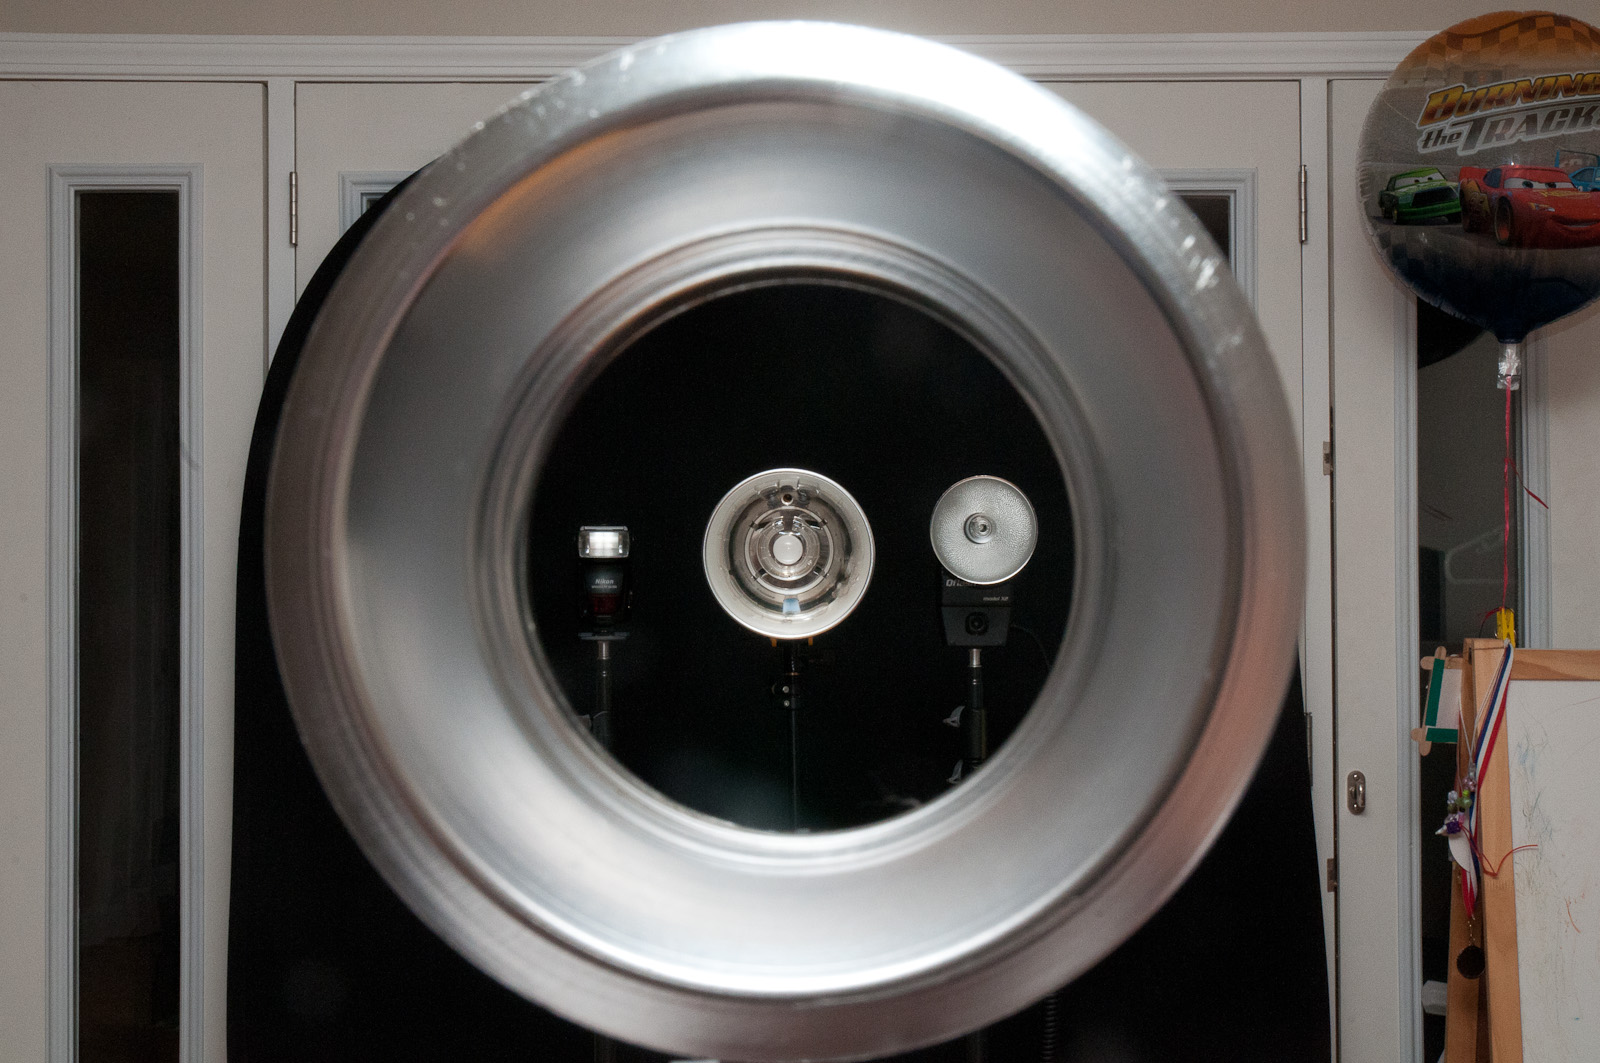

The test shot was close to what I wanted but even at f/22 the speedring was not sufficiently in focus. Sigh! I therefore switched to plan B, which was to use a composite of two shots.  As with my previous plan, I used bounce flash for both the shot of the speedring and of the strobes.  I used Topaz Remask to help me cut out the middle of the speedring.  Voila.
Read More
Posted in | No comments

Monday, 29 August 2011

Portrait Session

Posted on 22:05 by Unknown
Portrait

My friend asked me to take her portrait and I was glad to oblige.  We took a series of shots in different styles and this is probably one of my favorite shots from the day.  Although most of the shots had a white background (the safer choice due to her dark hair), we did take a few shots with a black background and I actually liked them even better.


For my key light, I chose a light source that was not super-soft in order to show off her facial features a little better.  I decided on a Quantum Qflash X2 with a Fotodiox 18" Beauty Dish.  The beauty dish was mounted on a light stand above the subject via a CowboyStudio Speedlight Bracket.

To maintain a bright "feel", I wanted to have a low highlight/shadow ratio.  I used an AlienBees B1600 firing through a 60" Westcott convertible umbrella in shoot-through mode as on-axis fill.

To give the shot a fashion magazine look, I used a silver/white Lastolite reflector below her and fired a bare Nikon SB-26 at it.  The SB-26 was triggered optically.  The three lights (key, fill, and reflector) can be seen in the catchlights.  Although some photographers prefer to have a single rectangular or round catchlight, I opted to keep the catchlights as is.  I think they make her eyes look more lively.

Finally, to create separation between her hair and the black background, I used a Nikon SB-800 as backlight, also triggered optically.  The backlight really helped make the shot work, making her hair appear like a glowing aura of energy, reflecting my friend's bubbly personality.

Look for upcoming reviews of the Fotodiox Beauty Dish, 60" Westcott convertible umbrella, and the Fotodiox popup background.  Use our RSS Feed, subscribe anonymously on Google Reader, or follow us on Twitter (@betterfamilypix) to keep updated!
Read More
Posted in | No comments

Wednesday, 24 August 2011

Sigma 50-150 OS or Non-OS?

Posted on 11:56 by Unknown
It's taking a bit longer than expected for Sigma's 50-150 OS (optically stabilized) lens to come out.  Meanwhile you may be wondering whether to get the 50-150 OS, the 50-150 without OS, or a 70-200 OS (or similar lens).
As a 50-150 non-OS user, here are my thoughts:


As Jim commented, the choice should not be based on the release date but on how you use the lens.  Yeah, it's annoying Sigma keeps pushing back the release date for this lens.  On the other hand, if the OS lens is what you really need, and you get the non-OS version now, then once the OS version is released, you may feel pangs of regret for the rest of the life of the lens.  Besides, you'll be using the lens for many years, so a few months' delay is not significant compared to the utility of the lens over its life.
Based on my usage of the 50-150 non-OS, I do think having OS would be helpful and would make the 50-150 lens much more useful.  However, sometimes I don't need OS: 
  • One example that Jim has pointed out is if your subject is fast-moving, and you want the subject to stay sharp, you'll need a fast shutter speed anyway and despite having OS, you won't be able to shoot at a slower shutter speed.
  • In moderately bright ambient light, OS isn't a necessity.  In the morning or afternoon, with an ISO of 400 or 800, I can usually get shutter speeds of 1/500 or 1/1000 or faster.  At those speeds, my images are as sharp as my lens will allow and camera shake isn't a significant factor for me.  See: Why I love my Sigma 50-150.
  • In dim ambient light when I can use flash, OS isn't critical either.  The flash duration (which is 1/1000 or faster) becomes my effective shutter speed.
  • At high ISOs, you may be able to get high enough shutter speeds in somewhat dim light.  Please note: I'm not afraid to use high ISOs.  I often use ISO 1600 with my D70 and use ISO 3200 with my D300 when I have to.  It helps that I use Lightroom 3 which has pretty good noise reduction capabilities.  In the end though, I'm just not a pixel peeper.  I don't mind luminance noise, and LR3 does a pretty good job of getting rid of unsightly chroma noise.  Yes, some details do get lost with high ISO and noise reduction but my audience doesn't make large prints.  They look at images on a computer monitor at up to 1600 pixels on the long edge -- that's like a 2-megapixel camera resolution. So I personally don't have a strong need for very crisp and detailed images.
Notwithstanding the counter-arguments I discussed above, I am still tempted by the 50-150 OS:
  • Dim ambient light.  Sometimes, raising my ISO isn't good enough and flash is not an option.
  • Dim ambient light even with flash.  Even when I can use flash to freeze the subject, I still need a slow shutter speed to allow the background to "burn in".  If you don't have OS, then the background will be somewhat blurry due to camera shake.  If you prefer a sharp background, then OS would be needed even with flash.
  • The new lens is a total overhaul of the 50-150 non-OS.  The new lens has 21 elements in 15 groups, compared to the non-OS lens which has 18 elements in 14 groups.  The new lens also has a huge filter size of 77mm compared to the 67mm of the old lens.  I'm guessing that Sigma didn't just simply add OS to its old lens and instead tried to improve on image quality.  I would not at all be surprised if the new lens turns out to be significantly sharper than its predecessor.
One comment that I sometimes hear from prospective buyers of the 50-150 is that you may as well buy a 70-200, particularly if you're going full frame.  I'm one of those folks who are thinking of possibly getting a full frame camera in the future.  However, if I had the choice of a crop-sensor body with the 50-150 or a full-frame body with a 70-200, with all factors being equal (e.g. image quality, sensor noise, etc.) I think I would go with the 50-150 because of the depth of field.   With my 50-150 on my crop-sensor body, the depth of field is just enough to render the subject sharp from nose to ear while still having a blurred background.  See: Why I love my Sigma 50-150.  I don't have personal experience with a 70-200 on a full-frame camera but I have seen some professional photographers whose 70-200 images (on full frame cameras) had insufficient depth of field.  It's just something to think about...
If you ask me if I plan to upgrade to the OS version, the answer is probably not.  The reasons?
First is the size of the new lens.  It's about the same size as the 70-200 OS (7.8 inches long) compared to the current 50-150 (5.5 inches long).  It would be inconvenient to bring it around, and if it's inconvenient, I probably won't use it as much my current lens.
Second is the cost.  To get the new lens, I would need to sell my 50-150 (probably take a $50-100 hit), then put in additional funds to buy the OS lens (probably another $500 hit).
In my opinion, the new lens would have to be really amazing for me to upgrade. YMMV.
Summary:
If the most important factor for you is image quality and you want the best image quality possible from your crop-sensor camera at this focal length range, then you probably should wait for the 50-150 OS.
If you are an aspiring pro or may be getting a full frame camera in the future, you *may* want to consider getting a 70-200 OS instead.  Meanwhile, to cover the 50-70 gap, you may want to use a 24-70, 16-85, or the Sigma 17-70 for your standard zoom.  But note that the depth of field may be shallower.
If you are care about things like convenience and portability along with image quality, then you might not be a pixel peeper, in which case the compact 50-150 non-OS may meet your needs better than the 50-150 OS.
Read More
Posted in | No comments

Monday, 22 August 2011

Sigma 50-150 OS update: now on Sigma's website

Posted on 11:03 by Unknown
The Sigma 50-150 OS now has a page on Sigma's website:
http://www.sigmaphoto.com/shop/50-150mm-f28-ex-dc-os-hsm-sigma
 
The dimensions (3.4in.× 7.8 in.) are similar to that of a 70-200 OS (i.e. much larger than the non-OS 50-150).  No pricing posted yet.
 
 
Read More
Posted in | No comments

Saturday, 20 August 2011

One Speedring to Rule Them All: One Set of Modifiers for Speedlights and Strobes

Posted on 23:22 by Unknown


[OK, if you're a longtime reader of this blog you know I've used that headline before.  It was just too tempting... :) ]

Are you new to studio strobes or are thinking of getting strobes in the future?  One of the issues with moving up to studio strobes is the modifiers.  You may already have modifiers for speedlights.  Do you really need to buy a whole new set of modifiers for a studio strobe?  Not if you plan ahead.  Details after the jump.

BTW, this post is part of a series called Toys for Big Kids, where we discuss modifiers for setup shots, when considerations of time, convenience, and/or cost take a backseat to emphasis on control and getting the best result possible.


Except perhaps for umbrellas, modifiers for speedlights usually differ slightly from modifiers made for studio strobes.  However, there are modifiers out there that can be used with studio strobes, speedlights and even some battery-powered strobes (Quantum, Sunpak, and Armatars).  This can not only save you some money, but it will also make it easier to haul around just one set of modifiers.

HOW IT WORKS:
The key to making this work is this flat type of speedring:

"Flat" speedrings (AlienBees and Bowens mounts shown)

At a minimum, you'll need a Bowens-type flat speedring, another flat speedring for your studio strobe, and a CowboyStudio bracket (see #1 in the list below).

1. CowboyStudio Bracket
This bracket for your speedlight will allow you to use modifiers for strobes.  See our review here.  So far I've only seen a bracket for Bowens modifiers but that's going to be fine even if your strobe is not Bowens, because you'll be using this bracket for your speedlights, Quantum, Sunpak or Armatar.

2. flat Bowens speedring
To get a flat Bowens speedring, you can get the Lastolite EZybox Bowens adapter.  Alternatively, you can buy one of the modifiers below that uses a flat speedring, and choose the version that's made for Bowens.
CowboyStudio bracket with flat Bowens speedring
3. flat speedring for your strobe
Lastolite makes flat speedrings for several strobes.  Again, you can instead get one of the modifiers below with a flat speedring, and select the type for your strobe.
AlienBee with flat speedring


THE LIST:
Once you have the minimum gear, you can choose among these modifiers that will be compatible with your speedlights and strobes.

1. Speedlight Softbox (Foldable)
These softboxes are made for speedlights.  They fold flat and popup easily when you're ready to use them.  See the Softbox review.
Usually, these softboxes come with their own speedring and bracket.  However, they also work with flat speedrings:
24" speedlight softbox with original speedring
24" softbox with flat speedring (AlienBees mount)

2. Traditional or octagon softbox: EZ-Pro
Unlike the foldable softbox, traditional softboxes have curved sides (instead of the straight sides on foldable softboxes).  Traditional softboxes usually have speedrings, to which you attach tension rods that hold the assembly together.  See this youtube video of a typical softbox being assembled:

An octagon softbox takes even longer to assemble because it has 8 rods.

The EZ-Pro is a newer type of softbox that instead opens up like an umbrella.  Here's a video of one being setup (octagon softbox shown, but the concept is the same for a rectangular EZ-Pro softbox):


The cool thing for our purposes is that the EZ-Pro softboxes use flat speedrings.  The EZ-Pro does cost significantly more than traditional softboxes but at least you won't need separate softboxes for your speedlight and strobe.  Plus it deploys much more quickly.

(BTW, we will be reviewing the EZ-Pro on this blog.)

3. Beauty Dish: Fotodiox
Many entry-level (i.e. cheaper) beauty dishes have interchangeable speedrings.  However, not all of the speedrings can be used as flat speedrings.  A couple of beauty dishes I found to have such a flat speedring are the Fotodiox 18" and the Fotodiox 28".  (Note: gridded versions are also available)

Left: a speedring used in some beauty dishes; right: a flat speedring used with the Fotodiox 18" beauty dish. Note the wider lip of the flat speedring

The speedring used in other beauty dishes won't necessarily be compatible with modifiers that use flat speedrings
PUTTING IT TOGETHER:
To use a modifier with your speedlight, Quantum, Sunpak or Armatar, just use the CowboyStudio bracket and your flat Bowens-type speedring.  To use a modifier with your studio strobe, use the flat speedring for your strobe.  It's that simple.  So there you have it -- one set of modifiers for your speedlights and studio strobes!

The Fotodiox 18" beauty dish used with a Nikon SB-800 speedlight
The same Fotodiox 18" beauty dish used with an AlienBee B1600
Coming posts in this series:
- EZ-Pro 48" Octagon Softbox
- Fotodiox 18" Beauty Dish
- AlienBees ABR800 Ring Flash
- Paul C. Buff MoonUnit
- White Lightning X3200 Monolight
- Vagabond II
- Do you need a flashmeter?
- Paul C. Buff CyberCommander
and more.  Meanwhile here are some RELATED POSTS:
Toys for Big Kids
Toys for Big Kids: Speedlight Softbox
Toys for Big Kids: CowboyStudio Speedlight Bracket
Toys for Big Kids: Quantum Flash
Read More
Posted in alien bee, alienbees, beauty dish, modifier, monobloc, monolight, quantum, softbox, speedlight | No comments

Wednesday, 17 August 2011

Happy Birthday BFP!

Posted on 08:16 by Unknown
I just noticed that BetterFamilyPhotos.com passed its 2nd anniversary.  Here's the story of BetterFamilyPhotos so far:


Mic: I created this blog to improve my photography and share what I learned.  Our first blog post was on June 29, 2009.  When we first started, the blog was getting around 50 visits and 85 page views in a whole month.  Stats didn't improve and I got busy so after a few months, I stopped posting.  Then I noticed that I wasn't improving my photography, so I in March 2010, I relaunched the blog, and started mentioning it in forums such as DP Review.  From 50 visits and 56 views in February 2010, we suddenly got 472 visits and 995 views in March 2010.  I promoted the blog through even more active participation in DP Review, and we went from 464 visits and 1066 views in June 2010 to 2,475 visits and 5,168 views in July, then to 3,595 visits and 7,654 views in August.  From there, readership continued to increase gradually.  In June 2011, we ended the month with 5,922 visits and 10,655 views.  Those numbers are small relative to blogs like strobist, but it's nice to see it grow each month.

Meanwhile, my photography has evolved.  When I first started, all I cared about was that the light was soft and directional.

Indoors with bounce flash

When I wasn't bouncing the flash, I was using a handheld umbrella.

Outdoors with an umbrella

Now, I usually apply a lighter touch (pun unintended) with my flash to make it not just flattering but also less apparent.  Working on the blog has allowed me to do this by practicing techniques and concepts such as   light motivation (i.e., making sure the direction of light appears natural), balancing ambient and flash (particularly through a better understanding of TTL), color, and other factors.

Flash or no flash?  I hope to keep you guessing :)

I've also started to pay more attention to everything else other than the lighting, such as the emotion and the moment.  That would not have been possible without practicing so much to become  very comfortable with exposure and lighting so that I no longer have to take too much time thinking about them.

Little Ballerina

This year I've also started learning setup shots, which has opened many interesting creative possibilities.

BC31: Local Hiro

We also finally added a subject-by-subject index of the literally hundreds of articles on the blog.  (Check it out if you haven't done so.)

Probably the best development that has happened to this blog, though, is the addition of Mohammad Shafik to our team!  Mohammad was a regular reader of our blog who started commenting more often.  What I noticed in his comments is how much we had in common.  I thought it would be interesting to have another voice for the blog so I invited him to do a guest post and the rest is history.  I'll let Mohammad share his side of the story himself...  :)


Mohammad: It seems to be a very long time since I stumbled upon this blog, I was probably searching for something that had to do with lighting and speed lights when I first found Mic's blog. Back then I was starting to learn photography (and still am, will always be), and I was hungry for any photography tutorials blog, I remember that the blog was almost one year old and I quickly devoured all of Mic's posts and started following the blog via Google Reader where I'm subscribed to no less than 50 blogs/sites (a new post idea just popped up: my favorite blogs).

I was always interested in Mic's posts because of their originality, practicality and the prevailing "user perspective" tone in all of his posts, I felt how much he cared to explain things and make them simple to average users. I also noticed we had lots in common regarding photography, so I started actively commenting on Mic's posts when I had something useful to say, you can see my first comment on the blog here, it will show you how much we had in common. @Mic: Wow, I don't remember you wanted the AB1600 for such a long time, and you also said you won't be dragging it along. :grin:

So after a few comment and email exchanges with Mic, he suggested that I do a guest post to demonstrate some concepts I commented upon, I used to send him the post in a word document and attach the pictures to the email, and this was my first guest post on the blog. I did two more guest posts and then Mic added me as an author to the blog, my first post as an author was one of my more successful posts, the first installment of the Canon Lenses Chat. And speaking of firsts, this particular post is my first collaborated post with Mic and also my first post as an admin to this blog, thanks for the trust Mic. :-)

This was a quick background on me joining the "betterfamilyphotos" family. As for my photography, I started learning on an advanced P&S, the Canon G11 back in March 2010 , I knew very little back then about lighting, how cameras worked, techniques and even DSLRs (can you imagine that?). I quickly started learning via online tutorials, here's a summary of the breakthroughs that I went through in the past year and a half:
  • Mar 2010: Had my first good camera, the Canon G11, my main reason behind the G11 was to get better indoor pictures of my little girl, it was ok but not good enough.
  • Apr 2010: Caught the strobist.com bug, bought my first cheap Chinese studio flashes, a couple of umbrellas and a light stand, this opened a new world for me regarding indoor pictures, I was finally able to use low ISOs and freeze my daughter, but the focusing speed and shutter lag of the G11 killed me.
  • May 2010: Discovered  Zack Arias' brilliant workflow post, it was the first time for me to successfully use RAW files and lightroom, my images had a huge boost in quality and color accuracy.
  • Jun 2010: Bought a couple of speedlites, a new 430EX and a used 580EX, and got a couple of eBay triggers. More lighting possibilities in outdoor environments, for all of my indoors shots I blasted both speedlights at the ceiling thinking that was how they were supposed to be used off-camera without light modifiers.
  • Jul 2010: I sold my G11 and finally made the jump to my first DSLR, the Canon 550D (T2i). I was in a different league regarding focusing speed, shutter lag and noise performance.
  • Aug 2010: Discovered the black foamie thing and Neil VN's world of on-camera directional flash, this lead to a huge jump in the quality and looks of my photos, still my favorite technique ever, especially that I hate to carry more than the camera, one lens and a flash at most.
  • Nov 2010: Joined this blog, this forced me to take more photos and try new techniques so that I am able to show the internet how they were done. From then on I started upgrading my photography kit including lenses, bags, modifiers, etc... until:
  • Apr 2011: Sold my 550D and bought the 60D + 580EX II during a trip to Malaysia.
  • Jun 2011: Bought my first softbox, the 24" Lastolite EzyBox, and took my first classic three light portraits (Key + Fill + Rim), I yet have to blog about it.

The above sort of sums up my not-so-long photography trip, and before I end this post I'd like to talk a bit about why I joined this blog in the first place, two main reasons, the first being my passion in teaching others about everything I know, if you know me in person you'd better be careful when you ask me questions, I might keep explaining to you everything related to the matter for hours on end, didn't you notice that my posts are usually lengthy? I also love reading long, detailed posts intertwined with personal opinions. So joining this blog opened a nice large door for me to teach and explain things I knew about photography. It makes me very happy when I read comments telling me that my post helped someone with a decision or a technique, that's why one of my favorite and most read posts is the Canon 60D vs Canon 550D & 600D, just look at the encouraging comments, guys, please keep them coming, I want to know that what I'm writing is interesting to you.

The second reason for joining this blog was to make it as generic as possible, i.e. Mic is using a Nikon system and I'm using a Canon system, so both of us would serve a wider audience than if it was a Nikon or Canon only blog.

So that's it, now you know all about me, my main photography now is centered around my little kids and my family, there are no real breakthroughs for me, but I'm quite interested in product photography, so I might expand into that area in the future, the only problem with product photography is that it requires a table and a large setup which is a hassle to keep installing and removing all the time unless I get a dedicated product photography room.

Thanks for all your support and for joining us on this adventure!  Happy Birthday BFP!
Read More
Posted in | No comments

Tuesday, 16 August 2011

Inspired by UFC

Posted on 02:57 by Unknown
_DSC6185.jpg


I'm a fan of UFC (Ultimate Fighting Championship) and decided to do a UFC-style portrait for fun.


I became a UFC (Ultimate Fighting Championship) fan many years ago when I watched a relatively thin and ordinary-looking guy named Royce Gracie take on muscular martial artists and streetfighters who weighed far more than he did in no-holds-barred matches and somehow win.  What most people did not know then was that Royce was a master of Brazilian Jiu-Jitsu (BJJ), a martial art that recognized that most fights ended up on the ground, where a fighter skilled with grappling could dominate an otherwise fearsome opponent who was unfamiliar with groundfighting. Almost two decades since Royce Gracie brought BJJ to prominence with his shocking success, BJJ still remains one of the most dominant fighting styles in the UFC.

Recently, I started learning BJJ to improve my fitness (gym is just too boring for me).  BJJ has been both challenging and fun.  While a match between a BJJ fighter and a traditional martial artist is interesting to watch, a battle between two skilled BJJ fighters is even more fascinating because of the depth of strategy and techniques involved.  It has been described as physical chess and I have to say that's not an exaggeration.  It is truly a beautiful mixture of science and art, just like photography.

Anyway, I decided to do a photo in the style of many UFC event posters, such as this one:
image credit: UFC and Zuffa, LLC
No way I was going to show my flabby muscles, so instead I donned my gi (the uniform we use in BJJ).  First, I selected my key light -- an Alien Bees B1600 in a 24-inch softbox, placed to camera left.  The B1600 was triggered by a CyberCommander.  Behind me was a black popup background.
test shot: key light only
Next I added a separation light above and behind me.  I used an SB-26, triggered by a Radiopopper JrX Studio.
2nd test shot: key + separation light
Finally, I added an accent light camera right.  It was an SB-80 in optical slave mode, Justin-clamped to a floor lamp.  In retrospect I would have liked to place it higher except I didn't have the space for a light stand.
3rd test shot: key only
4th test shot: key + accent light (no separation light)
Finally I got into character one more time and took the final shot...
Let's Get Ready to Rumble!!!
BTW, I will be posting a review of the CyberCommander soon, as well as how I combined it with the Radiopopper JrX.  I will also post a review of the popup background I used.
Read More
Posted in | No comments
Newer Posts Older Posts Home
Subscribe to: Posts (Atom)

Popular Posts

  • Samyang 24 f/3.5 Tilt Shift Lens Now Available
    A seller on ebay ( bestpriceoptics ) is now selling the Samyang 24 f/3.5 tilt shift lens, in Canon and Nikon mounts, for $999 shipped.  This...
  • Olympus E-PL3 with 14-42 Lens $199; Moving from Nikon to MFT?
    I saw on 43rumors.com that the Olympus E-PL3 was being sold at Newegg for just $199 with the 14-42 kit lens included.  I checked it out and...
  • Nikon 28 1.8G: Moody Artist?
    When Nikon had its recently-finished sale (now extended to end of March), the one lens that I considered buying was the Nikkor 28 1.8G.  To...
  • Double Camera Strap & BlackRapid RS-5 Review
    This is a review of two camera straps: - The first is a double camera strap that's -- let's be blunt -- a knockoff of the BlackRapid...
  • Best Alternative to Nikon 24-70 2.8G: the Nikon 28-70 2.8D
    Every Nikon shooter knows that the Nikkor 24-70 2.8G is the best standard zoom for Nikon's full frame cameras.  However, at around $1900...
  • Price drops!!! Olympus XZ-2, Pentax MX-1. And about the Casio EX-10
    I just noticed a huge price drop on the Olympus XZ-2 (previously $500 now under $400) and Pentax MX-1 (previously $500 now under $300 ).  Pe...
  • Abstract Fun
    In one of the rare times I put effort and setup a light stand and an umbrella to shoot my girls, I decided to make use of this burst of ener...
  • Update: Nikon D7100 Lightroom raw profiles
    UPDATE: The raw profiles don't seem to work.  I'm trying to find a workaround. UPDATE 2: The workaround is here: http://betterfamily...
  • Coco Ring Flash - First Impressions
    A few weeks ago, after much deliberation, I finally decided to get a ring flash adapter.  My purpose was to use it as on-axis fill, much lik...
  • Nikon D7000 vs. Nikon D7100
    D7000 + Tokina 11-16 I've been using the Nikon D7000 for a couple of months now, and in this post I'd like to share my thoughts on t...

Categories

  • "alien bee"
  • "april fool's"
  • "ring flash"
  • "yong nuo"
  • 1"
  • 1/1.7"
  • 10-17
  • 10-20
  • 11-16
  • 15-85mm
  • 15z
  • 17-50 vc
  • 190cx pro3
  • 2.8
  • 2.8G
  • 2/3"
  • 200 f2.8
  • 200 L
  • 200mm
  • 200mm f/2.8
  • 200mm f/2.8 L II
  • 200mm f2.8
  • 200mm f28
  • 200mm f28 L II
  • 2012
  • 2013
  • 23 Samsung led
  • 24-105 f4
  • 24-70
  • 25 1.4
  • 28-105
  • 28-70
  • 35mm
  • 35mm f/2
  • 35mm f2
  • 360
  • 3rd party
  • 4.1
  • 4/3
  • 40 pancake
  • 40 panckae
  • 40 stm
  • 40-150R
  • 40mm f/2.8
  • 430EX
  • 43rumors
  • 45 18
  • 45 AW
  • 4x4
  • 50 14
  • 50 f14
  • 50-150
  • 50mm
  • 50mm f/1.4
  • 55 AW
  • 55-250
  • 550D
  • 55aw
  • 560ex
  • 580 ex ii
  • 580EX
  • 580EX II
  • 5d
  • 5d mark 2
  • 5d mark 3
  • 5D Mark II
  • 5d mark iii
  • 5d2
  • 600d
  • 600ex-rt
  • 60d
  • 60fps
  • 60mm macro
  • 650d
  • 6d
  • 7.5mm
  • 720p
  • 75 f1.8
  • 85mm f1.8
  • 8x12
  • abbc
  • abstract
  • accuracy
  • active d-lighting
  • adjustment
  • adl
  • AF
  • af point
  • AF Point Expansion
  • aftermarket
  • airport
  • alexandria
  • alien bee
  • alien bees
  • alienbee
  • alienbees
  • alternative
  • ambient
  • ambient light
  • angle
  • aperture priority
  • APS-C
  • apsc
  • assignment
  • auto focus
  • auto white balance
  • autofocus
  • AWB
  • awl
  • back button focus
  • background
  • background blur
  • backlight
  • backlighting
  • backlit
  • bad behavior
  • bad photography
  • balance
  • bare flash
  • battery
  • BBF
  • beach
  • beams
  • beauty dish
  • bellagio
  • BFT
  • birthday
  • black
  • black foamie thing
  • black rapid
  • blackrapid
  • blogs
  • blower
  • blown
  • blur
  • bokeh
  • bounce
  • bounce card
  • bounce flash
  • bower
  • bracket
  • brightness
  • brilliance
  • brolly grip
  • brother
  • build
  • burst mode
  • butterflies
  • butterfly
  • C.Fn
  • cable
  • cake
  • camera
  • camera bag
  • camera releases
  • camera settings
  • candle
  • candlelight
  • canon
  • Canon 100mm Macro L IS
  • canon 200mm f28L
  • canon 24-105
  • canon 40 stm
  • canon 40mm f28 pancake
  • canon 50
  • canon 50 1.4
  • canon 55-250
  • canon 5d mark 2
  • canon 5d mark ii
  • canon 5d mark iii
  • canon 5d2
  • canon 5d3
  • Canon 60d
  • canon 6d
  • canon g11
  • canon speedlite
  • car
  • carbon fiber
  • catch lights
  • cheap
  • christmas
  • clean
  • cleaning
  • clipped
  • clipping
  • close up
  • clouds
  • cls
  • clustered
  • color
  • compact
  • comparison
  • composition
  • compositional aid
  • construction
  • contrast
  • cooler master
  • copyright
  • core i7
  • cowboy
  • cowboystudio
  • cpl
  • creepy
  • crop factor
  • crop sensor
  • cyber commander
  • cybersync
  • d-lux
  • d-lux5
  • d3
  • d300
  • D5100
  • D600
  • d70
  • d700
  • D7100
  • d90
  • dark background
  • david hobby
  • daylight
  • dell 24 inch
  • depth of field
  • desert
  • diamond
  • digital
  • directional
  • distance
  • diy
  • dlux
  • dlux5
  • dng
  • double
  • dslr
  • DSLR bag
  • dual
  • dust
  • dx
  • dynamic range
  • earthquake
  • ebay
  • ebay trigger
  • eclipse
  • editing
  • EF 40mm f/2.8
  • ef-s 60mm
  • einstein
  • Electro GN
  • engagement
  • environmental portrait
  • ep5
  • equipment
  • ETTL
  • ettr
  • europe
  • events
  • evf
  • ex600
  • existing light
  • expensive
  • exposing to the right
  • exposure
  • f/3.5
  • family
  • faq
  • fasten-r3
  • favorite
  • fayoum
  • Fayoum desert
  • fill
  • fill light
  • film
  • filter
  • finepix
  • fire
  • fireplace
  • first impressions
  • fish-eye
  • fisheye
  • fix
  • FL600R
  • flash
  • flash bounce
  • flash sync
  • flash trigger
  • flashmeter
  • flashright
  • focal length
  • focus
  • food
  • football
  • fotodiox
  • fountain
  • freexwire
  • fuji
  • fujifilm
  • Full Frame
  • fun
  • fx
  • galaxy s 3
  • galaxy s4
  • gecko
  • GeForce gtx570 OC
  • gel
  • geomag
  • ggs
  • ghost
  • gigabyte z77 ud3h
  • glass
  • gn
  • Goodbye
  • gorillapod
  • gregg
  • grid
  • grip
  • group shot
  • gskill ripjaws
  • guide
  • guide number
  • gx7
  • haf 912
  • handheld
  • hands on
  • hands-on
  • hdr
  • head shot
  • hiatus
  • high dynamic range
  • high iso
  • high speed sync
  • highlight
  • highlights
  • histogram
  • holder
  • holiday
  • home
  • home made
  • Honda civic
  • honeycomb
  • hotshoe
  • hoya
  • humor
  • i9500
  • id
  • image quality
  • impressions
  • indoor flash
  • infrared
  • infringement
  • insects
  • inverse square law
  • japan
  • jewel
  • jewelry
  • joby head
  • jpeg
  • Kingston hyperX SSD
  • kirk tuck
  • kl bird park
  • krakow
  • kuala lumpur
  • las vegas
  • lastolite
  • laurence kim
  • lax
  • lcd
  • leica
  • lens
  • lens cap
  • lens compression
  • lens review
  • lenses
  • lenspen
  • lensrentals
  • light
  • light painting
  • lighting
  • lightroom
  • lightroom 4
  • lightroom 5
  • location
  • long
  • long exposure
  • los angeles
  • low key
  • low light
  • Lowepro
  • Lowepro 45aw
  • Lowepro 55aw
  • lr4
  • lumiquest softbox III
  • lumix
  • lx-5
  • lx5
  • m4/3
  • m43
  • macro
  • macro adapter
  • makernotes
  • malaysia
  • manfrotto
  • manfrotto tripod
  • manual
  • mark ii
  • mark iii
  • MFT
  • mft. micro four thirds
  • micro four thirds
  • mielec
  • migration
  • mini review
  • mirror
  • mirror-less
  • mirrorless
  • mobile
  • modification
  • modifier
  • monobloc
  • monoblock
  • monolight
  • motion
  • motion blur
  • multi function printer
  • multiple
  • nano crystal
  • natural light
  • neil
  • Neil VN
  • niekerk
  • nikkor
  • nikon
  • nikon d600
  • noise
  • off camera
  • oil
  • olympus
  • olympus 12-50
  • Olympus 40-150
  • olympus 45
  • olympus 45 18
  • olympus om-d em-5
  • om-d
  • omd
  • omd em1
  • omd em5
  • omd em6
  • on-camera
  • one inch
  • overexposure
  • overpowering sun
  • panasonic
  • panasonic leica 25 14
  • pancake
  • party
  • passport
  • pastries
  • pastry
  • pc
  • pentax
  • peter
  • phone
  • phone photography
  • photo
  • photo tips
  • photography
  • photokina
  • photomerge
  • photoshop
  • photoshop elements
  • planning
  • pocketwizard
  • point and shoot
  • poland
  • polarizer
  • popup
  • popup flash
  • portrait
  • post processing
  • post-processing
  • postprocessing
  • product
  • product shots
  • profile
  • protection
  • protector
  • quad-flash
  • quantum
  • radiopopper
  • raid 0
  • Range finder
  • raw
  • raw editing
  • raw+jpeg
  • rays
  • real
  • recovery
  • reflection
  • reflector
  • resources
  • restaurant
  • review
  • rf-603
  • rf603
  • ricoh
  • ring
  • ringflash
  • robin wong
  • roger cicala
  • rogue
  • rokinon
  • roll off
  • roll-off
  • rolloff
  • rs-5
  • rs-7
  • rumors
  • s5
  • s5 pro
  • s5pro
  • samples
  • samsung
  • samyang
  • sb-26
  • sb-80
  • sb26
  • sb800
  • screen protector
  • sensor
  • sensor swab
  • sensorclear
  • sensorklean
  • sensorklear
  • separation
  • shadow
  • shadow pulling
  • shadows
  • shards
  • sharpening
  • sharpness
  • shoot through
  • shoot-through
  • shoot-thru
  • shooting technique
  • shootout
  • short
  • sigma
  • sigma 50-150
  • skin tones
  • skylight
  • Slik Mini Tripod
  • slingshot
  • slow
  • small
  • smooth
  • soft
  • softbox
  • sony
  • sony a99
  • sony rx100
  • sony t10
  • specular
  • speed
  • speedlight
  • speedlite
  • spinlight
  • spots
  • standard
  • stockholm
  • story
  • strap
  • strobe
  • strobist
  • studio
  • studio strobe
  • subject
  • substitute
  • sudden
  • summilux
  • sunrise
  • sunset
  • sweden
  • swivel
  • sync speed
  • t2i
  • t3i
  • Table top tripod
  • tamron
  • technique
  • techniques
  • tele
  • telephoto
  • thinktank retrospective 5
  • third party
  • tips
  • tokina
  • tonal
  • tonality
  • tone curve
  • toploader
  • toys
  • translucent
  • travel photography
  • tri-flash
  • Tribute
  • trifold
  • trigger
  • tripod
  • truth
  • ttl
  • TTL Cord
  • u43
  • ultra-wide
  • ultrawide
  • umbrella
  • underexposure
  • unlimited sync speed
  • up-rise
  • up-rise 15z
  • update
  • uprise
  • USM
  • uv
  • uwa
  • vanguard
  • versus
  • vertical
  • video
  • view nx2
  • visual science lab
  • vs
  • wadi rayan
  • wd caviar black
  • web
  • weekend
  • westin
  • white balance
  • white lightning
  • wide
  • wide angle
  • window
  • wireless
  • wireless flash
  • wireless release
  • wireless trigger
  • workflow
  • Yashica
  • yashica gtn
  • yashica st-7
  • yn-560
  • yn-560ex
  • yn-ex600
  • yn560
  • yong nuo
  • yongnuo
  • zack arias
  • zoom
  • zoom toploader
  • zuiko

Blog Archive

  • ▼  2013 (165)
    • ▼  December (5)
      • Olympus E-PL3 with 14-42 Lens $199; Moving from Ni...
      • Sigma 18-35 1.8 Revisited; Where to Get It
      • Speedlight Modifiers - 50% discount at Fotodiox
      • Olympus M.Zuiko 45mm f/1.8 Mini Review
      • Evening Portraits with Flash
    • ►  November (10)
    • ►  October (8)
    • ►  September (7)
    • ►  August (3)
    • ►  July (11)
    • ►  June (10)
    • ►  May (15)
    • ►  April (19)
    • ►  March (33)
    • ►  February (24)
    • ►  January (20)
  • ►  2012 (193)
    • ►  December (17)
    • ►  November (22)
    • ►  October (34)
    • ►  September (47)
    • ►  August (12)
    • ►  July (11)
    • ►  June (10)
    • ►  May (13)
    • ►  April (13)
    • ►  March (8)
    • ►  February (1)
    • ►  January (5)
  • ►  2011 (141)
    • ►  December (8)
    • ►  November (8)
    • ►  October (7)
    • ►  September (9)
    • ►  August (13)
    • ►  July (13)
    • ►  June (19)
    • ►  May (17)
    • ►  April (25)
    • ►  March (22)
Powered by Blogger.

About Me

Unknown
View my complete profile