Better Family Photos

  • Subscribe to our RSS feed.
  • Twitter
  • StumbleUpon
  • Reddit
  • Facebook
  • Digg

Tuesday, 3 May 2011

Intro to Studio Strobes

Posted on 07:40 by Unknown
Lately I've been thinking about doing more setup shots, especially location shots.  Outdoors you usually need more power because of the much brighter ambient conditions, especially with the days getting longer (at least in the northern hemisphere).  In terms of capacity to overpower the sun (even with a large modifier), a studio strobe is much more powerful than hotshoe flashes.  If you don't know anything about strobes, this post is for you.
BTW, strobes can mean different things to people.  I use the term to refer to big flashes.  First, I'll discuss their advantages and disadvantages compared to hotshoe flashes.  Next I'll talk about the main types of strobes.  I'll then discuss the strobe that I'd like to get, then finally I'll talk about remote adjustment options.

ADVANTAGES and DISADVANTAGES
+ Strobes are far more powerful than hotshoe flashes.  An Alien Bee B1600 for example, is approximately equivalent to ten SB-800s or about twenty SB-700s.  On the other hand, sometimes they are too powerful (such as when you want to use a wide aperture to get shallow depth of field).
+ Unlike hotshoe flashes whose flash tubes are recessed in the flash head, strobes have flash tubes that stick out, allowing the light to spread out in all directions, which makes them more suitable for modifiers such as softboxes -- no tupperware needed either. :) 
+ Many strobes also offer modeling lights (i.e., continuous lights that allow you to get a better idea of what the flash will look like).  My SB-800 does have a modeling light but it's pretty weak and pulses like a disco strobe light.
+ Fast recycling time.  An external battery pack for a hotshoe flash can mitigate this advantage somewhat but strobes can fire off shots quickly and take longer to overheat.
On the other hand:
- strobes are generally larger, and they need either an AC power outlet or a separate battery pack (battery-powered strobes being somewhat of an exception). 
- Their upfront cost is also much higher than speedlights although if you try to amass speedlights with equivalent power, using strobes can be more cost-effective. 
- Most strobes can only be used in manual mode (although some battery-powered strobes can operate in TTL mode).  
- No high speed sync (with a few exceptions).
- No zooming.  If you want to change the shape of the beam, you have to change the reflector or modifier.
- Finally, speedlights can have a shorter flash duration than some monolights (again, there are exceptions).  Many monolights also have a longer flash duration when you use less power.

POWER COMPARISON
The power of a hotshoe flash is usually expressed as a Guide Number, whereas the power of a strobe is usually measured in watt-seconds.  Watt-seconds don't convert into guide number because watt-seconds just describe the raw power and says nothing about efficiency and coverage (a large reflector can have a focusing effect like zooming the flash head).  That said, a Nikon SB-800 or Canon 580EXII has about 60 watt-seconds, while a medium-powered monolight like the Alien Bees B800 has 320 watt-seconds of power, and there are strobes with 640 watt-seconds, 1320 watt-seconds, and higher.

TYPES of STROBES
There are three main types of strobes: monolights, studio packs, and battery-powered strobes.
  • Monolights (aka monoblocs) have both a flash head and power supply built into the body of the flash.  The body is then connected to a power outlet or to a battery pack.  It is triggered either by a sync cord connected to the camera, an optical slave, or a radio trigger.  Generally, you set the power manually on the monolight itself, although there are options for remote adjustment (discussed below).  Examples include: Alien Bees, Hensel Integra, Elinchrom D-Lite.
  • Studio packs (aka "pack and head" or generator) have one or more flash heads connected via cords to a central power supply.  You can set the power level of the flash on the power supply (the better models allow power to be set independently for each flash).  The power supply is then connected to a power outlet or a battery pack.  The advantages of a studio pack compared to a monolight are: the convenience of setting power from the power supply, and lighter flash heads (more stable on light stands) .  The disadvantage is that if the flash heads are positioned far from each other, then they will likely need separate power supplies.  Another disadvantage of studio packs is that if the power supply fails, you won't be able to use any of the flashes.  Finally, studio packs tend to be more expensive than monolights.  Examples include: Broncolor Pulso and Grafit, Profoto AcuteB2 system (here).
  • Battery powered strobes are somewhat like studio packs, except that they connect to a battery pack and are designed to be fairly portable (though not as portable as hotshoe flashes).  Some of them have power that's controlled by the head (like a monolight), while others have power controlled by the battery pack (like a studio pack). Examples include: Quantum Qflashes, Elinchrom Ranger RX, Elinchrom Quadra RX, Norman A200C and A400B.

PAUL C. BUFF FLASH UNITS
Strobes can be quite expensive.  One of the less expensive strobe brands out there that nonetheless has a decent reputation for quality is Paul C. Buff, Inc.  PCB makes three lines of monoblocs:
  • Alien Bees
  • White Lightning
  • Einstein
Alien Bees are PCB's entry level flash units.  They have most of the features I care about, such as a cooling fan, auto-dump (to drain excess charge automatically), reasonable availability of flash modifiers, stepless adjustment down to 1/32 power, good triggering options (see below), and excellent customer support, all at the right price.
A step above Alien Bees are the White Lightning flash units.  They're built a little sturdier with aluminum instead of plastic bodies.  In addition, the X1600 and X3200 have a switch that can deactivate some of the capacitors, reducing the power to 1/4th without slowing down the flash duration.
The newest PCB flash unit is the Einstein, which has a lot of cutting edge features:
  • The Einstein uses IGBT transistors.  What that means is that unlike analog strobes, the flash duration of the Einstein becomes shorter when you decrease its power (just like hotshoe flashes).   The Einstein can be used in action mode (for faster flash duration) with t.1 durations as short as 1/13,500. 
  • Alien Bees have been criticized for inconsistent color at low power.  That's remedied by the Einstein's Color mode, which uses digital technology to give the same color temperature at any power level.
  • power adjustment in 1/10th stop increments over a range of 9-stops (down to 2.5ws).
  • More powerful modeling light.

REMOTE ADJUSTMENT OPTIONS
Within the last year or so, remote adjustment options for studio strobes, particularly the PCB strobes have increased.

Alien Bees and White Lightning:
Alien Bees and White Lightning strobes can be triggered by radio using the cheap ebay triggers.  However, they also feature an RJ-11 jack (just like landline phones), which allows them to be adjusted remotely in several ways:
- by wired connection via an LG4X 4-Channel Wired Remote.
- wireless radio via Cyber Commander™.  The Cyber Commander is pretty cool system for controlling strobes.  The Cyber Commander can control up to 16 lights and has a built-in flashmeter (!) that can tell you the f/stop of each light or any group of lights.  And if you have an unlimited sync speed camera such as the Nikon D70, the Cyber Commander system will allow sync speeds of up to 1/2500.  A Cyber Commander can also trigger a speedlight but not remotely adjust it (darn!).
- wireless radio via the Radiopopper JrX Studio receiver, and have their power adjusted remotely from the camera's position with either a Radiopopper JrX Studio transmitter or a PX transmitter. An important advantage of the Radiopoppers is that they can also control hotshoe flashes, making it possible to combine both hotshoe flashes and these strobes, all remotely adjusted.
- wireless radio via PocketWizard AC9 receiver, with the power adjusted remotely either by a PocketWizard MiniTT1 or a FlexTT5.  As with the Radiopopper system, this makes it possible to combine hotshoe flashes with these strobes, with remote adjustment capability.

Einstein: 
The Einstein has different triggering options because it's digital, unlike the Alien Bee and White Lightning strobes.
-  wireless radio via Cyber Commander.  What's cool is that the dedicated receiver for Einsteins, the CSXCV*, costs just $30!  *PCB needs a marketing consultant to rename their products...
- wireless radio via PocketWizard PowerMC2 receiver, with the power adjusted remotely either by a PocketWizard MiniTT1 or a FlexTT5.
- as of now, there is no Radiopopper unit yet that can remotely adjust the Einstein.

I'm still debating whether to go with an Alien Bee or Einstein, though I'm leaning toward the latter.  Meanwhile, I'd like to use a multiple speedlight setup first, which I will be discussing next.

RELATED POSTS
  1. Multiple Speedlights vs. Studio Strobe.
  2. Are you ready for AlienBees?
ADDITIONAL RESOURCES:
Syl Arena's Speedliter's Handbook
Strobist.com - A Walk Around the Monobloc
Photo.net - Intro to Studio Lighting Equipment
Read More
Posted in alien bee, einstein, lighting, strobe, studio strobe, white lightning | No comments

Monday, 2 May 2011

WTH? Canon 60D Wireless Master Catch Lights

Posted on 13:44 by Unknown
This is a short rant, I was taking photos today with my 60D and I decided to get familiar with the built-in popup flash acting as a wireless master to my Canon speedlites.

The setup was simple, one flash (580EX II) set on E-TTL and a shoot through umbrella camera left, the camera was set to fire the 580EX II with the popup flash output disabled, i.e. it will only act as a trigger and will not fire during the actual exposure.

To my surprise I found that all of the pictures I took had the popup flash appearing in the eyes of my subject, I double checked everything and you can see both the umbrella's and the popup flash catch lights, why does the popup flash appear in the actual exposure? It is supposed to send pre-flashes only!!!


The fix in post is really easy and only took 5 seconds per photo, but I was really pissed off, I will start searching to see if other people are facing the same issue. I faced other limitations as well with this shoot but that's for another article.
Read More
Posted in Canon 60d, canon speedlite, catch lights, popup flash, wireless flash | No comments

Upcoming Posts

Posted on 10:43 by Unknown
I was really busy taking photos last week -- company party, school concert, our kid's first karate class, plus two birthday parties.  Anyway, I'm catching up.  Meanwhile here are some upcoming posts.
 
Location Shooting
In this series of posts I'd like to talk about issues and solutions for shooting outdoors.
- Intro to Studio Strobes.  With summer is upon us, we'll be dealing with much brighter ambient light.  Is it time to use the big guns of lighting - studio strobes?  In this post, we'll discuss the basics of studio strobes.
- Multiple Speedlights vs. Studio Strobe - including cost effectiveness, triggering and remote adjustment options.
- Improving the reliability of optical triggering (including CLS Advanced Wireless Lighting) in sunny conditions.
 
Other upcoming posts
- Tips for shooting indoor parties
- Shooting in a small auditorium
Read More
Posted in | No comments

Thursday, 28 April 2011

Getting Directional Light Using Your Popup Flash

Posted on 00:47 by Unknown
 
 
Ever wondered if you can get good quality directional light from your DSLR's popup flash just like the big boys with external speedlites do? This is what we'll try to find today. Hit the jump for the details.

DISCLAIMER: If you feel this post is hastily made, then you're probably correct, I had only one hour to prepare the images and write the post because of time constraints, so excuse me, I will be revisiting this topic later on with more finesse.

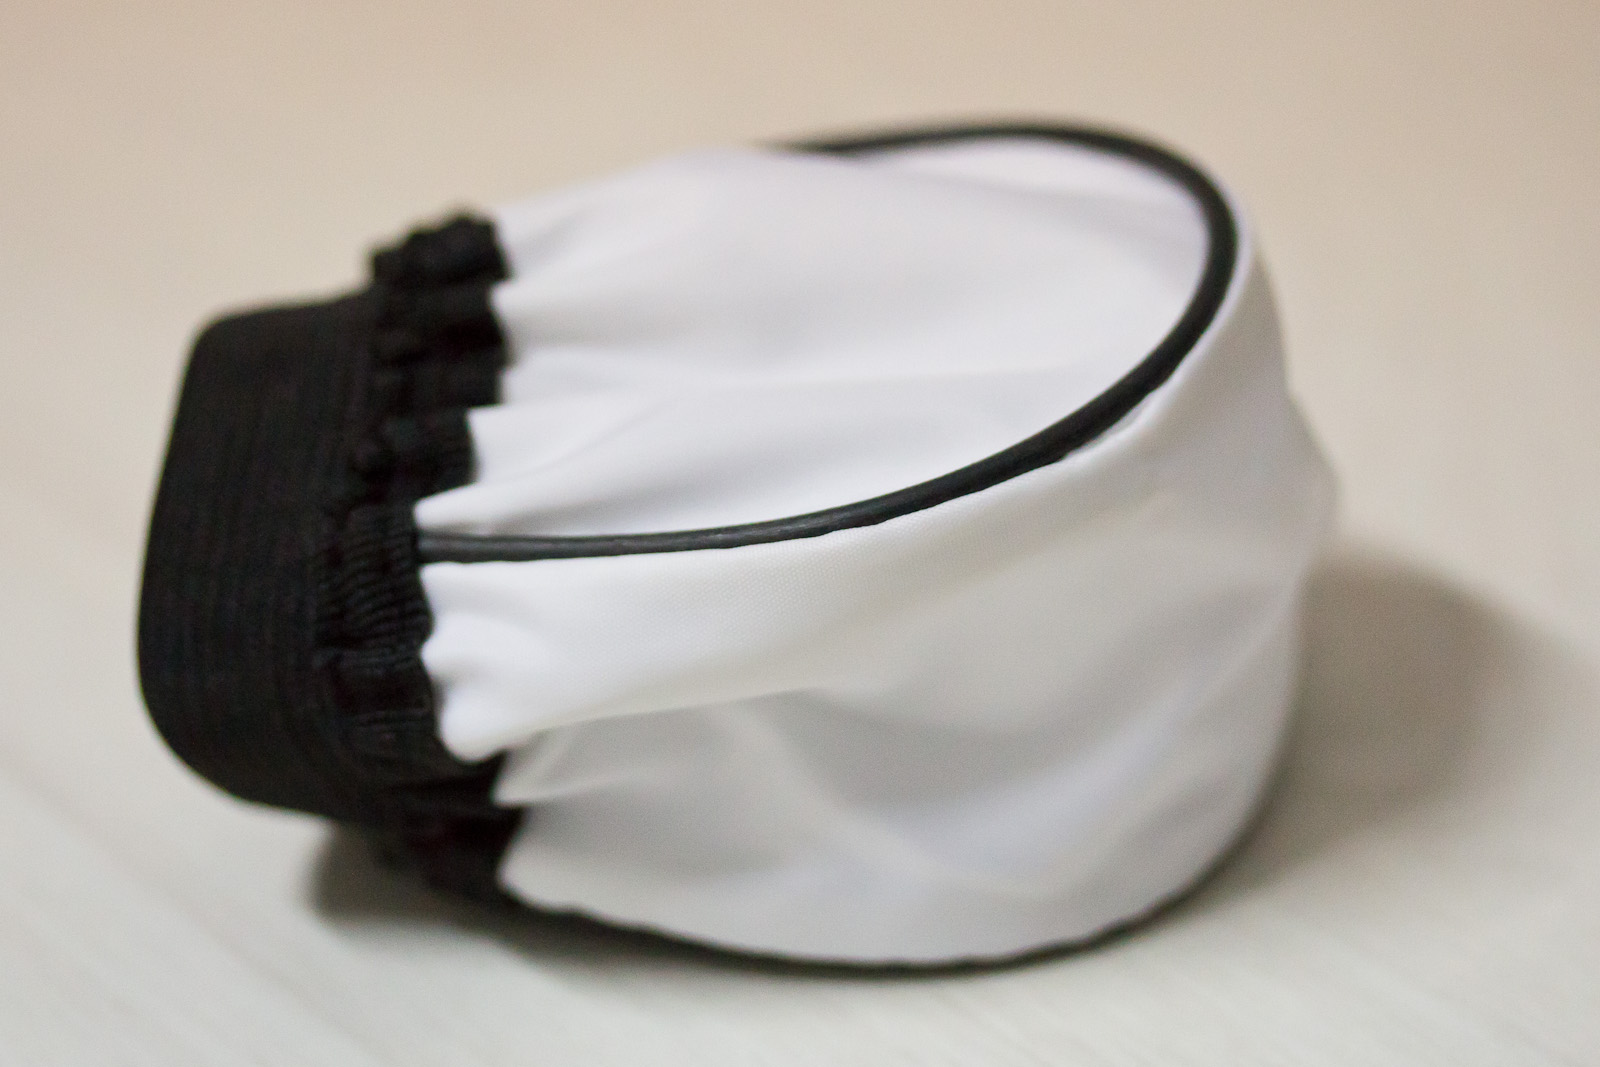
Ever since I bought my first speedlite I wanted a Sto-Fen Omni Bounce diffuser, I had almost zero lighting knowledge back then and I thought this was how everyone used their external flash, but since we don't have great camera accessories shops in Egypt, all I was able to find was this strange looking thing:


Excuse the lousy quality of the pictures but I really had no time (available light, handheld, ISO 1600), anyway, as you can see, this diffuser has a translucent white material at the top part, the sides and the front part, while the back part which looks black from the outside is lined with a bumpy reflective silver material from the inside. I think I bought this contraption for less than $6, and I also think it is supposed to fit on the speedlite's head some way or another, but I was never able to find any use for it with my flashes and it sat gathering dust for a long time.

Then one day I had the idea of using it on my camera's popup flash to bounce light of walls, can it work? Does the popup flash have enough power to get through the diffusing material, bounce from the wall and back to the subject and still give acceptable exposure? I know that new sensors now can deal with ISO 1600 with almost no noise, but will this be enough?

 
I think my camera's popup flash  guide number is 13 or something, while the speedlites have guide numbers of 40 and more, but even then, I remember that in several situations my speedlite didn't need to use full power to successfully bounce and give me a good exposure. So to try this idea I started off with a high shutter speed to kill the ambient and see how the flash did on it's own, I even started with ISO 400 to challenge the flash even more. I will be using f/2.8 aperture throughout the post, needless to say, this whole article is talking about indoor shooting.

Base Exposure - f/2.8, 1/250 sec, ISO 400

Direct Flash - f/2.8, 1/250 sec, ISO 400
I forgot how ugly direct flash looks, I left that years ago when I sold my point & shoot, and no matter what I tried to do with the white balance I was never able to get any better results.

Directional Popup Flash - f/2.8, 1/250 sec, ISO 400
As you can see here, the picture looks way better than direct flash alone, I put the diffuser thing over my popup flash with the reflective material facing almost towards me but an angle to reflect on my right side. I also put my hand in front of the flash to prevent any stray direct flash from reaching my subject, but as you can see from the catch lights I was not 100% successful.

Directional Popup Flash - f/2.8, 1/250 sec, ISO 800
I was not getting enough light from the flash, so I pumped the ISO to 800 and the result looked even better. Next I wanted to try getting some ambient light to work in my favor, remember that in bounce flash situations we don't always get light by using the flash alone, we use it to enhance the available light, so I dialed my shutter speed to 1/160 sec and kept the ISO at 800.

Base Exposure - f/2.8, 1/160 sec, ISO 800

Directional Popup Flash - f/2.8, 1/160 sec, ISO 800
You can see even better results with the ambient light (fluorescent lamps) contributing to the exposure, and I was able to shield the direct flash with my hand better in this one.

You might be wondering by now why go through this hassle and not shoot available light directly, two reasons, first, for the sake of experimentation, I am a geek and I like to try things, and secondly, because it looks way better than overhead available light that throws ugly shadows, see for yourself.

Available Light Only

Popup Flash Diffused Light (and no, the difference is not in WB alone)
Anyway, to sum this up, I was very happy with the results and I will definitely return to this topic with more ideas, but because of the short time I have to end here, if you have any comments or ideas please share them, and excuse any typos, I didn't proof read this post.
Read More
Posted in directional, flash, light, popup, portrait | No comments

Wednesday, 27 April 2011

Nikon 50 1.8G officially announced

Posted on 14:58 by Unknown
Check out the product page:
http://www.nikonusa.com/Nikon-Products/Product/Camera-Lenses/2199/AF-S-NIKKOR-50mm-f%252F1.8G.html
 
Key differences in specs from 50 1.8D:
- This is an AF-S lens meaning it has a silent wave motor (SWM).  Can autofocus on entry-level Nikons that don't have a focusing motor.  Should focus quickly and quietly.
- M/A switch.  Allows manual override of autofocus.
- Has one aspherical element, which should reduce aberration.
- As a G lens, it doesn't have an aperture ring.  On some film bodies, aperture can't be controlled in A or M mode (it can be indirectly controlled in P or S mode).
- Minimum aperture f/16 vs. f/22 for the 1.8D.
- Filter size 58mm vs 52mm for 1.8D.
- The product page makes a big deal about the bokeh.  I'm no bokeh hound but will be looking into this.
- The product page mentions Super Integrated Coating (SIC) to reduce flare but even the 1.8D already has that.
- MSRP: $220 vs. $135 for the 1.8D.
Read More
Posted in | No comments

Lightroom 3.4 and ACR 6.4 released

Posted on 14:36 by Unknown
New camera raw files supported, new lens profiles added (a bunch of them for Pentax lenses; also added Nikon 18-105 VR and Nikon 55-200 VR), plus some bug fixes.
 
For a list of the changes check out:
http://blogs.adobe.com/lightroomjournal/2011/04/lightroom-3-4-and-camera-raw-6-4-now-available.html
 
To download the update go to:
http://www.adobe.com/downloads/updates/
Read More
Posted in | No comments

Tuesday, 26 April 2011

Checklist for Moving Lightroom

Posted on 13:25 by Unknown
I'm pleased to report that I migrated my Lightroom successfully. If you have a new computer or need to reformat your current computer, be aware of some migration pitfalls for the unwary.
BACKSTORY
I wish I had to migrate my Lightroom because I had a new computer.  Instead it's because my PC was plagued with a stubborn virus.  I couldn't get them all even with 3 antivirus programs installed, and I was getting so many antivirus alerts (several per second) that my computer became unusable.  Finally I hit the proverbial Big Red Button and reformatted my PC which is now back to normal.
LIGHTROOM'S BACKUP CATALOG
Before I reformatted my computer, I was very concerned about Lightroom.  I didn't want to lose all my edits or my photos.
Everyone knows that Lightroom has a built-in function for backing up a catalog.  However, if you don't read the fine print, you may be in for a surprise.  The backup catalog only includes the catalog itself.  It does not include:
  • the photos themselves
  • sidecar files (with edits)
  • previews
  • slide shows
  • web galleries
Let me add a few more to that list:
  • presets (unless you select "Store presets with catalog")
  • plugins
  • custom preferences
  • custom lens correction profiles
  • camera profiles
  • I haven't tested this but I think it also may not include collections and publish services settings either.
Losing all that would be a nightmare!
HOW I MIGRATED LIGHTROOM
Fortunately, in my revived computer, Lightroom now looks pretty much like it did before I formatted my computer.  I didn't rely on the backup catalog or even the export catalog command.  Instead I took these steps:
1. Note the location of your photos, slideshows, and galleries (again, they are not part of your catalog).  Copy all those files into an external drive.  In my case, my photos already reside in an external drive.
2. Note the location of the Lightroom catalog (see under Additional Resources below re default file locations).  Copy the whole Lightroom folder into an external drive.  Confirm by checking the total number of files and file size of the original Lightroom folder and the copied folder.
3. Note the location of each of the following and copy them to the external drive (see under Additional Resources below re default file locations):
  • Presets (if not stored with the catalog).
  • Plugins
  • Preferences (note: if you're moving from PC to Mac or vice-versa, preferences are not cross-platform)
  • Custom Camera Profiles
  • Custom Lens Correction Profiles
*Note that the folder AppData is a hidden folder in Vista.  You need to go to Control Panel then select Folder Options and view hidden files.

4. In your new computer, install Photoshop or Photoshop Elements (if you have either) before Lightroom so that when Lightroom is installed you'll automatically get the option for roundtrip editing in those programs.
5. Install Lightroom, including updates.  Exit Lightroom.
6. Start copying back all the files you copied from your old PC, and place them in the same directory locations:
  • photos, slideshows, galleries
  • replace the new Lightroom folder with the copied Lightroom folder from your old computer
  • Presets (if not stored with the catalog).
  • Plugins
  • Preferences
  • Custom Camera Profiles
  • Custom Lens Correction Profiles
7. Relaunch Lightroom.
Voila.  It will look like you never left (well, almost -- I had to re-register one of the plugins).
ADDITIONAL RESOURCES:
Lightroom Queen - How Do I Move Lightroom to a New Computer
Lightroom Queen - Default File Locations
Read More
Posted in | No comments
Newer Posts Older Posts Home
Subscribe to: Posts (Atom)

Popular Posts

  • Samyang 24 f/3.5 Tilt Shift Lens Now Available
    A seller on ebay ( bestpriceoptics ) is now selling the Samyang 24 f/3.5 tilt shift lens, in Canon and Nikon mounts, for $999 shipped.  This...
  • Nikon 28 1.8G: Moody Artist?
    When Nikon had its recently-finished sale (now extended to end of March), the one lens that I considered buying was the Nikkor 28 1.8G.  To...
  • Olympus E-PL3 with 14-42 Lens $199; Moving from Nikon to MFT?
    I saw on 43rumors.com that the Olympus E-PL3 was being sold at Newegg for just $199 with the 14-42 kit lens included.  I checked it out and...
  • Double Camera Strap & BlackRapid RS-5 Review
    This is a review of two camera straps: - The first is a double camera strap that's -- let's be blunt -- a knockoff of the BlackRapid...
  • Price drops!!! Olympus XZ-2, Pentax MX-1. And about the Casio EX-10
    I just noticed a huge price drop on the Olympus XZ-2 (previously $500 now under $400) and Pentax MX-1 (previously $500 now under $300 ).  Pe...
  • Best Alternative to Nikon 24-70 2.8G: the Nikon 28-70 2.8D
    Every Nikon shooter knows that the Nikkor 24-70 2.8G is the best standard zoom for Nikon's full frame cameras.  However, at around $1900...
  • Abstract Fun
    In one of the rare times I put effort and setup a light stand and an umbrella to shoot my girls, I decided to make use of this burst of ener...
  • Coco Ring Flash - First Impressions
    A few weeks ago, after much deliberation, I finally decided to get a ring flash adapter.  My purpose was to use it as on-axis fill, much lik...
  • Nikon D7000 vs. Nikon D7100
    D7000 + Tokina 11-16 I've been using the Nikon D7000 for a couple of months now, and in this post I'd like to share my thoughts on t...
  • Sigma 18-35 1.8 Revisited; Where to Get It
    Back in April of this year, Sigma surprised everyone by announcing the Sigma 18-35 f/1.8 , the first zoom lens for a large sensor that had s...

Categories

  • "alien bee"
  • "april fool's"
  • "ring flash"
  • "yong nuo"
  • 1"
  • 1/1.7"
  • 10-17
  • 10-20
  • 11-16
  • 15-85mm
  • 15z
  • 17-50 vc
  • 190cx pro3
  • 2.8
  • 2.8G
  • 2/3"
  • 200 f2.8
  • 200 L
  • 200mm
  • 200mm f/2.8
  • 200mm f/2.8 L II
  • 200mm f2.8
  • 200mm f28
  • 200mm f28 L II
  • 2012
  • 2013
  • 23 Samsung led
  • 24-105 f4
  • 24-70
  • 25 1.4
  • 28-105
  • 28-70
  • 35mm
  • 35mm f/2
  • 35mm f2
  • 360
  • 3rd party
  • 4.1
  • 4/3
  • 40 pancake
  • 40 panckae
  • 40 stm
  • 40-150R
  • 40mm f/2.8
  • 430EX
  • 43rumors
  • 45 18
  • 45 AW
  • 4x4
  • 50 14
  • 50 f14
  • 50-150
  • 50mm
  • 50mm f/1.4
  • 55 AW
  • 55-250
  • 550D
  • 55aw
  • 560ex
  • 580 ex ii
  • 580EX
  • 580EX II
  • 5d
  • 5d mark 2
  • 5d mark 3
  • 5D Mark II
  • 5d mark iii
  • 5d2
  • 600d
  • 600ex-rt
  • 60d
  • 60fps
  • 60mm macro
  • 650d
  • 6d
  • 7.5mm
  • 720p
  • 75 f1.8
  • 85mm f1.8
  • 8x12
  • abbc
  • abstract
  • accuracy
  • active d-lighting
  • adjustment
  • adl
  • AF
  • af point
  • AF Point Expansion
  • aftermarket
  • airport
  • alexandria
  • alien bee
  • alien bees
  • alienbee
  • alienbees
  • alternative
  • ambient
  • ambient light
  • angle
  • aperture priority
  • APS-C
  • apsc
  • assignment
  • auto focus
  • auto white balance
  • autofocus
  • AWB
  • awl
  • back button focus
  • background
  • background blur
  • backlight
  • backlighting
  • backlit
  • bad behavior
  • bad photography
  • balance
  • bare flash
  • battery
  • BBF
  • beach
  • beams
  • beauty dish
  • bellagio
  • BFT
  • birthday
  • black
  • black foamie thing
  • black rapid
  • blackrapid
  • blogs
  • blower
  • blown
  • blur
  • bokeh
  • bounce
  • bounce card
  • bounce flash
  • bower
  • bracket
  • brightness
  • brilliance
  • brolly grip
  • brother
  • build
  • burst mode
  • butterflies
  • butterfly
  • C.Fn
  • cable
  • cake
  • camera
  • camera bag
  • camera releases
  • camera settings
  • candle
  • candlelight
  • canon
  • Canon 100mm Macro L IS
  • canon 200mm f28L
  • canon 24-105
  • canon 40 stm
  • canon 40mm f28 pancake
  • canon 50
  • canon 50 1.4
  • canon 55-250
  • canon 5d mark 2
  • canon 5d mark ii
  • canon 5d mark iii
  • canon 5d2
  • canon 5d3
  • Canon 60d
  • canon 6d
  • canon g11
  • canon speedlite
  • car
  • carbon fiber
  • catch lights
  • cheap
  • christmas
  • clean
  • cleaning
  • clipped
  • clipping
  • close up
  • clouds
  • cls
  • clustered
  • color
  • compact
  • comparison
  • composition
  • compositional aid
  • construction
  • contrast
  • cooler master
  • copyright
  • core i7
  • cowboy
  • cowboystudio
  • cpl
  • creepy
  • crop factor
  • crop sensor
  • cyber commander
  • cybersync
  • d-lux
  • d-lux5
  • d3
  • d300
  • D5100
  • D600
  • d70
  • d700
  • D7100
  • d90
  • dark background
  • david hobby
  • daylight
  • dell 24 inch
  • depth of field
  • desert
  • diamond
  • digital
  • directional
  • distance
  • diy
  • dlux
  • dlux5
  • dng
  • double
  • dslr
  • DSLR bag
  • dual
  • dust
  • dx
  • dynamic range
  • earthquake
  • ebay
  • ebay trigger
  • eclipse
  • editing
  • EF 40mm f/2.8
  • ef-s 60mm
  • einstein
  • Electro GN
  • engagement
  • environmental portrait
  • ep5
  • equipment
  • ETTL
  • ettr
  • europe
  • events
  • evf
  • ex600
  • existing light
  • expensive
  • exposing to the right
  • exposure
  • f/3.5
  • family
  • faq
  • fasten-r3
  • favorite
  • fayoum
  • Fayoum desert
  • fill
  • fill light
  • film
  • filter
  • finepix
  • fire
  • fireplace
  • first impressions
  • fish-eye
  • fisheye
  • fix
  • FL600R
  • flash
  • flash bounce
  • flash sync
  • flash trigger
  • flashmeter
  • flashright
  • focal length
  • focus
  • food
  • football
  • fotodiox
  • fountain
  • freexwire
  • fuji
  • fujifilm
  • Full Frame
  • fun
  • fx
  • galaxy s 3
  • galaxy s4
  • gecko
  • GeForce gtx570 OC
  • gel
  • geomag
  • ggs
  • ghost
  • gigabyte z77 ud3h
  • glass
  • gn
  • Goodbye
  • gorillapod
  • gregg
  • grid
  • grip
  • group shot
  • gskill ripjaws
  • guide
  • guide number
  • gx7
  • haf 912
  • handheld
  • hands on
  • hands-on
  • hdr
  • head shot
  • hiatus
  • high dynamic range
  • high iso
  • high speed sync
  • highlight
  • highlights
  • histogram
  • holder
  • holiday
  • home
  • home made
  • Honda civic
  • honeycomb
  • hotshoe
  • hoya
  • humor
  • i9500
  • id
  • image quality
  • impressions
  • indoor flash
  • infrared
  • infringement
  • insects
  • inverse square law
  • japan
  • jewel
  • jewelry
  • joby head
  • jpeg
  • Kingston hyperX SSD
  • kirk tuck
  • kl bird park
  • krakow
  • kuala lumpur
  • las vegas
  • lastolite
  • laurence kim
  • lax
  • lcd
  • leica
  • lens
  • lens cap
  • lens compression
  • lens review
  • lenses
  • lenspen
  • lensrentals
  • light
  • light painting
  • lighting
  • lightroom
  • lightroom 4
  • lightroom 5
  • location
  • long
  • long exposure
  • los angeles
  • low key
  • low light
  • Lowepro
  • Lowepro 45aw
  • Lowepro 55aw
  • lr4
  • lumiquest softbox III
  • lumix
  • lx-5
  • lx5
  • m4/3
  • m43
  • macro
  • macro adapter
  • makernotes
  • malaysia
  • manfrotto
  • manfrotto tripod
  • manual
  • mark ii
  • mark iii
  • MFT
  • mft. micro four thirds
  • micro four thirds
  • mielec
  • migration
  • mini review
  • mirror
  • mirror-less
  • mirrorless
  • mobile
  • modification
  • modifier
  • monobloc
  • monoblock
  • monolight
  • motion
  • motion blur
  • multi function printer
  • multiple
  • nano crystal
  • natural light
  • neil
  • Neil VN
  • niekerk
  • nikkor
  • nikon
  • nikon d600
  • noise
  • off camera
  • oil
  • olympus
  • olympus 12-50
  • Olympus 40-150
  • olympus 45
  • olympus 45 18
  • olympus om-d em-5
  • om-d
  • omd
  • omd em1
  • omd em5
  • omd em6
  • on-camera
  • one inch
  • overexposure
  • overpowering sun
  • panasonic
  • panasonic leica 25 14
  • pancake
  • party
  • passport
  • pastries
  • pastry
  • pc
  • pentax
  • peter
  • phone
  • phone photography
  • photo
  • photo tips
  • photography
  • photokina
  • photomerge
  • photoshop
  • photoshop elements
  • planning
  • pocketwizard
  • point and shoot
  • poland
  • polarizer
  • popup
  • popup flash
  • portrait
  • post processing
  • post-processing
  • postprocessing
  • product
  • product shots
  • profile
  • protection
  • protector
  • quad-flash
  • quantum
  • radiopopper
  • raid 0
  • Range finder
  • raw
  • raw editing
  • raw+jpeg
  • rays
  • real
  • recovery
  • reflection
  • reflector
  • resources
  • restaurant
  • review
  • rf-603
  • rf603
  • ricoh
  • ring
  • ringflash
  • robin wong
  • roger cicala
  • rogue
  • rokinon
  • roll off
  • roll-off
  • rolloff
  • rs-5
  • rs-7
  • rumors
  • s5
  • s5 pro
  • s5pro
  • samples
  • samsung
  • samyang
  • sb-26
  • sb-80
  • sb26
  • sb800
  • screen protector
  • sensor
  • sensor swab
  • sensorclear
  • sensorklean
  • sensorklear
  • separation
  • shadow
  • shadow pulling
  • shadows
  • shards
  • sharpening
  • sharpness
  • shoot through
  • shoot-through
  • shoot-thru
  • shooting technique
  • shootout
  • short
  • sigma
  • sigma 50-150
  • skin tones
  • skylight
  • Slik Mini Tripod
  • slingshot
  • slow
  • small
  • smooth
  • soft
  • softbox
  • sony
  • sony a99
  • sony rx100
  • sony t10
  • specular
  • speed
  • speedlight
  • speedlite
  • spinlight
  • spots
  • standard
  • stockholm
  • story
  • strap
  • strobe
  • strobist
  • studio
  • studio strobe
  • subject
  • substitute
  • sudden
  • summilux
  • sunrise
  • sunset
  • sweden
  • swivel
  • sync speed
  • t2i
  • t3i
  • Table top tripod
  • tamron
  • technique
  • techniques
  • tele
  • telephoto
  • thinktank retrospective 5
  • third party
  • tips
  • tokina
  • tonal
  • tonality
  • tone curve
  • toploader
  • toys
  • translucent
  • travel photography
  • tri-flash
  • Tribute
  • trifold
  • trigger
  • tripod
  • truth
  • ttl
  • TTL Cord
  • u43
  • ultra-wide
  • ultrawide
  • umbrella
  • underexposure
  • unlimited sync speed
  • up-rise
  • up-rise 15z
  • update
  • uprise
  • USM
  • uv
  • uwa
  • vanguard
  • versus
  • vertical
  • video
  • view nx2
  • visual science lab
  • vs
  • wadi rayan
  • wd caviar black
  • web
  • weekend
  • westin
  • white balance
  • white lightning
  • wide
  • wide angle
  • window
  • wireless
  • wireless flash
  • wireless release
  • wireless trigger
  • workflow
  • Yashica
  • yashica gtn
  • yashica st-7
  • yn-560
  • yn-560ex
  • yn-ex600
  • yn560
  • yong nuo
  • yongnuo
  • zack arias
  • zoom
  • zoom toploader
  • zuiko

Blog Archive

  • ▼  2013 (165)
    • ▼  December (5)
      • Olympus E-PL3 with 14-42 Lens $199; Moving from Ni...
      • Sigma 18-35 1.8 Revisited; Where to Get It
      • Speedlight Modifiers - 50% discount at Fotodiox
      • Olympus M.Zuiko 45mm f/1.8 Mini Review
      • Evening Portraits with Flash
    • ►  November (10)
    • ►  October (8)
    • ►  September (7)
    • ►  August (3)
    • ►  July (11)
    • ►  June (10)
    • ►  May (15)
    • ►  April (19)
    • ►  March (33)
    • ►  February (24)
    • ►  January (20)
  • ►  2012 (193)
    • ►  December (17)
    • ►  November (22)
    • ►  October (34)
    • ►  September (47)
    • ►  August (12)
    • ►  July (11)
    • ►  June (10)
    • ►  May (13)
    • ►  April (13)
    • ►  March (8)
    • ►  February (1)
    • ►  January (5)
  • ►  2011 (141)
    • ►  December (8)
    • ►  November (8)
    • ►  October (7)
    • ►  September (9)
    • ►  August (13)
    • ►  July (13)
    • ►  June (19)
    • ►  May (17)
    • ►  April (25)
    • ►  March (22)
Powered by Blogger.

About Me

Unknown
View my complete profile