Better Family Photos

  • Subscribe to our RSS feed.
  • Twitter
  • StumbleUpon
  • Reddit
  • Facebook
  • Digg

Tuesday, 30 October 2012

Camera Settings for Halloween Photos

Posted on 16:07 by Unknown
Inline image 1

Here are some suggested settings for taking photos at Halloween.

BALANCING FLASH AND AMBIENT

Scenario 1: Dark Light
In this scenario, there is almost no ambient light on the subject.  Flash will of course be the dominant light for the subject.  This includes situations where the subject is backlit and the face of the subject has little or no light from the ambient.
a. Flash exposure: on TTL, start at 0 FEC then adjust to taste.
b. Ambient exposure: you can choose any exposure up to 1 stop below for the subject or the correct ambient exposure for the background, whichever is less.  If you go above 1 stop below for ambient for the subject then be aware that flash blur may become a problem.  If you go above the correct exposure for the background, the background will be overexposed.
- Choose manual exposure.  Turn off Auto ISO.
- Aperture: go as wide as possible (taking into account the depth of field you need). A wider aperture will allow your flash to recycle faster and at the same time you can get enough ambient in the shot without needing a super slow shutter speed.
- ISO: if you are bouncing the flash, choose the highest ISO that is acceptable to you.  Note: if you have a very wide aperture and very high ISO, you may get flash overexposure because the TTL cannot go below a minimum threshold.  If that happens, adjust ISO and/or aperture.
- Shutter speed: you can slow down the shutter as needed to allow enough ambient to show up in the shot, up to 1 or 1.5 stops below for the subject or the correct ambient exposure for the background, whichever is less.  As long as you don't go above 1 or 1.5 stops below for the subject, the subject will be sharp because the flash duration will freeze the subject.  Note that with a slower shutter speed, the background will become more blurred (unless you're using a tripod). 

Scenario 2: Dim Light
In this scenario, there is some ambient on the subject but it's not bright enough to serve as the dominant light source.  Flash will still be the dominant light.  The difference is that flash blur can become an issue.
a. Flash: on TTL, start at 0 FEC then adjust to taste.
b. Ambient exposure: you can choose any exposure up to around 1 stop below for the subject or the correct ambient exposure for the background, whichever is less.  If you expose above 1 stop below for ambient for the subject then be aware that flash blur may become a problem.  If you go above the correct exposure for the background, the background will be overexposed.
- Choose manual exposure.  Turn off Auto ISO.
- Aperture: go as wide as possible (taking into account the depth of field you need). A wider aperture will allow your flash to recycle faster and at the same time you can get enough ambient in the shot without needing a super slow shutter speed.
- ISO: if you are bouncing the flash, choose the highest ISO that is acceptable to you.  Note: if you have a very wide aperture and very high ISO, you may get flash overexposure because the TTL cannot go below a minimum threshold.  If that happens, adjust ISO and/or aperture.
- Shutter speed: since there will be some ambient on the subject, don't go any slower than about 1/60.    If you go slower than that, be aware that there will be some blur from the ambient on the subject.  The blur can sometimes add to the effect but generally I try to avoid it.  Faster would be better but do not go above the sync speed or else you will be reducing the effective output of your flash.

Scenario 3: Bright Light
In this scenario, there is enough ambient light on the subject.  You have a choice of using flash or ambient as the dominant light source.  If flash will be the dominant light source, then use the formula in scenario 2.  If you want ambient to be the dominant light source, then here is a suggested procedure.
a. Adjust the ambient exposure to expose correctly for the subject.
- I would not mind using aperture priority with auto ISO turned on.  However, you can use manual exposure as well.
- Aperture: go as wide as possible (taking into account the depth of field you need).
- Shutter speed: use a high enough shutter speed to freeze the subject to get a sharp photo.  At a minimum I would use 1/125, preferably 1/200 or 1/250.  Don't go above the sync speed or else.
- ISO: choose the highest ISO that is acceptable to you.
b. Flash: flash will be acting as fill.  On TTL, start at -1 FEC then adjust to taste.

CONTROLLING COLOR, DIRECTION, AND QUALITY
If you want the shot to look natural, balancing flash and ambient is just one part of the equation.  You also need to mind your flash color, direction and quality.
Color:  At night there is rarely a natural source of white light like that of flash.  Using an ungeled flash will make the flash use obvious.  To simulate the light from the environment (probably lit by lamps), use a CTO or CTS gel, or bounce from a yellowish surface.  Alternatively, you can use a blue or green or other unusual gel color for effect (don't do it on all the shots).
Direction:  Choose a flash direction that is flattering and logical. 
- Generally, a safe direction is to position the flash high and aim downward for a butterfly lighting effect. 
- If you want to position the flash to the side, it has to make sense - are you simulating a fireplace for example?  If so, you need to gel it appropriately as well.
- If the subject is wearing a wide-brimmed hat (e.g. a witch's hat) then of course the hat would block light coming from above, so instead consider using bounce flash from the front or off to the side, to simulate light reflecting off the ground or a nearby wall.
Quality: Usually soft light is more flattering but because it's Halloween, you can probably get away with hard light.  Just make sure to keep motivation in mind (i.e., try to make the appearance and characteristics of the light logical).

OTHER EFFECTS:
Separation light: With black or dark costumes, one issue is getting enough separation between the subject and the background.  Choose a background with enough ambient light so that the background can contrast with the costume.  Another strategy is to find a place where there is an existing light source (e.g. lamp, etc.) that can serve as backlight, shoulder light, or kicker.  Or ask someone to hold a flash off-camera as a kicker.
Volumetric lighting:  If there is a fog, smoke or mist, you can backlight the fog with off-camera flash for a dramatic effect.  You can light the fog either directly behind the subject or from above and behind the subject.

RELATED POSTS:
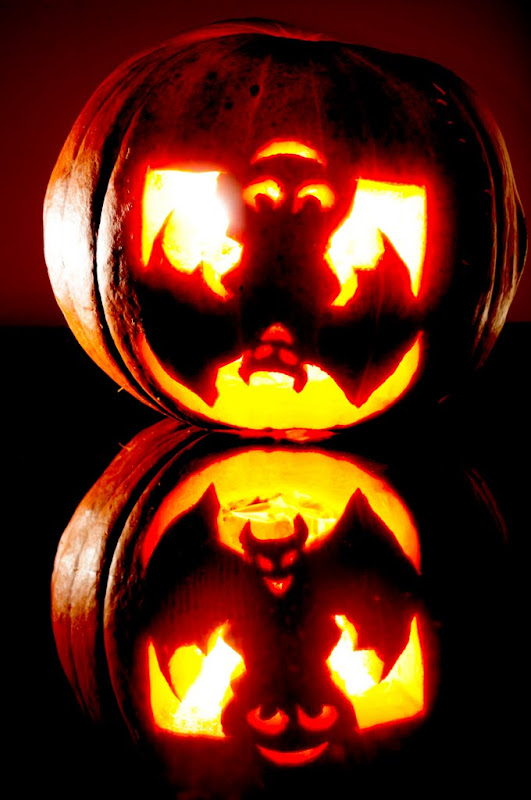
Pumpkin Carving - how I took the pumpkin shot above
Haunting Halloween Portraits - scary Halloween-themed fashion/portrait session
Taking Halloween Pictures - some Halloween shots I took 3 yrs ago, what went right and what went wrong.
Read More
Posted in | No comments

Monday, 29 October 2012

A Bit Busy!

Posted on 14:01 by Unknown
Sorry for being busy and not posting a lot, but I'm way excited with my new Zoom H1 mic and wired Lav mic, trying out different things and enjoying myself a little too much, if you're a car afficando like I am, you might imagine the possibilities, I was just recording the exhaust sound of a nice sports car by taping the wired Lav mic on the rear bumper, and plugging that into my Zoom H1 inside the car, while reviewing the audio recording realtime via headphones. Probably will start doing more video reviews, now that sound is too good.
 
Anyway here are a couple of pictures that I was keeping for the 5D Mark II review, I promise to be back soon.
 
 
Posted with BlogsyPosted with Blogsy
Read More
Posted in update | No comments

Nikkor 85 1.8G with Nikon D600

Posted on 08:57 by Unknown

Here are my preliminary impressions of the Nikkor 85 1.8G used on a full frame camera (the Nikon D600).

WHY I GOT THIS LENS
I've never sought out this kind of lens.  I knew this focal length was great for portraits, but I felt it was too specialized to be useful.  At the same time, I had other lenses that I thought could fulfill a similar function.  For example, Nikon 24-70, the Nikon 70-200 VR, the Sigma 50-150 or maybe the Sigma 50 1.4.  Nonetheless, I kept hearing great things about this lens, which kept it on my radar.

ALTERNATIVES
Nikkor 85 1.4G - never really considered it, regardless of all the accolades heaped upon it.  It is way too expensive for me for a specialized lens.
Nikkor 85 1.4D - legendary bokeh but still quite expensive.
Sigma 85 1.4 - Ryan Brenizer is a fan, and notes the extremely fast autofocus, with image quality close to that of the 85 1.4G.  However, it's also too expensive for me.  Plus, because it is not a Nikon or Canon lens, I was concerned about the resale value.
Nikkor 85 1.8D - cheap but the bokeh is not that great, which I think defeats the purpose of getting one.
Tamron 90 2.8 - a macro, with about the same focal length.  However, I think at 2.8 the depth of field would not be shallow enough.
Nikkor 85 1.8G - great image quality and the price is not out of this world.

I saw a Nikon-refurbished copy of this lens with a good warranty and exchange policy, so I thought I'd give it a try.

IMPRESSIONS

  • My first impression of the lens was that it was very light.  Ridiculously light for its size.  It feels like I'm holding a hollow plastic tube.
  • The lens is plastic but feels very solidly built.
  • This is a G lens therefore it doesn't have an aperture ring.
  • Instead of a dot to mark the lens mounting position, it has a round white bump to facilitate changing lenses without looking.  The D600 has a similar round white bump, therefore it is possible to mount this on the D600 without looking.
  • The lens hood doesn't have ridges (the ridges help reduce the amount of reflection that would cause glare).
  • AF speed does not seem impressive.  Just before it locks focus the lens seems to take a moment to adjust the focus back and forth, even in bright conditions.  Also my refurbished copy has a squeaky sound when it is adjusting, like you're tightening a jar.  UPDATE: Some folks at dpreview responded to my inquiry - the squeaking sound is a warning of impending AF failure so I need to return the lens.
  • The minimum focus distance is closer than I expected, at around 2 feet.

REAL WORLD SAMPLES
I took my daughter to the park, while my wife got some rest and my son asked to stay home to play Skylanders.  I thought it would be a good chance to take portraits of our daughter with the Nikkor 85 1.8G.

One of my concerns was that the depth of field would be too shallow to be usable.  I was surprised to find the depth of field is very usable even at f/1.8.


I also noticed that the contrast seems high.  The image looks vivid even with just the standard picture mode, although I still adjusted it in post.


The bokeh usually looked good but I think the Sigma 50 1.4 seems smoother.  That's just my impression.  I plan to compare them side-by-side next time, although of course they can't be compared completely because of the difference in focal length.
Often the bokeh is nice and smooth

Sometimes the bokeh is not that great
I'm not a pixel-peeper, but this lens is very sharp even wide open.


On the down side, the lens had quite a bit of chromatic aberration (purple and green).  Again, Lightroom 4 comes to the rescue.
Uncorrected - no cropping.
Corrected - no cropping.

Uncorrected - cropped.

Corrected - cropped.
The lens also can be susceptible to flare, even with the lens hood.  However, the flare could be mitigated in post.
SOOC. Flare.

Quick adjustments in post
Overall I am quite impressed with this lens.  However, I still have a few questions:

  • Can 24-70 compete (70mm 2.8)?  What about the Sigma 50 1.4 (on full frame or APS-C), or the Tamron 70-300 VC or Sigma 50-150?
  • How does it perform on APS-C?
  • I'd like to do a side-by-side bokeh comparison with the Sigma 50 1.4.
  • Is it practical?  How often would I get to use it?  Usually we go out as a family.  How easily can I use it with a group as subject?
  • What would I pair it with?  Perhaps Tokina 11-16 on APS-C?

I will pin down these questions in a follow-up post.  In the meantime, here are a few more samples.


Read More
Posted in | No comments

Saturday, 27 October 2012

Nikon WU-1b Wireless Mobile Adapter for Nikon D600

Posted on 04:18 by Unknown
I finally received the Nikon WU-1b wireless mobile adapter for the Nikon D600.  This wireless adapter is designed for two functions: it can facilitate review of your images using an Android or iOS smartphone, and it can help you take shots with remote live view.  I was really excited at the prospect of being able to use my phone as an external live view monitor to take shots at unusual angles that may even be impossible without remote live view.
Hit the jump to find out my preliminary review of how it performs.

10/31/12 UPDATE: Correction re AF Area Mode - You can use Face Priority AF Area Mode.
10/29/12 UPDATE: Added new section re compatibility
My first impression was that the adapter was smaller than I expected.  I thought it would be slightly smaller than an SD card.  It's much smaller than that, and is closer to the size of a mini-SD card.
The package comes in a blister pack that includes not just the adapter but also a small case that can be attached to your camera strap.  There is also a lanyard that can tether the adapter to your camera strap even while inside the small case.
COMPATIBILITY
Not all iPhone/iOS and Android devices can use the Wireless Mobile Utility Adapter app.
  • iPad 1 - works but requires iOS 5.1.  The app is not native to iPad therefore it won't fill the screen.
  • iPad 3 running iOS 6 - the app doesn't show up in the App Store no matter what I search.
  • iPhone 4 running iOS 6 - the app shows up in the App Store and works.  This is the phone I used for this review.
  • iPhone 4S running iOS 6 - the app doesn't show up in the App Store no matter what I search.
  • My wife's low-end Andoid phone - the Google Play store said her phone wasn't compatible.
Suggestion: Before buying this, check if your phone can download the app first.

SETTING UP
The documentation wasn't very detailed, but it was easy to setup.
1. Download the free app to your phone.
2. Connect the adapter to the D600's mini-USB port and turn on the camera.  The adapter will power on.
3. Turn on the phone's wi-fi and search for the ad hoc wireless network created by the adapter.  Optional: establish a password for the wireless adapter's network.  My phone memorized the password so I didn't have to re-enter it every time I wanted to connect to the adapter.
That's it.  You're ready to use it.

USAGE
1. Connect the wireless adapter to the camera.
While the adapter is attached, you cannot playback photos on the camera and you cannot use Live View mode. Pressing the playback or live view button has no effect.
2. Connect your phone to the wireless adapter's network.
You connect to the network using your phone the same as you would for any wi-fi network.
No multiple users: when one device is already connected to the wireless adapter, no other device can connect to that same adapter.
3. Launch the app.
4. In the main menu, choose: Take Photos or View Photos or Settings
TAKING PHOTOS
- Upon choosing "Take Photos," the camera's live view photo automatically activates.  You hear the mirror lift immediately, though it takes about a second for the live view feed to start showing up on my phone.  Once I see the live view feed, the refresh rate is very responsive, as if you are looking at the live view at the back of the camera.
- When the remote live view is active, the camera is locked (as though it is shooting tethered).  However, from the shooting screen, you can bring up the quick option menu and activate the camera shooting mode, which will allow you to shoot with the camera.  (The function of the phone would then be to review the images.)
The quick option menu, with the option to shoot with the camera
- Although flipping the camera on its side will rotate the screen just like most other apps, the live view feed's orientation always remains in landscape mode, regardless of the camera's orientation.  If the camera is on portrait it is a bit tricky to adjust the camera.
- You will see the shutter speed, aperture, number of shots left and battery level.  Can't see ISO.  You cannot change exposure settings.  However, exposure is not locked.  If you are in an autoexposure mode (P, A, S, Auto, etc.) the exposure will vary as the scene changes.
- One cool feature is that you can tap anywhere on the phone's screen to choose the AF point.  This is way faster than using the joystick.  The AF area mode is always single depends on the Live View setting for the Live View mode that is currently selected (Photo or Movie as the case may be).  The AF mode is either AF-S or AF-F depending on your Live View setting.  You cannot zoom in the image to select the AF point more precisely.  However, if you rotate the phone to the landscape orientation the image is larger.
- Tap the "shutter" on the phone screen to take the shot.
- If the Live View selector is on Live View Movie mode, then pressing the shutter will take a photo with 16:9 ratio.
- By default, phone will download the preview.  (This option can be disabled.)
- The review of the shot is kind of slow.  The workaround is to enable Raw + JPEG and choose small basic JPEG.  With these settings, the image shows up after about 6 to 8 seconds.  By comparison, if I use a large basic JPEG, it takes about 25 seconds.  If I use raw, it takes about 40 seconds to see the shot.
- The preview has several limits.  First, you can zoom in but the preview is of a limited resolution (it seems it is the same resolution as the LCD screen).  The resolution is the same regardless of the JPEG size chosen, making it hard to use it for confirming focus.  The download preview also does not have auto-rotation for the orientation, so viewing a portrait image can be a little confusing.  You also can't see the EXIF data.
- If preview download is enabled, the 4 most recent shots will show up on the bottom of the screen (similar to Lightroom's filmstrip).  If the phone is in landscape orientation, the filmstrip won't show up.  Note: going back to the main menu will clear the filmstrip.
- When you tap on a shot on the filmstrip you can bring up additional options: e-mailing, tweeting, or sending to another app.  These options show up only in this mode, not the viewing photos mode (weird).  On my phone I only saw two of the apps (I have several).  I don't know how to add more of the apps.
- The disadvantage of turning on the download is that you have to wait for the download to finish before taking another shot.  That's ok when you have unlimited time.  But if there are people waiting (e.g. group shot, or your friends/family waiting for you to finish taking your photo) it's not practical, and there's no way to skip the download temporarily without changing the settings.

VIEWING PHOTOS
From the main menu, you can select "View Photos."  In this mode you can see the shots on the D600's memory card, regardless of whether it was taken with remote live view.  You'll see thumbnails of the photos (JPEGs appear separately from NEFs and NEFs are labeled as such).  You can select photos then download them to your Photos app for editing, sharing, using as a wallpaper, etc.
Downloading photos takes longer than I expected.

SETTINGS
From the main menu, you also have the option to change settings.  Here you can set up the wireless network password, and the power-off timer for the adapter.
One useful function in the Settings menu is that you can synchronize camera clock with phone clock.  This is great if you have several cameras and you want them to be in sync with each other.
Another potentially useful feature is that the operation of the wireless mode can be tied to the power level of the camera and/or the phone.  You can set the minimum amount of power for the camera and for the phone.  If the battery levels are below your threshold, the remote functions won't work and you'll get a warning about the battery level.  This will help you avoid accidentally draining either your phone or the camera while playing around with the wireless mode.
SAMPLES - TBA
I haven't taken real world shots yet with this adapter.  I'll update this post when I do.

Here is a test shot.  I took this while holding the camera at arms length.  The live view was in movie mode, hence the 16:9 ratio.  The live view focus was on face priority with AF-F.  As you can see the focus is exactly on my eyes.


Here is a casual group shot that I took (note: photomerged very quickly in Photoshop).  The D600 was on face priority.  The focus was on the faces on the front row.  The focus was spot-on.

RESOURCES
Wireless Mobile Adapter Utility instructions here.
Read More
Posted in | No comments

Friday, 26 October 2012

Heart, Mind, Soul: What I Seek to Capture in Photos

Posted on 08:52 by Unknown
Inline image 1
This post is a follow up to Shooting Technique, where my coauthor MShafik discussed the settings he uses to take photos.  In this post, I'll discuss my shooting technique, but the emphasis of this post will be different.  Instead of talking about my specific settings, I'd like to discuss my shooting philosophy and the concepts I have in mind.

 
There are three broad categories of photos that I try to capture, and I call them photos with Heart, Mind and Soul.


MIND
These are shots that are technically excellent.  The shooter used very good technique (not necessarily knowingly) and sometimes, equipment comes into play as part of the technique.  The result is a photo with one or more amazing technical characteristics such as composition, lighting, tonality, sharpness, etc.

Playground Hero

The emphasis is on the process with which the photo was made (but in my view, part of the process is the choice of the subject so an otherwise technically excellent shot of an inappropriately-chosen subject would not work for me).

The reaction to this kind of shot is usually along the lines of, "Clever," "Brilliant!" or, "How did you get that shot?"  By its nature, I believe this kind of shot is limited by its weakest technical link.  For example, if a photo has fantastic lighting, composition and colors but the focus is clearly on the wrong point, then it doesn't work.


HEART
These are shots that I like because it is about getting an emotional response from the viewer.  Whereas photos with Mind usually invite scrutiny and discussion, photos with Heart are usually simple and often need no words.  Sometimes, this is because the subject shows a powerful and authentic emotional expression, be it joy, laughter, sadness, fear, anger, surprise, or anything.


In this same category I put photos that capture sheer beauty, the kind that defies language.
Portrait

By beauty I mean not just of people, but of any kind of subject, so this category is not just for photos of people.

With the best samples kind of shot, the reaction is typically a spontaneous emotional reaction, or a response  like, "Breathtaking!"

In my view, if the photo has emotion or beauty, it doesn't need to be technically excellent.

SOUL
While photos with heart often need no words, these shots on the other hand are full of meaning.  Some people talk about photos that tell a story.  I like to say that this kind of photo has significance to the viewer because of the viewer's own experience.

"Safe"

In this shot, I wanted to capture how my daughter instinctively hugged her mom's leg when she was confronted with an unfamiliar situation.  Because of her trust and love for her mom, it instantly made her feel safe.  It is an experience people can relate to.

What if a shot wasn't intended to communicate the same meaning that the shooter intended?  I think so long as there was some intent to communicate then it still qualifies, albeit imperfectly.  Now if there was absolutely zero intent to communicate meaning but the viewer saw meaning, then in my opinion the shot is a work of found art by the viewer not the shooter.

EXAMPLES
Although these are what I try to capture, I don't always get those shots.  However, I have a few shots that I believe have Heart, Mind and Soul in varying degrees.

Example 1:
"Carefree"
This is a shot that has Heart and Soul.  The expression of joy and delight is clear, authentic and engaging.  You can easily relate to it and perhaps feel a little bit of that joy as well.  What I really like about this shot however, is the juxtaposition of my daughter's expression and the older guy in the background looking down.  To me it has meaning because I often feel like that older guy, thinking and worrying about the usual things in life.  It contrasts starkly with the joyful expression on my daughter who seemingly has no care in the world.  This photo reminds me of what it is like to be a child with no responsibilities.

Example 2:
Friends

In this shot, my son was playing with his friends at a park.  Part of this shot is about the composition, with the way the branches and their shadows curve in interesting ways around the frame.  It's also about the interesting lighting.  However, my other intent was to capture the purity of the friendship of the kids, and how they just "are" with each other.

Example 3:
Maty's Art Project
This is a shot of one of my son's paintings, now hanging in my office.  This photo is mostly about composition, so in that sense it has Mind.  However, it is also about parenthood.  The painting looks exactly like what it is -- just a child's painting.  But parents display simple works like this in their workplaces with pride.  That layer of meaning in this photo gives it Soul.

FYI I haven't taken any photography classes and I haven't done any research for this.  I'm probably not the only one who has tried to categorize photos this way.  But FWIW, this is my way of thinking of what I look for, and it helps give me some direction when I'm shooting.
Read More
Posted in | No comments

Thursday, 25 October 2012

Comment on the Nikkor 70-200 f/4 VR

Posted on 07:59 by Unknown
So the Nikkor 70-200 f/4 VR got announced yesterday the other day.  Here is the official Nikon page:
http://imaging.nikon.com/lineup/lens/zoom/telephotozoom/af-s_70-200mmf_4g_ed_vr/index.htm
Key specs compared to the 70-200 2.8 VR II:
- VR is better (Nikon claims 5 stops vs. 4 stops slower shutter speed than would otherwise be required)
- 40% lighter (850g vs. 1540g)
- Closest focusing distance is almost 30% closer (3.28 ft. vs. 4.6 ft.)
- Costs 40% less ($1400 vs. $2400)
- Slightly shorter (7 inches vs. 8 inches).
I would be interested in this lens except for the length.  At 7 inches, it is more than 25% longer than the Sigma 50-150 non-OS (5.5 inches) or Tamron 70-300 VC (5.6 inches).  When I had the Nikkor 70-200 2.8 VR I, its length (8.5 inches) was the main reason I didn't use it much.  But perhaps if the image quality of the 70-200 f/4 is reeaaaaally good, I might consider it.  We'll see...

RELATED POSTS:
Sigma 50-150 review
Tamron 70-300 VC review - TBA
Read More
Posted in | No comments

Wednesday, 24 October 2012

Flash Portrait in Fayoum Desert

Posted on 17:41 by Unknown
Flash Portrait - End Result
I want to share with you a few flash pictures I took during my second trip to Fayoum desert, you might remember my three-part post about my visit there four months ago. I repeated most of what I did before, but challenged myself not to take a single picture similar to the ones I took last time.
When I posted the lead picture you see above on Facebook, it got some nice comments, so here's how I did it. Can you guess how many lights were used? Can you guess the light modifiers used?
 
I started by taking a normal picture using aperture priority, to show you how the available light looked like, we were sitting under a wooden roof with full 3pm sun blazing outside, as expected, the camera was tricked by the strong back light and under-exposed the subject, I opened the shadows in Lightroom.
 
 
Next, I turned the camera to manual mode, I wanted to decrease the available light exposure as much as I can, so I started by choosing the fastest shutter speed possible with flash (sync speed), which is 1/200 in my case, I also reduced the ISO as much as I can, which is ISO 50, finally I closed my aperture and taking test frames, I ended up with f/18, I decided that I want this ambient level judging from the histogram and the back LCD preview, here's the final setting without flash.
 
Ambient light reduced greatly, see the backlight?
 
See that backlight on both shoulders and the head cloth? They will end up in the final picture, they give an edge to the subject. Next, I triggered my Canon 580EX II using another speedlite (600EX-RT) on the camera with it's output turned off, I used the flash on ETTL (i.e. both the camera and the flash worked together to determine the correct flash power), and started shooting. One of my friends was holding the flash, bare, without any light modifiers, we took two or three frames until I got one I liked, here it is straight out of the camera.
 
SOOC
 
Almost there, I like the effect and the shadow covering his mid-section caused by his hand, but I find the eyes that you can see through the sun glasses and the flash reflection quite distracting, so I used the local adjustment brush on the sun glasses to decrease the exposure until it looked natural, and then I cloned out the remaining flash hot spot, and here's the end result for your convenience.
 
Final result
 
I took a similar picture of one of my other friends, using the exact same method and a bare flash as well, but no bright background this time, there was a shaded area behind his back, what I like about this picture is his look, the light shape on his face and eyes, and the black and white conversion.
 
Looking at the future
 
I followed the exact same method with an interesting looking mini-cart outside in the sun, I started by taking an available light shot, but with reduced exposure, can't remember how much, probably -2 EC.
 
 
It looked quite ok, but its color was too close to the sand and the walls behind it, so I turned to manual mode and decreased the ambient exposure, my settings were the same, 1/200, f/18 and ISO 50, here's what I got.
 
 
I then added an external bare flash to the camera right, and slightly higher, mimicking the sun's position, I adjusted the flash exposure compensation until I got this frame.
 
 
I like it more than the available light shot, but the wheels are quite dark, and I wanted to lift the shadows a bit, so I enabled the on-camera flash and set its power to 1/2 the power of the other flash (remember, I'm using ETTL, the camera determines the suitable flash power and then uses half that power for the on-camera flash), but that looked like too much, so I changed the ratio to 1/4 power, and here's the end result, with almost no processing, a few tweaks in the color and some burning using the adjustment brush would yield a better image, but I just wanted to share the concept with you.
 
Final image
 
And just for kicks here's one more picture taken in the same way, I hope you've enjoyed this post. Any questions are welcome.
 
Hanging pot
 
Posted with BlogsyPosted with Blogsy
Read More
Posted in 580 ex ii, 5d mark iii, 600ex-rt, bare flash, canon, canon 24-105, desert, fayoum, Fayoum desert, flash, overpowering sun, speedlight, speedlite | No comments
Newer Posts Older Posts Home
Subscribe to: Posts (Atom)

Popular Posts

  • Olympus E-PL3 with 14-42 Lens $199; Moving from Nikon to MFT?
    I saw on 43rumors.com that the Olympus E-PL3 was being sold at Newegg for just $199 with the 14-42 kit lens included.  I checked it out and...
  • Exploring 3D Photography with the Loreo 3D Lens in a Cap
    When I hear of 3D photos or videos, my first impression is that it's gimmicky.  Interesting for one or two shots maybe and then after th...
  • Double Camera Strap & BlackRapid RS-5 Review
    This is a review of two camera straps: - The first is a double camera strap that's -- let's be blunt -- a knockoff of the BlackRapid...
  • 2x Lowepro Review: Toploader Zoom 45 AW & 55 AW + Unraveling The SlipLock™ Mystery
    Left: Lowepro Toploader Zoom 55AW, Right: 45AW, Middle: Canon 60D + 15-85 Welcome to a new rare photography accessory review as I'd lik...
  • Toys for the Big Kids: Speedlight Softbox
    In this post, we will have a look at a softbox for speedlights.  This post is part of a series that will cover equipment reviews for committ...
  • A Couple Of Yashica Oldies
    Yashica Electro 35 GTN + Yashica ST-7   How many of you know the above camera? Have you seen such a tripod before? Hit the jump for a flas...
  • Sigma USB dock available for preorder
    B&H is offering the Sigma USB dock for preorder for $59 + s/h , due for shipping on May 18. The dock allows you to update your firmwar...
  • Canon Professional Network
    I didn't know about Canon Professional Network until Syl Arena recently blogged about his 4-part article on speedlites.  I took a look ...
  • Minimizing Nikon D5200 and D7100 banding; Mysteries Remain
    Many people have noted that the Nikon D5200 and Nikon D7100 have banding in the shadows when the exposure is pushed.  In this post I'll ...
  • Going Crazy With Tripods
    My Tabletop Tripod Trio I love tripods, I go all soft and wobbly when I see attractive looking ones, so here is my story with tripods, inclu...

Categories

  • "alien bee"
  • "april fool's"
  • "ring flash"
  • "yong nuo"
  • 1"
  • 1/1.7"
  • 10-17
  • 10-20
  • 11-16
  • 15-85mm
  • 15z
  • 17-50 vc
  • 190cx pro3
  • 2.8
  • 2.8G
  • 2/3"
  • 200 f2.8
  • 200 L
  • 200mm
  • 200mm f/2.8
  • 200mm f/2.8 L II
  • 200mm f2.8
  • 200mm f28
  • 200mm f28 L II
  • 2012
  • 2013
  • 23 Samsung led
  • 24-105 f4
  • 24-70
  • 25 1.4
  • 28-105
  • 28-70
  • 35mm
  • 35mm f/2
  • 35mm f2
  • 360
  • 3rd party
  • 4.1
  • 4/3
  • 40 pancake
  • 40 panckae
  • 40 stm
  • 40-150R
  • 40mm f/2.8
  • 430EX
  • 43rumors
  • 45 18
  • 45 AW
  • 4x4
  • 50 14
  • 50 f14
  • 50-150
  • 50mm
  • 50mm f/1.4
  • 55 AW
  • 55-250
  • 550D
  • 55aw
  • 560ex
  • 580 ex ii
  • 580EX
  • 580EX II
  • 5d
  • 5d mark 2
  • 5d mark 3
  • 5D Mark II
  • 5d mark iii
  • 5d2
  • 600d
  • 600ex-rt
  • 60d
  • 60fps
  • 60mm macro
  • 650d
  • 6d
  • 7.5mm
  • 720p
  • 75 f1.8
  • 85mm f1.8
  • 8x12
  • abbc
  • abstract
  • accuracy
  • active d-lighting
  • adjustment
  • adl
  • AF
  • af point
  • AF Point Expansion
  • aftermarket
  • airport
  • alexandria
  • alien bee
  • alien bees
  • alienbee
  • alienbees
  • alternative
  • ambient
  • ambient light
  • angle
  • aperture priority
  • APS-C
  • apsc
  • assignment
  • auto focus
  • auto white balance
  • autofocus
  • AWB
  • awl
  • back button focus
  • background
  • background blur
  • backlight
  • backlighting
  • backlit
  • bad behavior
  • bad photography
  • balance
  • bare flash
  • battery
  • BBF
  • beach
  • beams
  • beauty dish
  • bellagio
  • BFT
  • birthday
  • black
  • black foamie thing
  • black rapid
  • blackrapid
  • blogs
  • blower
  • blown
  • blur
  • bokeh
  • bounce
  • bounce card
  • bounce flash
  • bower
  • bracket
  • brightness
  • brilliance
  • brolly grip
  • brother
  • build
  • burst mode
  • butterflies
  • butterfly
  • C.Fn
  • cable
  • cake
  • camera
  • camera bag
  • camera releases
  • camera settings
  • candle
  • candlelight
  • canon
  • Canon 100mm Macro L IS
  • canon 200mm f28L
  • canon 24-105
  • canon 40 stm
  • canon 40mm f28 pancake
  • canon 50
  • canon 50 1.4
  • canon 55-250
  • canon 5d mark 2
  • canon 5d mark ii
  • canon 5d mark iii
  • canon 5d2
  • canon 5d3
  • Canon 60d
  • canon 6d
  • canon g11
  • canon speedlite
  • car
  • carbon fiber
  • catch lights
  • cheap
  • christmas
  • clean
  • cleaning
  • clipped
  • clipping
  • close up
  • clouds
  • cls
  • clustered
  • color
  • compact
  • comparison
  • composition
  • compositional aid
  • construction
  • contrast
  • cooler master
  • copyright
  • core i7
  • cowboy
  • cowboystudio
  • cpl
  • creepy
  • crop factor
  • crop sensor
  • cyber commander
  • cybersync
  • d-lux
  • d-lux5
  • d3
  • d300
  • D5100
  • D600
  • d70
  • d700
  • D7100
  • d90
  • dark background
  • david hobby
  • daylight
  • dell 24 inch
  • depth of field
  • desert
  • diamond
  • digital
  • directional
  • distance
  • diy
  • dlux
  • dlux5
  • dng
  • double
  • dslr
  • DSLR bag
  • dual
  • dust
  • dx
  • dynamic range
  • earthquake
  • ebay
  • ebay trigger
  • eclipse
  • editing
  • EF 40mm f/2.8
  • ef-s 60mm
  • einstein
  • Electro GN
  • engagement
  • environmental portrait
  • ep5
  • equipment
  • ETTL
  • ettr
  • europe
  • events
  • evf
  • ex600
  • existing light
  • expensive
  • exposing to the right
  • exposure
  • f/3.5
  • family
  • faq
  • fasten-r3
  • favorite
  • fayoum
  • Fayoum desert
  • fill
  • fill light
  • film
  • filter
  • finepix
  • fire
  • fireplace
  • first impressions
  • fish-eye
  • fisheye
  • fix
  • FL600R
  • flash
  • flash bounce
  • flash sync
  • flash trigger
  • flashmeter
  • flashright
  • focal length
  • focus
  • food
  • football
  • fotodiox
  • fountain
  • freexwire
  • fuji
  • fujifilm
  • Full Frame
  • fun
  • fx
  • galaxy s 3
  • galaxy s4
  • gecko
  • GeForce gtx570 OC
  • gel
  • geomag
  • ggs
  • ghost
  • gigabyte z77 ud3h
  • glass
  • gn
  • Goodbye
  • gorillapod
  • gregg
  • grid
  • grip
  • group shot
  • gskill ripjaws
  • guide
  • guide number
  • gx7
  • haf 912
  • handheld
  • hands on
  • hands-on
  • hdr
  • head shot
  • hiatus
  • high dynamic range
  • high iso
  • high speed sync
  • highlight
  • highlights
  • histogram
  • holder
  • holiday
  • home
  • home made
  • Honda civic
  • honeycomb
  • hotshoe
  • hoya
  • humor
  • i9500
  • id
  • image quality
  • impressions
  • indoor flash
  • infrared
  • infringement
  • insects
  • inverse square law
  • japan
  • jewel
  • jewelry
  • joby head
  • jpeg
  • Kingston hyperX SSD
  • kirk tuck
  • kl bird park
  • krakow
  • kuala lumpur
  • las vegas
  • lastolite
  • laurence kim
  • lax
  • lcd
  • leica
  • lens
  • lens cap
  • lens compression
  • lens review
  • lenses
  • lenspen
  • lensrentals
  • light
  • light painting
  • lighting
  • lightroom
  • lightroom 4
  • lightroom 5
  • location
  • long
  • long exposure
  • los angeles
  • low key
  • low light
  • Lowepro
  • Lowepro 45aw
  • Lowepro 55aw
  • lr4
  • lumiquest softbox III
  • lumix
  • lx-5
  • lx5
  • m4/3
  • m43
  • macro
  • macro adapter
  • makernotes
  • malaysia
  • manfrotto
  • manfrotto tripod
  • manual
  • mark ii
  • mark iii
  • MFT
  • mft. micro four thirds
  • micro four thirds
  • mielec
  • migration
  • mini review
  • mirror
  • mirror-less
  • mirrorless
  • mobile
  • modification
  • modifier
  • monobloc
  • monoblock
  • monolight
  • motion
  • motion blur
  • multi function printer
  • multiple
  • nano crystal
  • natural light
  • neil
  • Neil VN
  • niekerk
  • nikkor
  • nikon
  • nikon d600
  • noise
  • off camera
  • oil
  • olympus
  • olympus 12-50
  • Olympus 40-150
  • olympus 45
  • olympus 45 18
  • olympus om-d em-5
  • om-d
  • omd
  • omd em1
  • omd em5
  • omd em6
  • on-camera
  • one inch
  • overexposure
  • overpowering sun
  • panasonic
  • panasonic leica 25 14
  • pancake
  • party
  • passport
  • pastries
  • pastry
  • pc
  • pentax
  • peter
  • phone
  • phone photography
  • photo
  • photo tips
  • photography
  • photokina
  • photomerge
  • photoshop
  • photoshop elements
  • planning
  • pocketwizard
  • point and shoot
  • poland
  • polarizer
  • popup
  • popup flash
  • portrait
  • post processing
  • post-processing
  • postprocessing
  • product
  • product shots
  • profile
  • protection
  • protector
  • quad-flash
  • quantum
  • radiopopper
  • raid 0
  • Range finder
  • raw
  • raw editing
  • raw+jpeg
  • rays
  • real
  • recovery
  • reflection
  • reflector
  • resources
  • restaurant
  • review
  • rf-603
  • rf603
  • ricoh
  • ring
  • ringflash
  • robin wong
  • roger cicala
  • rogue
  • rokinon
  • roll off
  • roll-off
  • rolloff
  • rs-5
  • rs-7
  • rumors
  • s5
  • s5 pro
  • s5pro
  • samples
  • samsung
  • samyang
  • sb-26
  • sb-80
  • sb26
  • sb800
  • screen protector
  • sensor
  • sensor swab
  • sensorclear
  • sensorklean
  • sensorklear
  • separation
  • shadow
  • shadow pulling
  • shadows
  • shards
  • sharpening
  • sharpness
  • shoot through
  • shoot-through
  • shoot-thru
  • shooting technique
  • shootout
  • short
  • sigma
  • sigma 50-150
  • skin tones
  • skylight
  • Slik Mini Tripod
  • slingshot
  • slow
  • small
  • smooth
  • soft
  • softbox
  • sony
  • sony a99
  • sony rx100
  • sony t10
  • specular
  • speed
  • speedlight
  • speedlite
  • spinlight
  • spots
  • standard
  • stockholm
  • story
  • strap
  • strobe
  • strobist
  • studio
  • studio strobe
  • subject
  • substitute
  • sudden
  • summilux
  • sunrise
  • sunset
  • sweden
  • swivel
  • sync speed
  • t2i
  • t3i
  • Table top tripod
  • tamron
  • technique
  • techniques
  • tele
  • telephoto
  • thinktank retrospective 5
  • third party
  • tips
  • tokina
  • tonal
  • tonality
  • tone curve
  • toploader
  • toys
  • translucent
  • travel photography
  • tri-flash
  • Tribute
  • trifold
  • trigger
  • tripod
  • truth
  • ttl
  • TTL Cord
  • u43
  • ultra-wide
  • ultrawide
  • umbrella
  • underexposure
  • unlimited sync speed
  • up-rise
  • up-rise 15z
  • update
  • uprise
  • USM
  • uv
  • uwa
  • vanguard
  • versus
  • vertical
  • video
  • view nx2
  • visual science lab
  • vs
  • wadi rayan
  • wd caviar black
  • web
  • weekend
  • westin
  • white balance
  • white lightning
  • wide
  • wide angle
  • window
  • wireless
  • wireless flash
  • wireless release
  • wireless trigger
  • workflow
  • Yashica
  • yashica gtn
  • yashica st-7
  • yn-560
  • yn-560ex
  • yn-ex600
  • yn560
  • yong nuo
  • yongnuo
  • zack arias
  • zoom
  • zoom toploader
  • zuiko

Blog Archive

  • ►  2013 (165)
    • ►  December (5)
    • ►  November (10)
    • ►  October (8)
    • ►  September (7)
    • ►  August (3)
    • ►  July (11)
    • ►  June (10)
    • ►  May (15)
    • ►  April (19)
    • ►  March (33)
    • ►  February (24)
    • ►  January (20)
  • ▼  2012 (193)
    • ►  December (17)
    • ►  November (22)
    • ▼  October (34)
      • Camera Settings for Halloween Photos
      • A Bit Busy!
      • Nikkor 85 1.8G with Nikon D600
      • Nikon WU-1b Wireless Mobile Adapter for Nikon D600
      • Heart, Mind, Soul: What I Seek to Capture in Photos
      • Comment on the Nikkor 70-200 f/4 VR
      • Flash Portrait in Fayoum Desert
      • Nikkor 28-105 3.5-4.5D - Cheap, Sharp FX Standard ...
      • Shooting Tip: Prime Focal Lengths (Basic)
      • Better Point-and-Shoot Shots with an External Flash
      • Nikon D600 posts
      • How to Fix Underexposure
      • Nikon D600 Dynamic Range in the Real World
      • Hands On: Canon EF 40mm f/2.8 STM Pancake
      • Updated: Nikon D600 oil spots
      • Review: Vanguard Up-Rise 15Z vs Lowepro TopLoader ...
      • Nikon D600 vs. Fuji S5 Pro Dynamic Range Retested
      • Shooting Tip: Custom Reset
      • Nikon D600 Oil Spots
      • Nikon D600 + Nikkor 24-70: A Day with My Precious ...
      • Shooting Tip: Blinkies v. 2.0
      • Lightroom Tip: Adjusting More than 5 Stops of Expo...
      • Nikon D600 Hands-On Review Updates 10/10/12
      • Nikon D600 autofocus: speed, accuracy, low light, ...
      • Limits of Highlight Recovery With Lightroom and ACR
      • Shooting Technique – Part 1 (mshafik)
      • Updated: A Miracle Happened Today
      • The Nikon D600's Unique Custom Setting Capability
      • Cross-Camera Profiles for Lightroom
      • Accurate and free AF fine-tuning/microadjustment m...
      • Updates
      • Traveler
      • Nikon D600 Raw Supported in Lightroom 4.2 - now av...
      • Nikon D600 vs. Fuji S5 Pro highlight dynamic range
    • ►  September (47)
    • ►  August (12)
    • ►  July (11)
    • ►  June (10)
    • ►  May (13)
    • ►  April (13)
    • ►  March (8)
    • ►  February (1)
    • ►  January (5)
  • ►  2011 (141)
    • ►  December (8)
    • ►  November (8)
    • ►  October (7)
    • ►  September (9)
    • ►  August (13)
    • ►  July (13)
    • ►  June (19)
    • ►  May (17)
    • ►  April (25)
    • ►  March (22)
Powered by Blogger.

About Me

Unknown
View my complete profile