Better Family Photos

  • Subscribe to our RSS feed.
  • Twitter
  • StumbleUpon
  • Reddit
  • Facebook
  • Digg

Sunday, 30 September 2012

Nikon D600 Review Update: Instant Zoom workaround

Posted on 10:25 by Unknown
Here are a few updates to the Nikon D600 Hands-On Review, including a workaround for the lack of an instant zoom button.

Face recognition on review.  When you zoom in on an image at any zoom level, the camera can recognize faces.  When it recognizes a face, you will see an icon on the lower left part of the screen and you can turn the sub-command dial to view the faces identified in the shot. The camera won't zoom to the face, but will be centered on it as you zoom in the face.  

This function can be used somewhat like a workaround for the lack of a single button zoom.  What I do is to press the zoom button at least once so that the face recognition indicator will show up, then rotate the sub-command dial to center into a face, then hold down the zoom button.  If I then rotate the main command dial, it goes to the next photo at the same zoom level, then I rotate the sub-command dial to let it center on an identified face.

The face recognition works most of the time so long as both eyes, the nose and the mouth are visible.  Occasionally, even though the entire face is visible it won't recognize the face.  But overall, it works reasonably well.


Low light autofocus.  The D600 autofocus is rated to -1EV, which is equivalent to an exposure of ISO 100, f/2.8, 15 seconds (not 1/15 second).  I tried a shot at a dimly lit bedroom at an exposure value of 4 and the D600 focused without hesitation at all and was critically in focus, even though the lens wasn't super fast with a maximum aperture of f/4.5.


Ergonomics.  From the sleek appearance, I thought it would feel snug in my hand.  It doesn't.  The grip feels too small for my hand.  I think the issue is that the lower part of the grip is not thick enough.  Not a huge deal but a D300 or D3 definitely fits my hand better.
Also of note, below the Nikon red swoosh on the grip, there is a seam or edge that feels a little sharp, and for some users, it can cause discomfort to their fingers.  With my hands I don't feel it unless I look for it.
Read More
Posted in | No comments

Saturday, 29 September 2012

DIY Adjustment of Your Sigma Lens via USB Dock

Posted on 12:57 by Unknown
Missed this announcement at Photokina (saw it mentioned at the Nikon D600 Club).


That USB Dock looks interesting.  Too bad it appears to work only with newer lenses.  The old lenses -- the ones that are in most need of firmware updating -- don't seem to be compatible with the USB dock.  Unfortunately for my Sigma 50 1.4 and Sigma 50-150, both of which don't focus in LiveView with the D600. argh.
Read More
Posted in | No comments

Friday, 28 September 2012

Nikon D600 DNG raw files show ridiculous Lightroom recovery

Posted on 22:21 by Unknown

We're all still waiting for Adobe's raw support for the Nikon D600.  To be fair, Nikon should have allowed DNG support either in-camera like Pentax or at least as a conversion option in View NX2, so that we wouldn't have to wait like this no matter how new the camera is.

Meanwhile I found out that you can trick Lightroom into reading Nikon D600 raw files by altering the EXIF data to specify that the camera model is a model that is already supported by Adobe.  The downside is that the image will be cropped, and there is no guarantee that it will behave exactly the way it should.


To change the EXIF data, I used ExifTool by Phil Harvey.  For Windows, just download the zipfile, and extract it to a temporary folder.  Rename the executable file to exiftool (so that it doesn't say "(-k)" at the end of it).  Copy (not move) the D600 raw files that you want to convert into the temporary folder.  Launch the windows command prompt (cmd.exe) then change directories into the temporary folder*.

[*If you don't know how to use a command prompt then for simplicity put the temporary folder into your top user folder.  In the C: drive there is a directory called Users.  In that directory there is a subdirectory for your user name.  That is the top folder for you.  Create the temporary folder in that folder user name folder (just to be safe, use a name without spaces or punctuation and limit it to 8 characters).  When you launch the command prompt, you will be in the user name folder by default.  Change to the temporary folder by typing "cd xxxxxxx" where xxxxxx is the folder name.]

Once you are in the temporary folder, type the command: exiftool –MODEL=”yyyyyyy” –ext NEF *.NEF

Replace yyyyyy with the model name such as Nikon D800.  Be sure to include the quotation marks around the model name.  See the screenshot for some examples.


Once the exif has been modified, you can import it into Lightroom as usual (I converted mine to DNG).  As noted above there will be quirks.  These were the camera models I tried and the results:

  • Nikon D3200: the image was cropped (not resized) to a resolution of 6016x4000 - almost the native resolution of the D600 (6016 x 4016).  However, the image was very overexposed and the image did not seem to have nearly as much recoverable highlights as the other images.
  • Nikon D3x: image not readable by Lightroom.  Doesn't work.
  • Nikon D800: the image was cropped to 4800 x 3200.  The area outside it was lost.  However, the file seems to work fine.  Note: the crop size above assumes an FX image. For a DX cropped image, the resolution is proportionately less.
  • Nikon D7000: same as D800 except the resolution is 4928 x 3264
  • Nikon D4: same as D800 except the resolution is 4928 x 3280.

Using the Nikon D4 model, I did some experiments with the raw files, starting with the infamous black Ferrari shot.  You recall that in View NX2, the first shot had a huge swath of clipped highlights:

The DNG of that same file without adjustments showed far fewer clipped highlights (shown in red) even with no adjustments:

When highlight recovery is set to maximum, there are no clipped highlights .... !

Here's another sample.  Remember the shot of the Kettle restaurant in Part 2 of the review?  I mentioned that the scene was very backlit.  Here is the ViewNX2 version, which lost almost half of the sky:

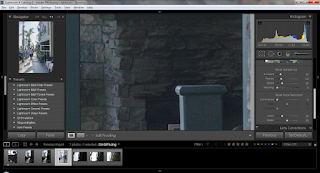
Here is the same image in Lightroom with highlight recovery at 100 and shadow recovery at 100 (just for demo purposes):

....Not a single pixel was clipped. :-O

Here is another shot I took.  This one was intensely backlit.  I was experimenting with Center-Weighted Average metering.  Anyway here's the shot from ViewNX2:

It looked pretty hopeless.  Here's what Lightroom was able to do to that file (full resolution for the cropped DNG file, published at quality of 92 via Lightroom):

In case you are wondering, after adjustments, there are no clipped highlights or shadows in this scene with extreme dynamic range.


Now maybe you're thinking with that much recovery from the shadows, surely there has to be a lot of noise...
1:1 view after shadow recovery with no noise reduction
nope.  The shot above just had a noise reduction of 20 applied, and it was enough to wipe out luminance noise at the 1:1 level.

Nikon is not going to support DNG anytime soon, so Adobe please please PLEASE get us the D600 raw support as soon as possible.  Give raw support and see this camera set to f____ purpose! (Spartacus joke... lol.)
Read More
Posted in | No comments

Sudden slow motion effect using a Nikon D600

Posted on 08:22 by Unknown
Many cameras offer video at a 60fps frame rate, which I find very useful for smooth slow motion.  Here is a sample shot with the Nikon D600 (shot at 720p, 60fps).


After shooting the video, I edited it in Photoshop CS6.  I split the video at the point where I wanted the slow motion to start, then split that second half again at the point where I wanted slow motion to end.  Then I right-clicked on the middle slow-mo segment to change the playback speed.  (I also had to adjust the ends of the middle and last segments to provide a smooth transition from slow-mo to normal speed.)

Although the video segments now have different frame rates, I didn't have to change their individual frame rates to make them consistent.  I just rendered the entire video to a specified frame rate, making the frame rate consistent throughout the video.

RELATED POSTS:
Nikon D600 Hands-On Review
Read More
Posted in 60fps, 720p, D600, motion, nikon, slow, smooth, sudden, video | No comments

Thursday, 27 September 2012

Discount on Spinlight Substitute Flashright

Posted on 16:24 by Unknown
You may know that I recently modified a FlashRight diffuser to use it like a Spinlight 360. Here is that post. The Flashright was $99 but recently has been sometimes discounted to around $27. Meanwhile, the makers of Flashright have since launched a new flash diffuser called Lumaburst, which appears to be a Flashright without the internal shield/flag (I'm not sure why it would be more expensive than the Flashright...). The Lumaburst appears to be usable as a modified Spinlight as long as that transparent dome turns. I haven't used it so I don't know if it does. Anyway, they have a discount on the Flashright and Lumaburst:
1. Original FlashRight PRO $25
2. Brand New Flash Diffuser LumaBurst $35
3. Brand NEW Flash Diffuser LumaBurst, FlashRight PRO
and ColorRight Classic ONLY $49.95
FYI I have no commissions or anything like that on these and I'm not affiliated with the makers of these products.
Read More
Posted in | No comments

Nikon D600 raw and JPEG high ISO studio comparisons on DPReview

Posted on 12:40 by Unknown
DPReview just posted its high ISO studio tests for the Nikon D600, both in raw and JPEG. The results are consistent with what we have seen from the Imaging Resource studio comparison samples.
The comparison tool is here:
JPEG
Raw
DPReview also posted more sample photos. What's interesting is that they mentioned that they took the shots in raw and converted them using a "private beta" of ACR 7.3. Hopefully this means that raw support for the D600 is just around the corner for the rest of us.
Read More
Posted in | No comments

Wednesday, 26 September 2012

Just To Let You Know

Posted on 14:04 by Unknown
We got a few requests in the recent "Who Are You?" post, below is a quick summary of the requests in no special order:
  • Vanguard Heralder 28
  • Shooting Techniques (2 requests)
  • More about flash photography
  • Lightroom 4 post as I've recently purchased it.
  • Anything on technique is appreciated
  • Intrigued by the ipad and phone photography future topics
  • Strobist stuff, so I would be very happy if the planned article on the Yongnuo 560 II
  • Post Processing Techniques - Lightroom 4 (2 requests)
  • Canon 24-105 Review
  • Canon 5D Mark II Review

As there are a couple of requests for both the shooting and post processing techniques, that's what I will start with, shooting techniques, then post processing. However, it will take me some time to prepare these two posts, especially the second one, so you might see some intermediate posts, but don't worry.

A few other updates:

  1. For some reason, Blogger is screwing up the images in old posts, I am still looking into it and will fix them ASAP.
  2. I got a 5D Mark III, initial impressions will be up soon, then a full comprehensive comparison with the 5D Mark II will be done, a la 60D vs 550D post.
  3. I will review the 650D since I got one for one of my friends and have used it a little, nothing new or radical apart from the focusing system and the touch screen.

Posted with BlogsyPosted with Blogsy
Read More
Posted in | No comments

Quick Review: Great Light Easy Light by Kevin Clark

Posted on 11:56 by Unknown
One of the photographers I look up to, Jose Antunes, often posts about Craft & Vision e-books. Today he posted about Great Light Easy Light by Kevin Clark. The book discusses how to use flash in a way that looks natural. That is a topic I am always interested in, and the book is only $5 ($4 with discount code EASY4) so I got it.
Usually when an ebook is inexpensive and has large nice photos with fancy layouts, I am a little wary because sometimes there's not a lot of substance and the photos are there just to make a prospective reader think that they can get photos that are just as good -- if only they would buy the book. That is of course almost never true, and as long as you know that, you won't be disappointed.
I'm pleased to say my first impression of the book is wrong. It is short - only 30 pages excluding the cover - but the content is very good. I expected that he would discuss basic lighting techniques (like the difference between hard and soft light, etc. etc.) but actually he discusses intermediate lighting techniques (controlling specularity, negative fill, etc.), which is awesome.
Kevin first discusses mixing flash and ambient and the characteristics of natural-looking light. Then he proceeds to discuss different shooting styles:
- one-light setups
- two-light setups
- three-light setups
- bounce flash setups.
For each setup style he starts off with a discussion of overall concepts for that topic, then moves on to an example of a shooting session where he used that style, showing 4 variations he used for that style (except for the three light setup where he used 2 variations), including lighting diagrams for each variation. Each section is also supplemented by a couple of case studies with large photos with brief one-paragraph descriptions of lighting setups for that photo (but no lighting diagrams).
Kevin's discussion of the concepts is clear. The descriptions of the setups are also clear where there is a lighting diagram. In the other samples without lighting diagrams, I sometimes find his descriptions a bit ambiguous. Example: "Position your softbox about eye level a foot away and slightly in front of (approx. 6-12 inches) your subject's face." Given that the softbox is already eye-level and a foot away, when he said "slightly" in front of I'm not sure if he means in front of the face but 6-12 inches to the side - but isn't the softbox already 1 foot away? :-? Nonetheless, I felt that I did learn the concepts he was trying to teach.
Conclusion.
The techniques in the book are for setup shots and for that purpose it is a very good resource for intermediate photographers (in fact it goes into techniques that are not even discussed in a real book I have about portrait lighting). For candids, the techniques are not directly applicable (because they require setup) but the concepts are very useful and with some creativity, it is possible to find or create the lighting that would create similar results. For anyone interested in lighting portraits, this ebook is a valuable resource and I recommend it.
Read More
Posted in | No comments

Tuesday, 25 September 2012

Nikon D600 Hands-On Review Part 2

Posted on 11:32 by Unknown


10/5/12 update: added info re Adobe raw support for D600.  Also added info re using camera profiles from other cameras.

I tried to finish the review last night but couldn't.  So rather than wait to finish the other parts, I'll break this up into part 2 and 3.

Part 1:
• Specifications - highlights.  Just want to highlight some of the best and worst parts of the specs.
• What's in the box.  Just so you know.
• Body.  How the body feels like, etc.
• Menus.  I'll highlight some differences from menus of other Nikons.
• Shooting.  What it's like to shoot with the D600.
• Live View Photo.  Characteristics of the D600's LV Photo mode.
• Image Quality.  Noise and dynamic range.
• Lighting.  Options for flash photography with the D600.
• Exposure.  Tests on the D600's exposure behavior.
Part 2
• Video (Live View Movie).  What it's like to shoot a movie with the D600.
• Features.  Special features and options of the D600.
• Processing the files.  Handling of D600 in post-processing.  File sizes and such.
• Sample photos.
Part 3
• Comparisons with other cameras.  I compare the D600 with its most likely alternatives, in terms of specs and image quality.
• Suggestions for full frame cameras.  My suggestions based on your needs.
• D600 Resources. Helpful links.
• Speculation about D600.  Just for fun, a look back at our posts about the D600 all the way leading up to its release.

Part 1 of this review is here: http://betterfamilyphotos.blogspot.com/2012/09/nikon-d600-hands-on-review-part-1.html
Part 3: TBA


VIDEO (LIVE VIEW MOVIE)

Until recently none of my DSLRs had a video mode.  I had always been curious about using a DSLR for video because I wanted to be able to have a shallow depth of field.  With the D600’s full frame sensor, the DOF is even more shallow.  I also wanted to be able to use special lenses such as an ultrawide, fisheye or macro lens.

The D600 has video from full HD 1080p at 24, 25, or 30 fps.  It can also take 720p video at 25, 30, 50, or 60 fps.  Using a 24fps frame rate makes the video look cinematic while using 60fps has smooth action shots and can also be used for slow motion.  The D600 can save the video as high quality (24mbps for 1080p or 12mbps for 720p) or as normal quality (12mpbs for 1080p or 8mpbs for 720p).  Video files are in MOV format and compressed with the H.264 standard.

How to record.  To record video, you have to switch to Live View Movie mode, then press the record button, which is near the shutter release.  I’m used to having the metering selection button on that spot, so I have at times pressed the wrong button.  There is an option to instead allow the shutter release for movie recording.  The problem is you won’t be able to take photos during video (see below).

Exposure controls.  You can control the exposure of the video, within limits.

a. Automatic modes:
If you switch to any exposure mode other than manual exposure, then you cannot control shutter speed or ISO.  You can change exposure compensation if you are in P, A, or S mode (you can do it in the middle of a recording as well).  In these automatic modes, ISO automatically adjusts to maintain the exposure level.  You can prevent changes to the exposure by using AEL.

As for aperture, it is possible to specify the aperture but you have to exit live view first, switch to aperture priority, choose your aperture, then turn on live view.  The aperture is then locked at whatever aperture you chose.  Alternatively, if you have a lens with an aperture ring, you can adjust aperture, even in the middle of the recording, and the ISO will adjust automatically.  Just remember to switch to A mode, and turn on the option for controlling aperture with an aperture ring (under option f5).

Note that the D800 can adjust aperture electronically.  You don’t have to exit live view or use a lens with aperture ring.

b. Manual mode:
It is possible to control the shutter speed, up to the frame rate limit (for example if you are using 60 fps, then the slowest shutter speed is 1/60).  It is also possible to control ISO.  To do these you have to switch to manual exposure.  In manual exposure, you control the exposure level using the shutter speed and ISO.  There is no automatic ISO in manual movie mode.

Controlling aperture in manual mode is similar to that of the automatic mode.  You have to exit live view, switch to aperture priority, select your aperture then turn on live view.  If you have a lens with an aperture ring, you can change the aperture in the middle of the recording but the ISO and shutter speed will not adjust automatically.

WYSIWYG.  Unlike in Live View Photo mode, the display in Live View Movie mode is of course what-you-see-is-what-you-get (aperture, shutter speed, ISO, fps).  Exposure compensation changes are visible on the screen within +/- 3EV (but in dim ambient conditions, it is -3EV to +1EV).

Autofocus.   Yes the D600 can autofocus continuously but based on the lenses I’ve tested, don’t expect miracles here.  My Canon HG10 dedicated video camcorder focuses faster.

The same AF modes and AF area modes in LV Photo mode are available in LV Movie mode.  Subject tracking can work but is effective only for slow-moving subjects.

Focusing is about the same speed as for photo.  You can zoom in to confirm focus before shooting the video but once you start shooting, the zoom gets canceled.

(Please note that my Sigma 50 1.4 and Sigma 50-150 non-OS can’t autofocus in live view. Some with newer copies of these lenses say they are able to autofocus.  Sigma might update your lens if they feel like it.)

Picture controls and scene modes with video.  Picture controls (standard, neutral, vivid, monochrome, etc.) and scene modes (portrait, pets, sports, etc.) can be used in video mode for additional creative control.  On the other hand, many video editors can apply these effects during video editing.

Audio recording.  Sound quality is one important way to elevate the quality of your videos.  The built-in mic is mono and will pick up the camera’s noises (while it’s autofocusing).  Fortunately, there is an external stereo microphone jack.  The audio level of the microphone can be adjusted manually, placed on auto, or simply turned off.  There is also a headphone jack to monitor the audio.  Like the mic audio level, the headphone audio level can also be on auto or manual.

Custom controls.  The Fn, DOF preview, and AEL buttons can be customized to have functions that are separate from their assigned functions in photo mode.  However there are some video functions such as frame rate and DX mode (see below) that can’t be assigned to these functions.  Instead I have to assign them as options in My Menu.

DX mode.  One of my favorite features in the movie function is that you can switch to a DX crop and still take video in full HD resolution.  This means your FX lens can do double duty to have two separate focal length ranges without having to change lenses!  You can also use a DX lens for shooting video in full HD.

Photo during video.  You’ve probably seen those videos where there is a short video clip then a “snap” then it’s followed by a shot of the photo that was taken.  That kind of effect is possible with the D600.  In the middle of recording video, you can press the shutter button to take a photo.  This is not a simple frame grab.  It is a photo at the same resolution as you can take in regular photo mode except that it is cropped to 16:9, therefore you can zoom in the details a la Ken Burns.

When you press the shutter to take a photo during a movie recording, there is a momentary pause then the D600 stops the video recording, takes the photo, then returns you to live view (with recording still stopped).  The resulting photo is in the same format as for photo (i.e., it can be in raw or even raw+JPEG if you wish).

Adding Chapters (Index function).  You can add indices to the video which act similar to chapters on a CD or DVD.  To add an index you have to assign one of the customizable function buttons to insert an index marker.  During playback, in addition to the other controls for advancing or rewinding the video (see below), you can skip from one index to another.

Playback and In-Camera Editing.  When you replay the video, you can advance the movie frame by frame, or skip forward or backward 10 secs (using the main command dial).  At any time you can pause the video then do a frame grab (in JPEG) or to identify a start or end point for the video.  Strangely, it does not appear possible to add an index marker while reviewing the video.

Uncompressed HDMI.  Videographers among you know better than I about how useful this is.

Sample video clip.


 Here is a sample video clip shot with the Nikon D600.  It was originally shot at 720p, 60fps.


After shooting the video, I edited it in Photoshop CS6.  I split the video at the point where I wanted the slow motion to start, then split that second half again at the point where I wanted slow motion to end.  Then I right-clicked on the middle slow-mo segment to change the playback speed.  (I also had to adjust the ends of the middle and last segments to provide a smooth transition from slow-mo to normal speed.)

Although the video segments now have different frame rates, I didn't have to change their individual frame rates to make them consistent.  I just rendered the entire video to a specified frame rate (in this case 30fps), making the frame rate consistent throughout the video.


FEATURES

1. Multiple photos: Self-timer, bracketing, multiple exposure, image overlay, HDR, interval shooting, and time lapse.  These options are interrelated.

a. Self-timer.  The D600's self-timer is more sophisticated than what I've seen before.  In addition to specifying the delay before the shutter is released (2 secs, 5 secs, 10 secs, or 20 secs), the self-timer can take up to 9 shots.  In addition, you can specify the interval between the shots (0.5 sec, 1 sec, 2 secs, 3 secs).  These are all in custom setting c3.

b. Bracketing.  There is a dedicated bracketing button below the flash button - it can be adjusted with the command dials, just like many of the other functions.  You can bracket exposure, flash exposure, both exposure and flash exposure, white balance, or Active D-Lighting.  You can only bracket 2 or 3 frames (with my D300 and D3 I could bracket up to 9 frames).  However, the bracketing increment is up to 3EV.  On the D300 the bracketing increment was only up to 1EV.  So, bracketing 3 frames on a D600 with a 3EV increment captures a similar range as a D300 with a 7-frame bracket at 1EV.  Bracketing can be combined with the self-timer.

c. Multiple exposure. In this mode you can take 2 or 3 shots that will be overlaid over each other.  (Compare: a D3 can do a 9-shot multiple exposure).  This can be useful for showing motion, or other effects.  This function can be combined with interval shooting (see below) so that the shots that comprise multiple exposure can be taken at specified time intervals.

d. Image overlay.  This is similar to multiple exposure, except that it is done after shooting.  It only works with raw files, and you can combine only 2 images.

e.  HDR.  The camera can take 2 shots and combine the exposures to get detail in both highlights and shadows.  Unfortunately this only works in JPEG mode, and the 2 shots that comprise the HDR are not saved.  The HDR function can work with interval shooting so that the camera will shoot HDR photos at each selected interval.

f. Interval shooting.  You can take several shots at specific time intervals automatically.  This mode has several options:
- You can specify when the interval shooting begins (now or at a specific starting time).
- You can specify the interval in hours, minutes and seconds.
- Finally, you can choose the number of intervals and the number of shots per interval.  If you are using interval shooting together with bracketing, then the camera will ignore the specified number of shots per interval and instead take the entire bracketing sequence at each interval.

g. Time lapse movie.  In this function, the camera takes several photos, similar to interval shooting, but combines the shots into a movie.  The options are similar to interval shooting except that instead of specifying the number of intervals and shots per interval, you specify how long the camera will take photos (up to 8 hours).  The movie will be recorded at the frame rate specified for movie settings.

2.  Steady shooting.  To minimize vibration during shooting, the Nikon D600 features a mirror up release mode (press the shutter once to raise the mirror, press it again to take a photo and return the mirror), and an exposure delay mode (specify a delay of up to 3 seconds from the time you press the shutter to the time the shutter is released).  Both functions can be used together.

There is also a remote delay option (2 second delay) and a remote mirror-up option (similar to mirror up except you use a remote).  Unfortunately, the D600 only has an IR remote (on the other hand, it has an IR receiver in front and behind the camera).  Alternatively, there is also a separate wireless adapter, the WU-1b that can function as a wireless remote release and in addition, remote live view.

Notably, the mirror action also appears to be smoother/more gentle than the one on my Fuji S5/D200, and is about the same as the one on my D90, even if the D600 has a larger mirror.

3.  Older lenses.

a.  Lenses without AF motors.  Some lenses for Nikon don't have autofocus motors.  Like mid-level and high-end Nikons, the D600 has an autofocus motor that will allow you to autofocus even with these lenses.

b.  Non-CPU lenses.  Old Nikon lenses lack a chip inside that is needed for communicating with the camera.  These lenses can still be mounted on Nikon F-mount cameras but normally they won't autofocus and can't be metered.  However, on the D600 and high-end Nikon bodies, these lenses can be used, with color matrix metering.  You just need to specify the widest focal length of the lens and its widest aperture.  

I've tried this with a Nikkor 50-135 f/3.5 AI-S and it works.  The lens can meter just like a modern lens, and although I can't autofocus, there is focus confirmation.

PROCESSING THE FILES

Raw files now supported in Lightroom 4.2.  Adobe now offers raw support for the D600 in Lightroom 4.2.  Windows version
Mac version
If you have a previous version of Lightroom or you use Photoshop, you can convert the D600 NEF raw file into DNG using Adobe's free DNG Converter 7.2.  Note that D600 raw support is only in beta phase and Adobe warns that your images may change slightly when the final version is released.

Camera Profiles.  Since the D600 raw support is only in beta, it doesn't have camera profiles (to emulate picture styles such as Standard, Neutral, Portrait, Vivid, etc.).  You can, however, use the camera profile from a different camera (even a non-Nikon one) and apply it to the D600.  Here are the instructions.

Custom file names.  Just like D3, you can change the file prefix.  For example, instead of DSC_xxxx.NEF it could read MIC_xxxx.NEF.  If you have more than one camera, this can help you distinguish between files from different cameras.

File sizes: Raw files are are anywhere from 20.7 to 29.2 MB depending on whether it is 12- or 14-bit, and whether it is just compressed or it is losslessly compressed (there is no option for uncompressed).  JPEG fine, large is 12.4 MB and JPEG basic, small is 1.0 MB.  These sizes increase if JPEG compression is set for optimal quality instead of size priority.

Computer upgrade?  One of my concerns with the D800 and now the D600 had been that I would be forced to upgrade my computer to handle the files.  I actually upgraded my laptop anyway.  Whether I would have been forced to upgrade or not is up in the air.  The only software I've used for the D600 files is ViewNX2 which is terribly slow.  On my upgraded computer, processing the files in ViewNX2 is workable.  I am sure that with LR4, processing the files will be painless.

If I had not upgraded, I imagine that with my previous computer, using ViewNX2 would not have been practical.  As for LR4, if I had been using LR4 with my previous computer, which is much much faster than ViewNX2, I'm not sure whether an upgrade would be required.  I'll update this section when Adobe provides raw support for the D600.

SAMPLE PHOTOS
Below are sample photos from the D600.  Most were taken in raw, then processed in ViewNX2.  I kept the adjustments to a minimum.  Mostly, what I did was to tweak exposure (to give you a better idea of the camera's metering, I tried not to adjust exposure too much), adjust highlight and shadow protection, adjust white balance as necessary, switch to one of the preset picture modes (typically, Standard or Neutral), and increased sharpening to around 6 or 7.  The files were saved in the highest quality JPEG available in ViewNX2 then uploaded to Picasa at the highest available resolution.  I think Picasa might also have applied its own adjustments when I uploaded the shots.

NOTE: ViewNX2 doesn't seem to have noise reduction.  So I have not used noise reduction on any of these.

Nikkor 24-70.  

Update: Here is a more detailed post about the D600 with the 24-70, including AF performance, etc.

These shots were mostly JPEG.  They were taken in Hermosa Beach, California during a cloudy afternoon.


Bounce flash used for this shot.  I was testing the new option to adjust exposure compensation without affecting flash exposure.


These couple of shots look like they were taken with a 70-200, but were just heavily cropped shots from the 24-70.  Still had plenty of detail.


Tokina 11-16.  This DX lens is not intended for use with a full frame camera but it can be used with the D600 and other full frames from around 15mm without vignetting.  However, as you can see the corners are very soft.


Sigma 50 1.4.  These were taken at Manhattan Beach in California.  For some of them I experimented with average metering.


See what details you can spot when you zoom in these shots :)


Take a look at the sky in this intensely backlit scene.  Incredibly, the D600 appears to have captured the range of the entire scene.  Exposure comp +2, highlight protection: 100.  The highlight rolloff also looks very smooth.


This scene was very challenging for the camera and I needed to adjust both the highlights and shadows.  A large part of the sky was blown out but there was actually no detail there anyway.  However, note again the smooth highlight transition to blowing out:


Sample shots with the Nikkor 85 1.8G here.
Sample shots with the Nikkor 28-105 3.5-4.5D here.

OTHER SAMPLE PHOTOS
Nikon samples
Imaging Resource samples
DPReview samples

RELATED POSTS:
Nikon D600 Resource Page .  All the Nikon D600-related posts on one page, organized by topic.
Read More
Posted in | No comments

9/25/12 Updates to Nikon D600 Hands-On Review Part 1

Posted on 08:15 by Unknown
I will be updating Part 1 of the Nikon D600 Hands-On Review with these additional info:

Auto ISO. I learned that the Auto ISO can be activated without the menus.  Just hold the ISO button and rotate the sub-command dial.  Cool!

AUTOFOCUS
Speed and accuracy. Autofocus appears to be fast and accurate.  The only time I've seen it hunt is when I was trying to focus on a plain black surface with no texture and a texture-less white surface.  Those would be challenging or impossible for any camera.  In terms of accuracy, the D600 appears to be reasonably accurate but it appears to more likely to misfocus in backlit conditions.

Smarter AF Area Options.  In previous Nikons, I could select any AF-Area (Auto, 3D, single, dynamic 9-point, dynamic 21-point, dynamic 39-point) in combination with any AF Mode (AF-C continuous, AF-S single, or AF-A).  The problem with this is that with AF-S, dynamic AF points and 3D tracking didn't do anything - it was just the same as single-point autofocus.  The D600 remedies this by limiting the available AF-Area modes available under AF-S to Auto and single point only.  It's less confusing.

PLAYBACK
Highlights display.  Like other cameras, you can display the clipped/blown highlights (aka "blinkies").  With the D600, you can show the clipped highlights for luminosity, red channel, green channel or blue channel.  Just press the zoom out button and press left or right.

RGB Histogram display.  I learned that in the RGB histogram display you can also display clipped highlights, also by luminosity, or any of the RGB channels.  But, while the histogram is zoomable, the highlights are not.  In other words, when you zoom in during the RGB histogram display, the histograms will only show the zoomed portion but the highlights will not be shown.

LCD Tint.  There seems to be something not quite right with the LCD colors in my opinion.  It looks kind of warm under some circumstances.  I'm not extra sensitive about this - I've never complained about the LCD color with any other camera I've owned, even point and shoots.  But this one looks different.  I will try to pin this down.

LIVE VIEW PHOTO
[Not] WYSIWYG.  Exposure compensation adjustments can be seen on the Live View Photo mode within a range of +/- 3EV but in dim conditions (e.g. at night), I can only see changes within a range of -3EV to +1EV.

DYNAMIC RANGE; HIGHLIGHT ROLLOFF
I don't have LR4 raw support to test the full extent of the D600's highlight range, but it appears that the D600 has excellent highlight range, much better than I thought.  What is also cool is that the highlights appear to blow gradually (similar to negative film or the Fuji S5, if not quite as smooth) making clipping less obvious.  I will do more tests on these but check this out:
If you look at the sky, you can't easily pinpoint where the detail ends and the clipping begins.  (Actually the histogram seems to show no highlight clipping but I have doubts about the ViewNX2 histogram.)  I will do more experiments on this (among others, to see whether this is true for all channels or just luminosity) but for now I am optimistic about the D600's DR and highlight rolloff.

IS THE D600 MORE DEMANDING?
Along with the D3200 and D3x, the D600 is among the highest resolution Nikon cameras.  Prior to the D3x, Nikon only had cameras with up to 12mp.  Then there was the 24mp D3x but that was considered a specialty camera.  For mainstream shooters, the D7000 broke new ground by upping the resolution to 16mp.  The D4 came out with 16mp, then shortly thereafter was followed by the D800 with a whopping 36mp.

Because the D800 had such high resolution, Nikon released a technical bulletin that cautioned shooters to be careful with their shooting technique in order to take advantage of the D800's resolution.  Thus, you pretty much had to use top-of-the-line lenses, shoot at really high shutter speeds, as much as possible with a tripod, etc. etc.  Diffraction was also visible at wider apertures (though if you resize the image to 12mp or 16mp it wasn't any worse).  That was one of the things that dissuaded me from the D800 - I couldn't shoot like that.

With the D600's 24mp one of my questions was whether it would be more demanding to shoot with it.  My previous cameras had only been 6, 10 or 12mp.  My answer is: it does show imperfections more easily but did not require a significant variation from my current shooting technique:
- Lenses: yes, a lens' weaknesses are more visible at 1:1 zoom.  You can more clearly see chromatic aberration, fringing, that kind of stuff.  Is it bad enough to force me to upgrade my lenses?  No, at least not the ones I have.
- Focus: yes, when a subject is out of focus it is easier to tell at 1:1.  Fortunately, the D600's autofocus appears to get critical focus a majority of the time.  The other times when it is not in critical focus, it still looks ok at my common viewing sizes such as 1600pix.
- Depth of Field:  at 1:1 zoom it is easier to observe when an object is outside the depth of field.  Objects that seem within the DOF at 50% view may be out of the DOF at 1:1.  I just need to be a little more careful with my aperture and focus point.
- Shutter Speed.  These days I try to shoot at as high of a shutter speed as I can get in order to get a sharp photo.  That approach did not require adjustment for the D600.  It also helps that the D600 has an Auto ISO that can be tweaked for 2 stops faster than the 1/focal length rule.
- Tripod.  No I don't feel the need to use a tripod.
- Diffraction Limit: I'm sure it's visible at wider apertures - it's just optics/physics but I haven't noticed it.

If you're thinking to yourself that the high res is more of a burden than a benefit, just consider that you can crop more heavily (therefore carrying fewer lenses is possible), and you can apply noise reduction more effectively.

From what I've read, the D600 is noticeably less demanding than the D800.
Read More
Posted in nikon d600 | No comments

Monday, 24 September 2012

Victory Run

Posted on 13:43 by Unknown
2012092112-DSC_3603-Edit.jpg by mic_ty
2012092112-DSC_3603-Edit.jpg, a photo by mic_ty on Flickr.

Did you catch the space shuttle Endeavor's victory run over California? I was fortunate to have watched the flyby.

I don't usually take sports or animal photos so I don't have a long lens. My longest is the Sigma 50-150, a DX lens. I had a choice of using the D90 or the D600.

If a DX lens is used on a D600, the resolution becomes about 10mp, which is less than the D90's 12mp. Often, for web viewing sizes or small prints, there's no difference between 10 or 12mp. However, I knew that 150mm (225mm equivalent) was too short and I would need to crop heavily. So I chose the D90.

To make sure the exposure wasn't crazy, I used manual exposure and while watiing for the shuttle I set the exposure to avoid blowing highlights. IIRC, I used a very high shutter speed, 1/2500, for maximum sharpness, and an aperture of f/5.6 for adequate DOF, and the D90's base ISO of 200 for low noise.

I didn't have to do much adjustment in Lightroom - this is close to SOOC. I sharpened in Photoshop CS6 using the process used by Ming Thein in his Photoshop Workflow Tutorial (which I will review soon).

Read More
Posted in | No comments

Nikon D600, D800: Beware Using Sigma Lenses

Posted on 12:04 by Unknown
I found out that my Sigma 50 1.4 and Sigma 50-150 HSM II (non-OS)
cannot autofocus in live view with the D600. I have not tested with
other Sigma lenses (sold the 10-20 I had) but I suggest you check to
see if your Sigma lens will work with the D600. I understand there are
problems with Sigma's compatibility with the D800 and possibly the
D7000 as well.

Anyway, it appears newer copies of Sigma lenses are able to autofocus,
and there is a procedure for updating the lenses to allow
autofocusing. However, Sigma didn't want to fix mine unless I could
show them a copy of a receipt showing it was bought in the last 5
years. Even then they won't commit to fixing it unless you send your
lens in first. So you might send it there with a receipt and they
might still refuse to fix it. Terrible product support....!
Read More
Posted in | No comments

Sunday, 23 September 2012

Further Experiments with the Nikon D600's Exposure

Posted on 20:26 by Unknown
This post is a follow up to my earlier post about experiments on the Nikon D600's exposure.  In that post my observation was that the Nikon D600 appeared to have a tendency to not give importance to highlights.  For some shooters, the resulting image looks fine.  For me, I like to protect highlights and there were way too many blown highlights even with ADL (i.e. the exposure is too "aggressive").

I posted about this observation on DPReview.  Here is the thread.  I received many helpful suggestions.  I tried out the suggestions, and I will discuss the results in this post, learning a few things in the process.


METERING METHOD
One suggestion is that I ought to meter a midtone then check the highlights.  That means I find an object in the scene that is in Zone V (middle gray tone, such as grass and dark-toned skin).  I spot meter that object and use manual exposure to adjust the exposure to 0.  Alternatively, in matrix mode, I focus on that object using single point AF.  The camera will attempt to render that object as a middle gray tone.

If a middle gray object is rendered as middle gray then the exposure will indeed be accurate for that object, and every other object in the scene will also fall into the right place.  However, sometimes the scene's dynamic range is outside the range of the sensor, so to avoid losing highlights, I should also spot meter any relevant highlights in the scene to see how far above Zone V they are, and adjust exposure downward as necessary to protect the highlight.  (If I do this, I need to alter the tone curve in post-processing to bring the midtones back up.)

If this method works for you, then it is a fairly accurate method and you don't need to read any further.  In my case, I usually shoot candid portraits of my family (wife and two kids).  They don't usually stay put in one place, making this method hard for me to implement.

PERILS OF AUTO AF
In the previous experiment, I used Auto-Area AF.  That means the camera automatically selects the object to focus on.  The potential problem with this is that the camera may choose an object that is dark-toned or bright-toned and the matrix metering would be influenced by the tone of that object.  So, blindly trusting the Auto AF may result in an unexpected exposure.

However, in my case, when I use Auto AF I don't just accept whatever AF point the camera gives me.  Rather, I have an area that I want to focus on, even before I half-press the shutter.  When I half-press the shutter and the camera chooses the area to focus on, I see whether it is what I intended or not.  If it is as I intended, then I go ahead and shoot.  If it is not as I intended, I refocus.  I do that until the camera chooses the area I want, not some random area.  I find that, with practice, this method can be faster than single point AF.  I will post about that next time.

For purposes of this experiment, the fact that I used Auto AF as opposed to single point AF does not have an impact because I made sure the camera chose an AF point that would be the same as if I had chosen single point AF anyway.  It's just a different way to get to the same end result.

AF POINT POSITION
Another suggestion was that the reason the previous experiment showed exposure is because the AF point was positioned on the black Ferrari, which is of course a dark-toned subject.  It is well known that Nikon's Matrix Metering takes into account the entire scene but gives more weight to the object that is focused upon (because it is likely to be the subject).  In the case of the Ferrari, the AF point was indeed on the car, as I intended.  Here it is (the AF points for the other shots were similar).

One explanation to the overexposure is that because the Ferrari is dark-toned and the AF points were on the Ferrari, therefore the camera tried to make the Ferrari a midtone instead of a shadow.

I tried to take a shot of a scene yesterday to see how much the scene metering would be influenced my the selection of the object to be in focus.

I tried a yellow pipe in shade...

dark green bushes in shade...

a sunlit gray wall (I focused and recomposed a bit because the AF point couldn't reach it)

I chose Program exposure.  The exposure was the same in each case:  f/7.1, 1/200, ISO 100.  This was unexpected for me.  I thought the exposure would be influenced by the focal point, so I ran more tests.  This time I used a Fotodiox Trifold Reflector as a target. It has a gray card, black card, and white card (as well as silver reflectors on the other side).

I first ran the test with just the trifold reflector, but the camera couldn't focus on the black or gray sides.  I added a black leather jacket and a white undershirt.  With the AF Point on the gray card, the exposure was 1600 ISO, f/5.6, 1/30:


With the AF Point on the black leather jacket, the exposure was still 1600 ISO, f/5.6, 1/30:

However, with the AF Point on the white shirt, the exposure did change 1 stop to 1600 ISO, f/5.6, 1/60:

Looking back at these tests, I did not observe a change in exposure when the AF point was on a dark-toned object (doesn't mean it doesn't ever happen; just that I didn't observe it on these tests).  I did observe a change in exposure when the AF point was on a light-toned object.  Therefore we ought to pay attention to the AF point location because it may affect the exposure.

As an aside, in case you're wondering, what if instead of autofocusing, I just used manual focus override (I was using the 24-70 with M/A mode) but kept the AF point over the black or white card?  I did try that and in that case: 1) the camera did not record the AF point - as though I had used manual exposure; 2) there was no change in exposure no matter where the overriden AF point was.


TRYING OUT THE SUGGESTIONS
So anyway I had taken more shots yesterday, this time using some of the suggestions from the DPReview forum.  My subject was my son, whose complexion probably falls into Zone V and I used single AF point.  Here are three test shots where I was able to focus on a midtoned subject.  And a screen capture showing the clipped highlights.

Test shot 1:


Test shot 2:


Test shot 3:


As we can see there are still plenty of clipped highlights.  In the previous post where the subject was a black Ferrari, one hypothesis was that the exposure was weighted toward the black Ferrari, which fooled the camera into overexposure, thus the abundance of blown highlights.  In these examples, the focal point was on a midtone, but there are still many blown highlights.

The exposures above are not necessarily wrong. Like I said in the last post, if you don't postprocess at all, the images look fine (lacking in contrast because I intentionally chose the Neutral picture style, but the exposure of the subject is more or less correct).

However, it appears that the camera doesn't care much about protecting highlights.  That is a concern for shooters like me who postprocess their images and who care about highlights (some shooters don't).  For shooters like me, I would describe this kind of exposure as "aggressive."

NOT ALL IS LOST
When I looked at the images above and their clipped highlights, it seemed disappointing because of the amount of clipping, even in relevant areas like the skin (the red channel was clipped).  But what I found is that the clipping display is not accurate and that there is indeed more recoverable information than is shown by the clipping display.

Sample 1:

Clipped highlights:

But if instead of highlight recovery I use digital exposure compensation, here's what I get (in this case -1 EC).
No clipped highlights at all.

And what's strange is if I undo the digital exposure compensation, here are the clipped highlights:


Sample 2:

Clipped highlights:

Digital exposure comp -2 [barely any clipped highlights :) ]:

Undoing the digital exposure compensation:

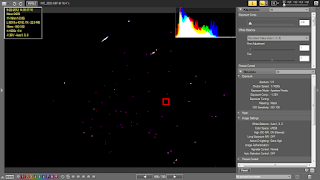
I found out that what ViewNX2 was doing was to take the initial display of the clipped highlights and histogram from the JPEG image (!).  Here's the JPEG's clipped highlights - identical to that of the initial display of clipped highlights and histogram:

Sample 3:

Initial clipped highlights from Raw:

Clipped highlights from JPEG for comparison:

With -2EV exposure compensation applied - virtually no clipped highlights.

Exposure compensation undone.

So, after all, the D600 wasn't losing anywhere near as much info as I previously thought.  Indeed, it was great that the camera appeared to be maximizing the amount of light, short of blowing relevant highlights, i.e., exposing to the right.  This could be awesome for minimizing noise.

However, in low-contrast scenes, it appears that the histogram is not biased to the right.  In the test shot below, you can see that the camera placed the tones toward the left side of the histogram even though there was plenty of room for highlights.


To my eyes, this was close to the actual amount of light in the scene.  If the camera were exposing to the right, then the histogram would be bunched toward the right side but it is not.  So, rather than ETTR, I think the camera is attempting to get the 'correct' exposure of the subject.


In high-contrast situations, the D600's attempt to get the "correct" exposure of the subject may result in the loss of some highlights (even with Active D-Lighting).  Nonetheless, you could say that the D600's exposure is correct in the sense that the subject will be "correctly" exposed.  For shooters with that perspective, the D600's metering algorithm is perfectly fine.


AN ALTERNATIVE APPROACH


On the other hand, because I typically postprocess shots, then my preferred type of exposure is the one that maximizes the amount of information on the sensor.  For shooters like me, you need to be aware that it appears the D600 will prefer to get the "correct" exposure of the subject rather than try to fit the dynamic range of the scene within the sensor's range.  Fortunately, the D600 appears to have more highlight range than was previously apparent, and therefore it is actually able to preserve much of the highlights.

However, if I truly want to fit the scene's range into the sensor's range, a more conservative method would be to just avoid blown highlights, and let the rest of the tones fall where they may.


Here is a shot with the D600's automatic exposure:


Here are the clipped highlights after -2EV exposure compensation applied in ViewNX2:

Here is another shot of the same scene.  This one had -1.3EV dialed in at the time of shooting.


Here are the clipped highlights - without any digital exposure compensation applied.

With further exposure compensation in post, all but the brightest specular highlights were recovered, i.e., the scene's range was able to fit in the sensor's range.

I could even reduce the exposure compensation adjustment and still retain every relevant detail.  This is at -1.5 exposure comp:

Using this method in a low-contrast scene, the image would appear overexposed but that is fine because the sensor was exposed to the maximum amount of light possible.  Bringing down the exposure would result in a lower-noise image than a normally-exposed image.  In a high-contrast scene, this method may make the subject look underexposed but the D600 appears to have exceptional shadow recovery abilities, therefore bringing the exposure back up would not be difficult for a D600 image.  I would also prefer to have a little more noise than to lose highlights that would otherwise be within the sensor's range.
Read More
Posted in clipping, D600, ettr, exposure, highlights, histogram, nikon, view nx2 | No comments
Newer Posts Older Posts Home
Subscribe to: Posts (Atom)

Popular Posts

  • Olympus E-PL3 with 14-42 Lens $199; Moving from Nikon to MFT?
    I saw on 43rumors.com that the Olympus E-PL3 was being sold at Newegg for just $199 with the 14-42 kit lens included.  I checked it out and...
  • Exploring 3D Photography with the Loreo 3D Lens in a Cap
    When I hear of 3D photos or videos, my first impression is that it's gimmicky.  Interesting for one or two shots maybe and then after th...
  • Double Camera Strap & BlackRapid RS-5 Review
    This is a review of two camera straps: - The first is a double camera strap that's -- let's be blunt -- a knockoff of the BlackRapid...
  • 2x Lowepro Review: Toploader Zoom 45 AW & 55 AW + Unraveling The SlipLock™ Mystery
    Left: Lowepro Toploader Zoom 55AW, Right: 45AW, Middle: Canon 60D + 15-85 Welcome to a new rare photography accessory review as I'd lik...
  • Toys for the Big Kids: Speedlight Softbox
    In this post, we will have a look at a softbox for speedlights.  This post is part of a series that will cover equipment reviews for committ...
  • A Couple Of Yashica Oldies
    Yashica Electro 35 GTN + Yashica ST-7   How many of you know the above camera? Have you seen such a tripod before? Hit the jump for a flas...
  • Sigma USB dock available for preorder
    B&H is offering the Sigma USB dock for preorder for $59 + s/h , due for shipping on May 18. The dock allows you to update your firmwar...
  • Canon Professional Network
    I didn't know about Canon Professional Network until Syl Arena recently blogged about his 4-part article on speedlites.  I took a look ...
  • Minimizing Nikon D5200 and D7100 banding; Mysteries Remain
    Many people have noted that the Nikon D5200 and Nikon D7100 have banding in the shadows when the exposure is pushed.  In this post I'll ...
  • Going Crazy With Tripods
    My Tabletop Tripod Trio I love tripods, I go all soft and wobbly when I see attractive looking ones, so here is my story with tripods, inclu...

Categories

  • "alien bee"
  • "april fool's"
  • "ring flash"
  • "yong nuo"
  • 1"
  • 1/1.7"
  • 10-17
  • 10-20
  • 11-16
  • 15-85mm
  • 15z
  • 17-50 vc
  • 190cx pro3
  • 2.8
  • 2.8G
  • 2/3"
  • 200 f2.8
  • 200 L
  • 200mm
  • 200mm f/2.8
  • 200mm f/2.8 L II
  • 200mm f2.8
  • 200mm f28
  • 200mm f28 L II
  • 2012
  • 2013
  • 23 Samsung led
  • 24-105 f4
  • 24-70
  • 25 1.4
  • 28-105
  • 28-70
  • 35mm
  • 35mm f/2
  • 35mm f2
  • 360
  • 3rd party
  • 4.1
  • 4/3
  • 40 pancake
  • 40 panckae
  • 40 stm
  • 40-150R
  • 40mm f/2.8
  • 430EX
  • 43rumors
  • 45 18
  • 45 AW
  • 4x4
  • 50 14
  • 50 f14
  • 50-150
  • 50mm
  • 50mm f/1.4
  • 55 AW
  • 55-250
  • 550D
  • 55aw
  • 560ex
  • 580 ex ii
  • 580EX
  • 580EX II
  • 5d
  • 5d mark 2
  • 5d mark 3
  • 5D Mark II
  • 5d mark iii
  • 5d2
  • 600d
  • 600ex-rt
  • 60d
  • 60fps
  • 60mm macro
  • 650d
  • 6d
  • 7.5mm
  • 720p
  • 75 f1.8
  • 85mm f1.8
  • 8x12
  • abbc
  • abstract
  • accuracy
  • active d-lighting
  • adjustment
  • adl
  • AF
  • af point
  • AF Point Expansion
  • aftermarket
  • airport
  • alexandria
  • alien bee
  • alien bees
  • alienbee
  • alienbees
  • alternative
  • ambient
  • ambient light
  • angle
  • aperture priority
  • APS-C
  • apsc
  • assignment
  • auto focus
  • auto white balance
  • autofocus
  • AWB
  • awl
  • back button focus
  • background
  • background blur
  • backlight
  • backlighting
  • backlit
  • bad behavior
  • bad photography
  • balance
  • bare flash
  • battery
  • BBF
  • beach
  • beams
  • beauty dish
  • bellagio
  • BFT
  • birthday
  • black
  • black foamie thing
  • black rapid
  • blackrapid
  • blogs
  • blower
  • blown
  • blur
  • bokeh
  • bounce
  • bounce card
  • bounce flash
  • bower
  • bracket
  • brightness
  • brilliance
  • brolly grip
  • brother
  • build
  • burst mode
  • butterflies
  • butterfly
  • C.Fn
  • cable
  • cake
  • camera
  • camera bag
  • camera releases
  • camera settings
  • candle
  • candlelight
  • canon
  • Canon 100mm Macro L IS
  • canon 200mm f28L
  • canon 24-105
  • canon 40 stm
  • canon 40mm f28 pancake
  • canon 50
  • canon 50 1.4
  • canon 55-250
  • canon 5d mark 2
  • canon 5d mark ii
  • canon 5d mark iii
  • canon 5d2
  • canon 5d3
  • Canon 60d
  • canon 6d
  • canon g11
  • canon speedlite
  • car
  • carbon fiber
  • catch lights
  • cheap
  • christmas
  • clean
  • cleaning
  • clipped
  • clipping
  • close up
  • clouds
  • cls
  • clustered
  • color
  • compact
  • comparison
  • composition
  • compositional aid
  • construction
  • contrast
  • cooler master
  • copyright
  • core i7
  • cowboy
  • cowboystudio
  • cpl
  • creepy
  • crop factor
  • crop sensor
  • cyber commander
  • cybersync
  • d-lux
  • d-lux5
  • d3
  • d300
  • D5100
  • D600
  • d70
  • d700
  • D7100
  • d90
  • dark background
  • david hobby
  • daylight
  • dell 24 inch
  • depth of field
  • desert
  • diamond
  • digital
  • directional
  • distance
  • diy
  • dlux
  • dlux5
  • dng
  • double
  • dslr
  • DSLR bag
  • dual
  • dust
  • dx
  • dynamic range
  • earthquake
  • ebay
  • ebay trigger
  • eclipse
  • editing
  • EF 40mm f/2.8
  • ef-s 60mm
  • einstein
  • Electro GN
  • engagement
  • environmental portrait
  • ep5
  • equipment
  • ETTL
  • ettr
  • europe
  • events
  • evf
  • ex600
  • existing light
  • expensive
  • exposing to the right
  • exposure
  • f/3.5
  • family
  • faq
  • fasten-r3
  • favorite
  • fayoum
  • Fayoum desert
  • fill
  • fill light
  • film
  • filter
  • finepix
  • fire
  • fireplace
  • first impressions
  • fish-eye
  • fisheye
  • fix
  • FL600R
  • flash
  • flash bounce
  • flash sync
  • flash trigger
  • flashmeter
  • flashright
  • focal length
  • focus
  • food
  • football
  • fotodiox
  • fountain
  • freexwire
  • fuji
  • fujifilm
  • Full Frame
  • fun
  • fx
  • galaxy s 3
  • galaxy s4
  • gecko
  • GeForce gtx570 OC
  • gel
  • geomag
  • ggs
  • ghost
  • gigabyte z77 ud3h
  • glass
  • gn
  • Goodbye
  • gorillapod
  • gregg
  • grid
  • grip
  • group shot
  • gskill ripjaws
  • guide
  • guide number
  • gx7
  • haf 912
  • handheld
  • hands on
  • hands-on
  • hdr
  • head shot
  • hiatus
  • high dynamic range
  • high iso
  • high speed sync
  • highlight
  • highlights
  • histogram
  • holder
  • holiday
  • home
  • home made
  • Honda civic
  • honeycomb
  • hotshoe
  • hoya
  • humor
  • i9500
  • id
  • image quality
  • impressions
  • indoor flash
  • infrared
  • infringement
  • insects
  • inverse square law
  • japan
  • jewel
  • jewelry
  • joby head
  • jpeg
  • Kingston hyperX SSD
  • kirk tuck
  • kl bird park
  • krakow
  • kuala lumpur
  • las vegas
  • lastolite
  • laurence kim
  • lax
  • lcd
  • leica
  • lens
  • lens cap
  • lens compression
  • lens review
  • lenses
  • lenspen
  • lensrentals
  • light
  • light painting
  • lighting
  • lightroom
  • lightroom 4
  • lightroom 5
  • location
  • long
  • long exposure
  • los angeles
  • low key
  • low light
  • Lowepro
  • Lowepro 45aw
  • Lowepro 55aw
  • lr4
  • lumiquest softbox III
  • lumix
  • lx-5
  • lx5
  • m4/3
  • m43
  • macro
  • macro adapter
  • makernotes
  • malaysia
  • manfrotto
  • manfrotto tripod
  • manual
  • mark ii
  • mark iii
  • MFT
  • mft. micro four thirds
  • micro four thirds
  • mielec
  • migration
  • mini review
  • mirror
  • mirror-less
  • mirrorless
  • mobile
  • modification
  • modifier
  • monobloc
  • monoblock
  • monolight
  • motion
  • motion blur
  • multi function printer
  • multiple
  • nano crystal
  • natural light
  • neil
  • Neil VN
  • niekerk
  • nikkor
  • nikon
  • nikon d600
  • noise
  • off camera
  • oil
  • olympus
  • olympus 12-50
  • Olympus 40-150
  • olympus 45
  • olympus 45 18
  • olympus om-d em-5
  • om-d
  • omd
  • omd em1
  • omd em5
  • omd em6
  • on-camera
  • one inch
  • overexposure
  • overpowering sun
  • panasonic
  • panasonic leica 25 14
  • pancake
  • party
  • passport
  • pastries
  • pastry
  • pc
  • pentax
  • peter
  • phone
  • phone photography
  • photo
  • photo tips
  • photography
  • photokina
  • photomerge
  • photoshop
  • photoshop elements
  • planning
  • pocketwizard
  • point and shoot
  • poland
  • polarizer
  • popup
  • popup flash
  • portrait
  • post processing
  • post-processing
  • postprocessing
  • product
  • product shots
  • profile
  • protection
  • protector
  • quad-flash
  • quantum
  • radiopopper
  • raid 0
  • Range finder
  • raw
  • raw editing
  • raw+jpeg
  • rays
  • real
  • recovery
  • reflection
  • reflector
  • resources
  • restaurant
  • review
  • rf-603
  • rf603
  • ricoh
  • ring
  • ringflash
  • robin wong
  • roger cicala
  • rogue
  • rokinon
  • roll off
  • roll-off
  • rolloff
  • rs-5
  • rs-7
  • rumors
  • s5
  • s5 pro
  • s5pro
  • samples
  • samsung
  • samyang
  • sb-26
  • sb-80
  • sb26
  • sb800
  • screen protector
  • sensor
  • sensor swab
  • sensorclear
  • sensorklean
  • sensorklear
  • separation
  • shadow
  • shadow pulling
  • shadows
  • shards
  • sharpening
  • sharpness
  • shoot through
  • shoot-through
  • shoot-thru
  • shooting technique
  • shootout
  • short
  • sigma
  • sigma 50-150
  • skin tones
  • skylight
  • Slik Mini Tripod
  • slingshot
  • slow
  • small
  • smooth
  • soft
  • softbox
  • sony
  • sony a99
  • sony rx100
  • sony t10
  • specular
  • speed
  • speedlight
  • speedlite
  • spinlight
  • spots
  • standard
  • stockholm
  • story
  • strap
  • strobe
  • strobist
  • studio
  • studio strobe
  • subject
  • substitute
  • sudden
  • summilux
  • sunrise
  • sunset
  • sweden
  • swivel
  • sync speed
  • t2i
  • t3i
  • Table top tripod
  • tamron
  • technique
  • techniques
  • tele
  • telephoto
  • thinktank retrospective 5
  • third party
  • tips
  • tokina
  • tonal
  • tonality
  • tone curve
  • toploader
  • toys
  • translucent
  • travel photography
  • tri-flash
  • Tribute
  • trifold
  • trigger
  • tripod
  • truth
  • ttl
  • TTL Cord
  • u43
  • ultra-wide
  • ultrawide
  • umbrella
  • underexposure
  • unlimited sync speed
  • up-rise
  • up-rise 15z
  • update
  • uprise
  • USM
  • uv
  • uwa
  • vanguard
  • versus
  • vertical
  • video
  • view nx2
  • visual science lab
  • vs
  • wadi rayan
  • wd caviar black
  • web
  • weekend
  • westin
  • white balance
  • white lightning
  • wide
  • wide angle
  • window
  • wireless
  • wireless flash
  • wireless release
  • wireless trigger
  • workflow
  • Yashica
  • yashica gtn
  • yashica st-7
  • yn-560
  • yn-560ex
  • yn-ex600
  • yn560
  • yong nuo
  • yongnuo
  • zack arias
  • zoom
  • zoom toploader
  • zuiko

Blog Archive

  • ►  2013 (165)
    • ►  December (5)
    • ►  November (10)
    • ►  October (8)
    • ►  September (7)
    • ►  August (3)
    • ►  July (11)
    • ►  June (10)
    • ►  May (15)
    • ►  April (19)
    • ►  March (33)
    • ►  February (24)
    • ►  January (20)
  • ▼  2012 (193)
    • ►  December (17)
    • ►  November (22)
    • ►  October (34)
    • ▼  September (47)
      • Nikon D600 Review Update: Instant Zoom workaround
      • DIY Adjustment of Your Sigma Lens via USB Dock
      • Nikon D600 DNG raw files show ridiculous Lightroom...
      • Sudden slow motion effect using a Nikon D600
      • Discount on Spinlight Substitute Flashright
      • Nikon D600 raw and JPEG high ISO studio comparison...
      • Just To Let You Know
      • Quick Review: Great Light Easy Light by Kevin Clark
      • Nikon D600 Hands-On Review Part 2
      • 9/25/12 Updates to Nikon D600 Hands-On Review Part 1
      • Victory Run
      • Nikon D600, D800: Beware Using Sigma Lenses
      • Further Experiments with the Nikon D600's Exposure
      • Digital Face Powder ShineOff Discount
      • Light Painting A Honda Civic
      • Nikon D600 manual now available on Nikon USA
      • Experiments on Nikon D600 Exposure
      • Updates to Nikon D600 Review
      • Mobile Phone Photography - Part 1: HDR
      • Nikon D600 Manual Now Online
      • The Full-Frame, Large Sensor Bonanza!!!
      • CORRECTION: Nikon D600 Subject-Tracking AF and Fac...
      • Nikon D600 Hands-On Review (Part 1)
      • Nikon D600 Order Update
      • Comment on Canon 6D Video
      • Compact Cameras to Watch at Photokina
      • Nikon D600 videos (samples and reviews)
      • Canon 6D specs; Nikon D600 compared
      • Nikon D600 High ISO noise comparisons
      • Nikon D600 Raw samples by Imaging Resource
      • Guide: Building a Photo/Video Editing PC
      • Full-resolution Nikon D600 Samples at All ISOs
      • Canon Powershot G15
      • Then and Now
      • UHS-1 SD Cards for your Nikon D600
      • The Nikon D600's Tragic Flaw
      • Nikon D600 Release 9/18/12; Amazon.com accepting N...
      • Nikon D600 Officially Announced for $2099
      • I'm calling BS on the Malaysian forum's Nikon D600...
      • Who Are You?
      • Nikon D600 specs
      • Nikon D600 Practically Confirmed; Offers Wireless
      • Yongnuo YN-560EX (EX600) Review
      • Comments on Samyang T-S lens
      • Cheap Wireless TTL? Aokatec AK-TTL Review
      • Dell Inspiron 14z Laptop for Photography
      • A Lighting Opportunity You Shouldn't Miss
    • ►  August (12)
    • ►  July (11)
    • ►  June (10)
    • ►  May (13)
    • ►  April (13)
    • ►  March (8)
    • ►  February (1)
    • ►  January (5)
  • ►  2011 (141)
    • ►  December (8)
    • ►  November (8)
    • ►  October (7)
    • ►  September (9)
    • ►  August (13)
    • ►  July (13)
    • ►  June (19)
    • ►  May (17)
    • ►  April (25)
    • ►  March (22)
Powered by Blogger.

About Me

Unknown
View my complete profile