Better Family Photos

  • Subscribe to our RSS feed.
  • Twitter
  • StumbleUpon
  • Reddit
  • Facebook
  • Digg

Sunday, 29 July 2012

Capturing Epic Sunrises and Sunsets

Posted on 20:14 by Unknown


Epic sunrise or sunset shots -- the kind where the sky is ablaze with hues of red, yellow and lavender -- don't happen purely by luck.  We can't control the weather but we can pay attention to the kinds of conditions that are conducive to producing glorious sunrises and sunsets.  Here are some techniques I learned for capturing sunrises and sunsets.

1.  Gotta have some clouds.  Just like a movie projector needs a screen, the sun needs clouds to catch the light from sunrises and sunsets.

2.  Cleaner air is better.  I recall learning at school that sunrises and sunsets are red due to selective scattering of sunlight passing through the air molecules.  I therefore thought that with some air pollution, sunrises and sunsets would be more impressive.  I was wrong.  The problem is that particles from air pollution tend to vary in size, so rather than scattering only a certain portion (e.g. blue and green) of the visible spectrum, most of the spectrum is scattered, so that air pollution produces a grayish light.

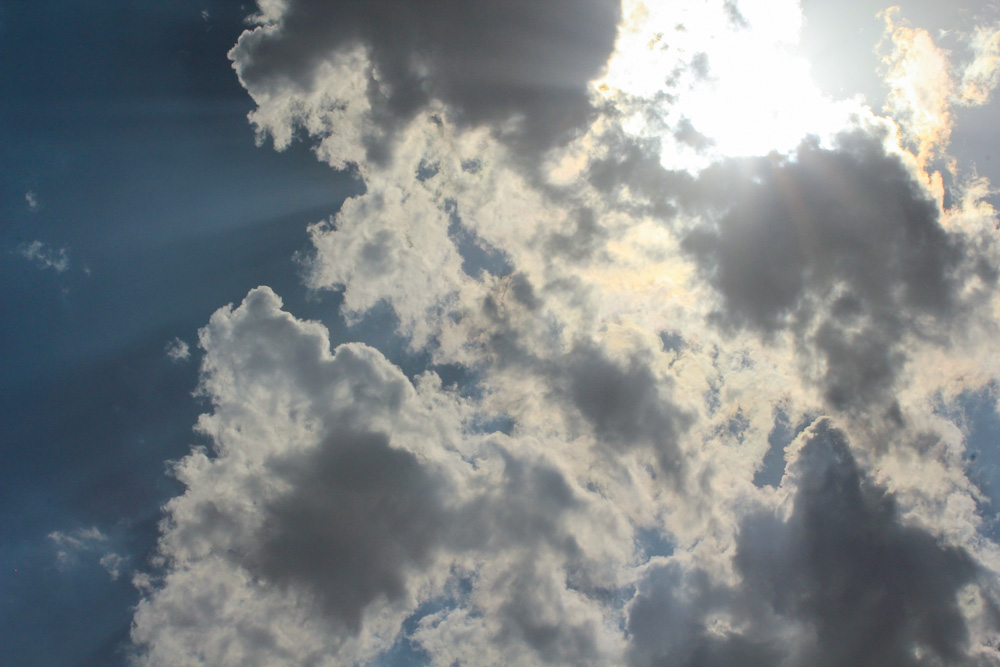
3. High or medium altitude clouds are usually better.  A couple of reasons: First, there is more air pollution at low altitudes.  Sunlight illuminating low clouds has to pass through a thick layer of this low-hanging air pollution, making the light more grayish.  On the other hand, sunlight reaching higher clouds (cirrus, altocumulus) has less air pollution to scatter it.  Second, even assuming there is no air pollution, higher clouds can catch the rays of the sun when the sun is lower in the horizon.  At those steeper angles, the sunlight has to travel a longer distance to reach the clouds, resulting in more scattering and thus shifting the color to a deeper red.


Low altitude clouds include the cumulus and stratus family of clouds.  In the picture below you can see that with cumulus clouds, even the peak of sunset colors is usually not impressive.

High altitude clouds include the cirrus family of clouds.  The medium altitude clouds I like are the altocumulus clouds.  (Altostratus is also medium altitude but is formless, like a fog in the sky).   The shot below is a sample of a sunset with altocumulus clouds (unfortunately all I had with me at the time was a camera phone).


4.  No cloud cover.  Even if you have high or medium altitude clouds, too many low-hanging clouds can block the view of the high and medium altitude clouds.  If there are stratus clouds (the fog-like clouds), I usually don't even bother to check what the sunrise or sunset looks like.

5.  Timing.  Assuming there are high or medium altitude clouds and no low-hanging clouds, it is best to start shooting about 15 to 30 minutes before sunrise or after sunset.  With the sun below the horizon, the sunlight has to travel a little farther to reach the clouds, scattering more of the greens and blues and casting a deeper red light on the clouds.

SAMPLES
A couple of weeks ago, I noticed that we had cirrus and altocmulus clouds in the sky without too many low-hanging clouds, close to sunset.  Conditions like those seem to be rare in our area, occurring only a handful of times in a year.  I quickly drove to the airport and waited at a popular local spot for watching planes land. Fortunately I was rewarded with a beautiful sunset, and I took some photos of planes landing (my first time to try that).

The series of shots below are arranged in chronological order.  The first couple of shots were taken at around sunset.  You can see that after sunset, the colors become more intense before becoming darker.


BTW, for my equipment I used the Fuji S5 (I thought the S5's unparalleled highlight range would help protect the highlight details in the clouds) and the Tokina 11-16.

FOR FURTHER READING
The Colors of Sunset and Twilight
Fuji S5 Review
Tokina 11-16 Review

Read More
Posted in 11-16, clouds, fuji, s5, s5 pro, s5pro, sunrise, sunset, techniques, tokina | No comments

Monday, 23 July 2012

Updated Status of D600 Preorder

Posted on 17:19 by Unknown
http://betterfamilyphotos.blogspot.com/2012/07/how-i-preordered-nikon-d600.html
Read More
Posted in | No comments

Formal Portraits with a Flashmeter

Posted on 03:17 by Unknown
Over the weekend I had the opportunity to take portraits for two beautiful families.  I'll discuss the lighting setup as well as the equipment I used, including the Paul C. Buff CyberCommander, which not only controls Paul Buff strobes but also functions as a flashmeter.


My friend asked me to take her daughter's graduation portrait.  It turned out that the official photographer for their school took everyone's photos but omitted the cap.  They wanted to charge extra for another portrait session with the cap.  This irked my friend (rightly so, in my opinion) and she asked if I could instead take her daughter's portrait.

SETUP: LIGHTS and LENS
The shot was to be taken indoors in an area about 10 ft. x 10 ft, with a ceiling height of about 8 ft.  Because this was intended to be a formal portrait, I wanted to use a traditional setup with key light, fill light, hair light, and background light:
  • Key light - this is the primary light on the subject and creates the pattern of highlights and shadows.
  • Fill light - this light illuminates the shadows created by the key light.  Depending on its position, it often also contributes to the illumination on the subject.
  • Hair light - this light helps separate the subject from the background and is usually placed above and behind the subject.
  • Background light - illuminates the background.  Adds separation.
I wanted to create a very softly-lit (not edgy) portrait.  For my key, I used a 43-inch umbrellabox / softbrella (it looks like a reflective umbrella but with a diffusion sock, thus somewhat resembling a round softbox) with an SB-800.  The umbrellabox has a more controlled light compared to a shoot-through umbrella, though not as controlled as a beauty dish.  I didn't think we would have a lot of time to shoot, so I positioned the key light for maximum flexibility, about 3 feet above the camera, slightly to camera left, mounting it on a Linco 8310 light stand.

For the fill light, I wanted it to be as soft as possible so as not to create its own shadows.  I chose a 60-inch shoot-through umbrella, positioned slightly to camera right, at about the camera's height.  To illuminate this large light source evenly, I used an AlienBee B1600 monobloc, also mounted on a Linco 8310 light stand.

For the hair light, I used a Nikon SB-800.  To position it above and behind the subject without the stand being seen in the shot, I used a boom stand.  Because the hair light was going to be pointed somewhat toward the camera's direction, I didn't want it to create flare which would reduce the contrast or create ghosting therefore I used a honeycomb grid on the SB-800.

For the background light, I used an old Nikon SB-26, which I just placed on the floor, aimed at the 5 ft x 7 ft popup background.  I varied the intensity between the shots to achieve different effects.

Here's what the setup looked like.


For my lens, I chose a telephoto lens to have a smaller field of view so that I wouldn't capture the area outside the pop-up background, and I could shoot in between the light stands without the stands or umbrellas being in the shot.  I used the Nikkor 70-200 VR with the Nikon D90.

USING THE FLASHMETER
Because this was a formal portrait, I wanted to be very precise with the exposure.  To do that, I used a flashmeter.  I don't have a dedicated flashmeter.  Instead I use the flashmeter function of the Paul C. Buff CyberCommander, the dedicated radio trigger for Paul Buff strobes.

About the CyberCommander
Besides being able to remotely adjust Paul Buff strobes, the CC has several awesome features to make setting up very convenient.  First, it can control up to 16 different light sources.  When you tell the CC which light source(s) you're using (Einstein, X3200, B1600, ABR800 or whatever), it will know the output range (in watt-seconds), flash duration (which varies with power), and color temperature (which in the case of non-Einstein monoblocs, can vary quite a bit with power level).  Each light source can be assigned specific names such as fill light, background light, etc. 

The CC has a built-in flashmeter to allow you to take measurements in 10ths of a stop.  If the setting is not where you want it, you can remotely adjust the power level (and even the modeling light output of any light source) - all while remaining at the subject's position.  Plus you can measure and adjust any single light source or any combination of lights.  There are several remote adjustment options out there, just as there are several flashmeters available, but having the two together makes it extremely convenient to set up lights.

BTW, did I mention you can also use the CC as an incident light meter?  OK, enough about the CC - you'll just have to wait for my review.  Back to our show.

Flashmeter
The primary benefit of a flashmeter is the precision of the exposure.  As we know, the camera's reflective meter can be fooled, and when using manual flash, can't be used at all.  Gauging the exposure from the image preview on the LCD screen is convenient but wildly inaccurate.  I often need to adjust exposure in postprocessing when I do that.  A step above that would be using the blinkies, which can help me avoid blowing out highlights (even then sometimes it's inaccurate), but it doesn't necessarily mean that the exposure is correct.  Finally, using the histogram to measure exposure can be misleading.

Besides nailing exposure, another benefit of a flashmeter is that I can set the lighting ratios more precisely.  In portraiture, the ratio of the key light to the fill light is very important and can determine the primary mood of the portrait.  Generally, the stronger the contrast between the intensity of the key and fill, the more dramatic and moody the portrait becomes.

To use the CC's flashmeter function, I just input the ISO and shutter speed I'm using.  I specify the light I'm measuring, aim the flashmeter dome, then press the button to take a measurement.  The flashmeter will indicate the aperture for the given ISO and shutter speed.  As for aiming the dome, there are varying opinions about this.  Some say to point the dome at the light source while others say to point it at the camera.  I'm not about to try to resolve that debate here.  In my case I positioned it at my chin and pointed it at the camera.

First I decided what aperture I wanted to use for the final shot.  I decided on an aperture of f/5.6.  An aperture of f/8 would have given me slightly better sharpness and a deeper depth of field but it would require the speedlights to work harder.  If the aperture had been wider, I was worried that the depth of field would not be enough to keep the entire head in focus, given the long focal lengths I was using.  I thought f/5.6 would be a reasonable compromise.

Having decided the aperture for the shot, I measured the fill light.  Initially, I decided to set it at f/4.0.  That meant that the shadow would be at f/4.0, i.e., one stop less than the subject's highlight at f/5.6, which means the ratio is 2:1.  I then adjusted the key light until my overall measurement (key + fill) was at f/5.6.  BTW, this meant that the key light by itself would have also been at f/4.0.  The highlights of the subject would be illuminated by both the fill light and the key light, bringing their exposure up to f/5.6.

As for the hair light and background light, they weren't linked to the CC, so I just had to adjust them by estimate.

RESULTS

First, I took shots of my friend's daughter.


We had time to take some shots of my friend.

They also asked if their neighbor could take a portrait.  I didn't expect this but I figured we could use the same setup.  After a few shots, I thought a white background would look better, so I just flipped the popup background and increased the intensity of the background light.

Finally, we took a few shots of their dogs.  The larger one posed like a champ.  The poor little one though was really scared of being high up on a chair.


OBSERVATIONS
Is having a flashmeter a necessity?  I don't believe so.  There are many situations when using one is not possible (e.g. events), and we do just fine after all.  On the other hand, for setup shots, having a flashmeter makes setting up faster and postprocessing simpler.

RELATED POSTS:
  • Lighting technique:
    • Intro to Basic Lighting for Family Photographers
    • Quality vs. Contrast: Soft Light Ain't All That
    • TTL vs. Manual Flash: a False Dilemma
    • Therapy for TTL Addiction: How to Use Manual Flash
  • Lenses: Sigma 50-150 is TIGHT and Controlling Depth of Field
  • AlienBees: Intro to Studio Strobes and Are you ready for AlienBees?
  • Old hotshoe flashes: Old School
  • Triggering options: Triggering Hotshoe Flashes and Remote Adjustment Radio Trigger Options
Read More
Posted in alien bee, alienbee, cyber commander, cybersync, flashmeter, lighting, portrait | No comments

Friday, 20 July 2012

Controlling Depth of Field

Posted on 00:06 by Unknown
Do you like having a shallow depth of field?  As shallow (ahem) as it sounds, I confess, I still do.  That's why all but a couple of the lenses I have had have a maximum aperture of f/2.8 or wider.

Meanwhile, take a look at these shots (all were taken with a Nikon D3).  Care to estimate the apertures I used?  [Don't cheat with the EXIF... :) ]

Sample #1:


Sample #2:


How about these second set of samples?

Sample #3:


Sample #4:


Hit the jump for the answers.


Sample #1 appears to have a shallow depth of field.  However the aperture I used was f/6.3.
Sample #2 appears to have a deep depth of field.  Yet, the aperture was at f/1.4.

In the second pair of samples, the apertures were taken a full stop apart, yet the images appear to have a similar depth of field.
Sample #3 was at f/4.0
Sample #4 was at f/2.8.

My point with these examples is that aperture is not always the most significant factor for controlling depth of field.  Depth of field is also influenced by focal length (the actual focal length, not the equivalent focal length), distance to the subject, and the circle of confusion (which is partly based on the sensor size and partly based on the viewing size).

Take a look at these comparisons (assume full frame camera for now).

Let's start with a baseline:
Focal length: 105mm
Distance: 10 ft.
Aperture: f/5.6
The resulting depth of field is 0.91 feet

Let's see how quickly DOF changes if we alter focal length (let's say by a factor of 1.4):
Focal length: 145mm
Distance: 10 ft.
Aperture: f/5.6
Depth of field: 0.47 feet

Focal length: 75mm
Distance: 10 ft.
Aperture: f/5.6
Depth of field: 1.81 feet

Another comparison, this time altering the distance to the subject (also by a factor of 1.4):
Focal length: 105mm
Distance: 7.14 ft.
Aperture: f/5.6
Depth of field: 0.46 feet

Focal length: 105mm
Distance: 14 ft.
Aperture: f/5.6
Depth of field: 1.8 feet

Finally, let's try changing the aperture by 1 stop:
Focal length: 105mm
Distance: 10 ft.
Aperture: f/4.0
Depth of field: 0.64 feet

Focal length: 105mm
Distance: 10 ft.
Aperture: f/8.0
Depth of field: 1.29 feet

In this theoretical example, there was arguably a more significant change to the depth of field when the focal length or the subject distance was changed compared to a change in aperture.

Don't get me wrong.  I'm not saying that aperture is not important.  All I'm saying is, it's a juggling act.  After all, the focal length and distance aren't just going to affect the depth of field - they will also of course affect the composition and perspective.   Similarly, you can't just rely on changing the aperture.  Sometimes, it's just not possible to use a wide aperture, as when there is bright ambient and you are using a monobloc flash with your camera already at its sync speed.

Indeed, those were the circumstances when I took the headshot above.  The subject was lit with an SB-800 on a beauty dish as key, with an AlienBee B1600 with 60-inch shoot through umbrella as fill, plus a white reflector on the side.  The B1600 doesn't have high speed sync so my shutter was limited to 1/250.  Although we were partially shaded, it was still relatively bright, and the widest my aperture could go at base ISO was f/6.3.  The client wanted a shallow depth of field -- was it a problem?  Not really.  By shooting at a relatively close distance (around 5 feet) and a somewhat long focal length (I used from 105mm to 150mm), I was still able to get a reasonably shallow depth of field.

BTW, these are the lenses I used here:
Sample #1: Nikkor 70-200 VR I
Sample #2: Sigma 50 1.4
Sample #3 and #4: Tamron 28-105 2.8

RELATED POSTS:
What's the point of having different lenses?
Using zoom lens as compositional aid
Sigma 50-150 is TIGHT
Read More
Posted in | No comments

Sunday, 15 July 2012

Fayoum Desert Trip - Part 3

Posted on 15:50 by Unknown
Sand Boarding
 
In the previous part, we stopped the story telling at the "Whales Valley", we rested there until the sun's & the sand's heat became bearable for sand boarding, which was our next activity, click through to find out more.

I have never done or seen any sand boarding before, and I was curious as to how the whole thing worked out. The drivers took us to some dunes with very soft sand (that of the type that enters beneath your focusing ring and under your mobile phone's keypad and sticks to yourhands and faces, a real threat for electronic devices) and a steep downward slope.
 
Car parked on a gentle slope
 
Next step are the boards themselves, as you can see in the opening picture, they are made of wood, and have straps to hold your feet, but not all of the boards had these straps. Before boarding, the sand boards are waxed from the bottom so the friction becomes minimal and they slide easily by the force of gravity, at first we tried going down sitting on the boards to see if we'll be able to control the board, it looked very steep from the top, and it was a far way down.
 
Sliding for the first time
 
Then some started sliding while standing.
 
Sitting & Standing
 
And soon enough we had our falling pictures.
 
Falling at speed
 
A heap at the bottom, far far away, that was shot with a 100mm focal length
 
Falling didn't hurt at all, but we soon discovered a big problem with the whole game, when you reach the bottom, you have to get to the top again, with the board, needless to say, it required a huge effort because of the slope and some of us took a break at the middle of the climb, I know I did, that killed it for me, after a couple of slides I decided the pleasure of sliding for a few seconds was just not worth climbing to the top again in several minutes. And it didn't help there were several people waiting and calling for you to climb tothe top so that they can use the board I had.
 
Using the board as an anchor by digging it in the sand to aid the climb
 
I spent the rest of the time taking photos from the top, gear wise, for the whole sand boarding thing, I have been exclusively using the 200mm f/2.8, the 24-105 went inside the bag and I decided not to use it for the rest of the day. I took some photos of the drivers and my exhausted comrades, there's just something with that 200mm look that makes me giddy.
 
Can't remember what was he saying, probably didn't even hear him since I was a 200mm f/2.8 away
 
Sun tired
 
Fallen down
 
Sun and effort took its toll on all of us
 
We had to leave this location and reach the place where we were supposed to cook dinner before the dark, and it was nearly sunset, one look behind us on the other side where the sun was setting, and I found some gorgeous photos, the 200mm helped me compress the pictures in a way I liked.
 
Cliche shot
 
Dunes and sunlight
 
Human steps
 
At the top
 
Once we finished taking these photos, we headed for a camp (just a torn tent) to grill our dinner and main course for the day, sun has already went down and I removed the 200mm and put on the 50mm f/1.4 and the 580EX speedlite which I specifically brought for low light shooting, and while we waited for the drivers to finish grilling, I decided to use the blue hues in the sky and take some pictures.
 
Last picture with available light, 50mm wide open
 
Artificial light
 
Sinister look
 
For the two pictures at the top, I metered for the sky until I got the blue hue I wanted and then I turned on my flash and bounced it to the left, I used the white fabric of the tent to bounce my flash from and get this nice directional light, I had my subjects sit beside the tent and turn their faces until I got what I wanted, flash was on TTL, I didn't fiddle with the power. The picture below shows a slight pull back to show where I bounced my flash from.
 
Bounce flash and TTL, best invention after digital sensors
 
After we finished dinner, we made some tea utilising the coal we used for grilling, and we spread around talking, relaxing, singing and doing whatever we felt like doing, we played for a while with a torch to make scary looking portraits.
 
Coal on fire, captured with the 550D and the 60 Macro
 
Lighting from the bottom looks scary, but the expression was not scary
 
Now that's more like it
 
For the final photos of the day, I wanted to try some long exposures, I had my Slik mini tripod, and I used the 50mm, I wonder how people focus on things in complete darkness, fot some photos I was able to focus using a torch to light someone's face, but for landscapes, it was very difficult, and I had to do some guessing based on the faint outline I saw at the back LCD live view image.
 
Can you believe this is only the light of the moon?
 
Pile of stuff, shot 1
 
Pile of stuff, shot 2
 
The two shots above were both identical 14 second long exposures, but with one difference, an accident actually, during the first exposure you see at the top, one of the guys was taking a photo of the same thing but he used his flash, resulting in a totally different picture, which one do you like more? I like the first one more, it looks more interesting.
 
Staying still for 14 friggin seconds
 
B&W version
 
My cousin in the images above has an uncanny ability to stay still for a long time, so this time we decided to test him to the limits in a 14 second exposure, what do you think, did he succeed?
 
The red light you see is an idea we decided to implement to make the picture more interesting, we had a Yongnuo 565 flash that emits this weird pattern as an AF assist light, so we moved the light around during the exposure to create what you see at the top, and I made a black and white version as well, which one do you like more?
 
That's it for the trip, after resting for a while we gathered all our stuff and moved back to where we left our cars, the only thing worth mentioning during our trip back is that the drivers turned off their headlights for a part of the road and used the moon light only, their reasoning was that they were able to see the road more evenely and farther away that way, we were back at around 10pm, exactly 12 hours after we started.
 
I hope you have enjoyed this series and that I managed to tell you the story in a fun and an immersive way, until next time.
 
 
RELATED POSTS
 
Fayoum Desert Trip - Part 1
Fayoum Desert Trip - Part 2
 
Posted with BlogsyPosted with Blogsy
Read More
Posted in 200mm, 200mm f28, 200mm f28 L II, 24-105 f4, 4x4, 5D Mark II, desert, fayoum, wadi rayan | No comments

Friday, 13 July 2012

How I preordered a Nikon D600

Posted on 11:03 by Unknown

UPDATE: 9/18/12 - What ultimately happened to my preorder.

UPDATE: 9/12/12 - Amazon.com now accepting preorders.
http://betterfamilyphotos.blogspot.com/2012/09/amazoncom-accepting-nikon-d600-preorders.html

UPDATED: 9/4/12 - SEE BELOW.

I sold my D3 and preordered a Nikon D600.

I am very sure that the D600 will be announced on or before Photokina, and I think there's a good chance it will be out by Christmas. I'm even more certain that the specs will be just right for my needs: a more reasonable pixel count than the 36mp of the D800, more portable than the D3 or D4 (I found the D3 too big and heavy). In terms of image quality, I believe it will have noise that is as good as if not better than the D3 and D700 but at a higher resolution (16 or 24mp) and therefore more easily cleaned up with noise reduction. Who knows, it may even have a pixel binning mode, which would be awesome (because low noise is more important to me than extremely high resolution). Plus it will have some of the new features from the D800 and D4. On top of it all, everyone is speculating that the price will be competitive. All of this adds up to one thing: the Nikon D600 is going to be a super hot seller. It will be harder to come by than the D800. Which means that unless you are part of NPS (Nikon Professional Services) or you pay a ridiculous premium on ebay or you preorder it, you will likely not get one for several months.

The problem of course is how to preorder it. If you call online stores like Amazon, Adorama and B&H, they'll tell you that you can't preorder it yet, because there's no item number for it (after all, it hasn't even been announced and is nothing more than a rumor right now). Instead, visit your friendly neighborhood camera store. Their policies are not as rigid as those of online stores. Ask them if you can preorder it or be on some sort of interest list.  Perhaps they may even already have such a list. If not, then offer to put down a deposit on one. They might start a list.

If you live in Los Angeles, call the Bel-Air Camera superstore. I like them because the staff are very knowledgeable, they stock a lot of equipment, and their pricing is usually very reasonable. I figure since they're one of the largest remaining brick and mortar stores in LA, there's a good chance that they will have a decent allocation of D600's. I spoke to Michael and Rica. Both of them were very helpful and created a preorder list for me. If you give them a call, tell them you were referred by Mic Ty.

After that, you can join me for the vigil. :)

A word of caution: it goes without saying you should pick a reputable camera store.  And obviously, nothing here is guaranteed.

EDIT:
In case anyone thinks I made this up, here is a screen cap of the charge on my credit card for the $300 deposit:

As I said, you should talk to Michael or Rica.  Mention my name, and my order number is 30228X (for privacy I'm excluding the last digit - I'm sure they will still be able to find the order).

7/23/12 update: called Bel-Air Camera and spoke to Michael today.  He said usually, Nikon will send their store a list of cameras that are available for them to order.  So far, they haven't received any such list from Nikon yet.  Meanwhile there is now a group of preorders.  So I'm not the only one who has been able to preorder from them.

8/15/12 update: spoke to Michael again.  No news yet re the D600.  FWIW he also believes the D600 will ship in time for Christmas.

9/4/12 update. Called Bel-Air.  They confirmed the news about a Nikon launch on September 13 although of course there's no official word on what the new camera will be.  They confirmed that they will be honoring preorders for anyone who has placed a deposit.  Once they receive the actual product, they will be calling people with preorders in the order that they were made.

RELATED POSTS:
Nikon D600 photos leaked; what we can deduce from the photos
Nikon D600 predictions
Nikon D600 order update
Read More
Posted in | No comments

Wednesday, 11 July 2012

Fayoum Desert Trip - Part 2

Posted on 14:57 by Unknown
The lake from the top
 
In the first part of this series we stopped at having breakfast by the lake side, in this part we climb up to see the full lake and go to the "whales valley" to see some fossils and have a light lunch.

Our breakfast location from the first part
 
Remember that picture? I showed it in the first part and told you to keep it in mind since I am going to refer to it, check that next picture, the red dot represents the place where we had our breakfast.
 
Red dot points to the bay where we had our breakfast
 
See how large the lake is, I was astonished at its sheer size when we climbed up, and in the middle of the desert. The opening picture features the same lake but shows a bit of the foreground to make a more interesting composition and give a sense about the size.
 
Taking pictures at the top
 
Small man, large desert
 
Climbing
 
During our time in the cars, we tackled some scary inclines and declines, but this was one of the scariest, at the top of that climb, the incline was almost 50 degrees with little space to gain enough speed beforehand, you don't take these steep inclines slowly, you gain enough speed beforehand and try to keep the engine running at its optimum power band.
 
The car in front of us, that 2-step climb is very difficult
 
Our first attempt to climb this two part incline failed (look carefully at the picture above), we weren't able to climb the top most part, the car loses too much speed and power once it climbs the first part, and there is no space to gain speed for the second part, so we descended to the bottom (going backwards, scary) and tried another go with more speed, you can see the cars waiting at the top. After the first attempt, I fancied taking pictures of the car climbing, so I left the car at the bottom (before the second attempt) and asked the driver to wait until I took a good safe position for shooting, and this is what I got.
 
Wheels in the air
 
When I showed the driver this picture, he was very happy and asked mt to send it to him (which I did).
 
After we reached the top and parked the cars, everyone spread around observing the scenery and taking pictures, I was checking the climb pictures with my cousin at the back of the camera's LCD, we were standing behind our car, the blue jeep, then suddenly I found myself taking a very strong hit in my forehead and flying backwards on my back, with the camera in my hands, I didn't really understand anything, all I did was raise my right hand holding the camera to protect it, and directmy fall on my left shoulder and arm, then I noticed the blue jeep moving backwards towards me, so that's what hit me, but it was still moving, so I started rolling away trying to escape the wheels before the car finally stopped, fortunately enough the driver heard the sound of the car hitting something and stopped.
 
After checking with my cousin and the driver, it turned out that the driver decided to move the car, but failed to notice us standing behind (I assume he's used to moving freely in the desert as there are no obstacles to hit, ha!), and he didn't actually hit me, he hit my cousin first since he was closer to the car when wewere both bent down looking at the camera's LCD, with a force that made his head hit mine strongly that I was thrown back, and fortunately my cousin was able to jump over me while he was falling. It was a really stupid move from the driver, but fortunately ended up with minor scratches on my left arm, and a swollen right eyebrow, and the camera never hit the ground once.
 
Happy driver
 
After that we moved on to our next destination, the "whales valley", at that point several of us were feeling exhausted because of the strong sun and the harsh weather, I took a few pictures on the way, see that picture at the top, I like it for several reasons, the relatively slow shutter speed shows motion in the wheels and the sand below the car, and is accentuated by the bent antenna, add to that the smiling driver and the guy sleeping at the back and you know why I like it.
 
Exhausted
 
Shot from the car while moving
 
Sun behind the clouds, it was this beautiful and moving in reality
 
Whales valley rest area
 
We arrived to the valley, and the drivers opened the cars' hoods to cool them down, after all, they were old tough Land Cruisers that are built from rocks. The actual fossils were not in the place you see above, this is the rest area, cafeteria and the bathrooms. The fossils were left where they were found, surrounded by a rope to keep people from touching them, they were distributed around the cafeteria, we were given a map showing all the fossil areas, and the paths to there were marked with rocks on the sides as a means of guidance.
 
We decided to wash ourselves, rest for a while and have our lunch before walking under the harsh sun to see the fossils, when we decided to mocve, some of us prefered the shade and didn't come see the fossils, I envy them, maybe I had high expectations but I was dissapointed, I didn't find them interesting at all, and I decided not to take a single picture of it.
 
Leaving the cafeteria and going to see the fossils, taken with the 550D and the 60 Macro
 
Some coral reefs from the times when this desert was covered by water
 
More reefs
 
Interesting shapes
 
More interesting shapes
 
Even more interesting shapes "reminds me of KFC, my phrase, not the picture, ultra mega super duper zinger supreme"
 
When we returned to the cafeteria, we decided to stay there until the sun's intensity decreased so that we can start our sand boarding fun, but that's for the next post. We spent the time chatting, taking pictures, playing riddles, etc... The large number of people made it really pleasant, I don't imagine I would have enjoyed it this much were we 4 or 5 guys only.
 
Me shooting video with my Galaxy S II
 
I rarely get my pictures taken, so I am celebrating here, 550D + 60 Macro
 
550D black and white mode, JPG shooting, me likey
 
My friend found this little fox and took this photo, long pointy ears
 
That's it for this part, the next and last post will have my absolute favorite pictures of the whole trip, sunset and sand dunes, that's all I can say.
 
 
RELATED POSTS
 
Fayoum Desert Trip - Part 1
Fayoum Desert Trip - Part 3


Posted with BlogsyPosted with Blogsy
Read More
Posted in 200 L, 200mm, 200mm f28, 200mm f28 L II, 24-105 f4, 4x4, 5D Mark II, desert, fayoum, wadi rayan | No comments
Newer Posts Older Posts Home
Subscribe to: Posts (Atom)

Popular Posts

  • Olympus E-PL3 with 14-42 Lens $199; Moving from Nikon to MFT?
    I saw on 43rumors.com that the Olympus E-PL3 was being sold at Newegg for just $199 with the 14-42 kit lens included.  I checked it out and...
  • Exploring 3D Photography with the Loreo 3D Lens in a Cap
    When I hear of 3D photos or videos, my first impression is that it's gimmicky.  Interesting for one or two shots maybe and then after th...
  • Double Camera Strap & BlackRapid RS-5 Review
    This is a review of two camera straps: - The first is a double camera strap that's -- let's be blunt -- a knockoff of the BlackRapid...
  • 2x Lowepro Review: Toploader Zoom 45 AW & 55 AW + Unraveling The SlipLock™ Mystery
    Left: Lowepro Toploader Zoom 55AW, Right: 45AW, Middle: Canon 60D + 15-85 Welcome to a new rare photography accessory review as I'd lik...
  • Toys for the Big Kids: Speedlight Softbox
    In this post, we will have a look at a softbox for speedlights.  This post is part of a series that will cover equipment reviews for committ...
  • A Couple Of Yashica Oldies
    Yashica Electro 35 GTN + Yashica ST-7   How many of you know the above camera? Have you seen such a tripod before? Hit the jump for a flas...
  • Sigma USB dock available for preorder
    B&H is offering the Sigma USB dock for preorder for $59 + s/h , due for shipping on May 18. The dock allows you to update your firmwar...
  • Canon Professional Network
    I didn't know about Canon Professional Network until Syl Arena recently blogged about his 4-part article on speedlites.  I took a look ...
  • Minimizing Nikon D5200 and D7100 banding; Mysteries Remain
    Many people have noted that the Nikon D5200 and Nikon D7100 have banding in the shadows when the exposure is pushed.  In this post I'll ...
  • Going Crazy With Tripods
    My Tabletop Tripod Trio I love tripods, I go all soft and wobbly when I see attractive looking ones, so here is my story with tripods, inclu...

Categories

  • "alien bee"
  • "april fool's"
  • "ring flash"
  • "yong nuo"
  • 1"
  • 1/1.7"
  • 10-17
  • 10-20
  • 11-16
  • 15-85mm
  • 15z
  • 17-50 vc
  • 190cx pro3
  • 2.8
  • 2.8G
  • 2/3"
  • 200 f2.8
  • 200 L
  • 200mm
  • 200mm f/2.8
  • 200mm f/2.8 L II
  • 200mm f2.8
  • 200mm f28
  • 200mm f28 L II
  • 2012
  • 2013
  • 23 Samsung led
  • 24-105 f4
  • 24-70
  • 25 1.4
  • 28-105
  • 28-70
  • 35mm
  • 35mm f/2
  • 35mm f2
  • 360
  • 3rd party
  • 4.1
  • 4/3
  • 40 pancake
  • 40 panckae
  • 40 stm
  • 40-150R
  • 40mm f/2.8
  • 430EX
  • 43rumors
  • 45 18
  • 45 AW
  • 4x4
  • 50 14
  • 50 f14
  • 50-150
  • 50mm
  • 50mm f/1.4
  • 55 AW
  • 55-250
  • 550D
  • 55aw
  • 560ex
  • 580 ex ii
  • 580EX
  • 580EX II
  • 5d
  • 5d mark 2
  • 5d mark 3
  • 5D Mark II
  • 5d mark iii
  • 5d2
  • 600d
  • 600ex-rt
  • 60d
  • 60fps
  • 60mm macro
  • 650d
  • 6d
  • 7.5mm
  • 720p
  • 75 f1.8
  • 85mm f1.8
  • 8x12
  • abbc
  • abstract
  • accuracy
  • active d-lighting
  • adjustment
  • adl
  • AF
  • af point
  • AF Point Expansion
  • aftermarket
  • airport
  • alexandria
  • alien bee
  • alien bees
  • alienbee
  • alienbees
  • alternative
  • ambient
  • ambient light
  • angle
  • aperture priority
  • APS-C
  • apsc
  • assignment
  • auto focus
  • auto white balance
  • autofocus
  • AWB
  • awl
  • back button focus
  • background
  • background blur
  • backlight
  • backlighting
  • backlit
  • bad behavior
  • bad photography
  • balance
  • bare flash
  • battery
  • BBF
  • beach
  • beams
  • beauty dish
  • bellagio
  • BFT
  • birthday
  • black
  • black foamie thing
  • black rapid
  • blackrapid
  • blogs
  • blower
  • blown
  • blur
  • bokeh
  • bounce
  • bounce card
  • bounce flash
  • bower
  • bracket
  • brightness
  • brilliance
  • brolly grip
  • brother
  • build
  • burst mode
  • butterflies
  • butterfly
  • C.Fn
  • cable
  • cake
  • camera
  • camera bag
  • camera releases
  • camera settings
  • candle
  • candlelight
  • canon
  • Canon 100mm Macro L IS
  • canon 200mm f28L
  • canon 24-105
  • canon 40 stm
  • canon 40mm f28 pancake
  • canon 50
  • canon 50 1.4
  • canon 55-250
  • canon 5d mark 2
  • canon 5d mark ii
  • canon 5d mark iii
  • canon 5d2
  • canon 5d3
  • Canon 60d
  • canon 6d
  • canon g11
  • canon speedlite
  • car
  • carbon fiber
  • catch lights
  • cheap
  • christmas
  • clean
  • cleaning
  • clipped
  • clipping
  • close up
  • clouds
  • cls
  • clustered
  • color
  • compact
  • comparison
  • composition
  • compositional aid
  • construction
  • contrast
  • cooler master
  • copyright
  • core i7
  • cowboy
  • cowboystudio
  • cpl
  • creepy
  • crop factor
  • crop sensor
  • cyber commander
  • cybersync
  • d-lux
  • d-lux5
  • d3
  • d300
  • D5100
  • D600
  • d70
  • d700
  • D7100
  • d90
  • dark background
  • david hobby
  • daylight
  • dell 24 inch
  • depth of field
  • desert
  • diamond
  • digital
  • directional
  • distance
  • diy
  • dlux
  • dlux5
  • dng
  • double
  • dslr
  • DSLR bag
  • dual
  • dust
  • dx
  • dynamic range
  • earthquake
  • ebay
  • ebay trigger
  • eclipse
  • editing
  • EF 40mm f/2.8
  • ef-s 60mm
  • einstein
  • Electro GN
  • engagement
  • environmental portrait
  • ep5
  • equipment
  • ETTL
  • ettr
  • europe
  • events
  • evf
  • ex600
  • existing light
  • expensive
  • exposing to the right
  • exposure
  • f/3.5
  • family
  • faq
  • fasten-r3
  • favorite
  • fayoum
  • Fayoum desert
  • fill
  • fill light
  • film
  • filter
  • finepix
  • fire
  • fireplace
  • first impressions
  • fish-eye
  • fisheye
  • fix
  • FL600R
  • flash
  • flash bounce
  • flash sync
  • flash trigger
  • flashmeter
  • flashright
  • focal length
  • focus
  • food
  • football
  • fotodiox
  • fountain
  • freexwire
  • fuji
  • fujifilm
  • Full Frame
  • fun
  • fx
  • galaxy s 3
  • galaxy s4
  • gecko
  • GeForce gtx570 OC
  • gel
  • geomag
  • ggs
  • ghost
  • gigabyte z77 ud3h
  • glass
  • gn
  • Goodbye
  • gorillapod
  • gregg
  • grid
  • grip
  • group shot
  • gskill ripjaws
  • guide
  • guide number
  • gx7
  • haf 912
  • handheld
  • hands on
  • hands-on
  • hdr
  • head shot
  • hiatus
  • high dynamic range
  • high iso
  • high speed sync
  • highlight
  • highlights
  • histogram
  • holder
  • holiday
  • home
  • home made
  • Honda civic
  • honeycomb
  • hotshoe
  • hoya
  • humor
  • i9500
  • id
  • image quality
  • impressions
  • indoor flash
  • infrared
  • infringement
  • insects
  • inverse square law
  • japan
  • jewel
  • jewelry
  • joby head
  • jpeg
  • Kingston hyperX SSD
  • kirk tuck
  • kl bird park
  • krakow
  • kuala lumpur
  • las vegas
  • lastolite
  • laurence kim
  • lax
  • lcd
  • leica
  • lens
  • lens cap
  • lens compression
  • lens review
  • lenses
  • lenspen
  • lensrentals
  • light
  • light painting
  • lighting
  • lightroom
  • lightroom 4
  • lightroom 5
  • location
  • long
  • long exposure
  • los angeles
  • low key
  • low light
  • Lowepro
  • Lowepro 45aw
  • Lowepro 55aw
  • lr4
  • lumiquest softbox III
  • lumix
  • lx-5
  • lx5
  • m4/3
  • m43
  • macro
  • macro adapter
  • makernotes
  • malaysia
  • manfrotto
  • manfrotto tripod
  • manual
  • mark ii
  • mark iii
  • MFT
  • mft. micro four thirds
  • micro four thirds
  • mielec
  • migration
  • mini review
  • mirror
  • mirror-less
  • mirrorless
  • mobile
  • modification
  • modifier
  • monobloc
  • monoblock
  • monolight
  • motion
  • motion blur
  • multi function printer
  • multiple
  • nano crystal
  • natural light
  • neil
  • Neil VN
  • niekerk
  • nikkor
  • nikon
  • nikon d600
  • noise
  • off camera
  • oil
  • olympus
  • olympus 12-50
  • Olympus 40-150
  • olympus 45
  • olympus 45 18
  • olympus om-d em-5
  • om-d
  • omd
  • omd em1
  • omd em5
  • omd em6
  • on-camera
  • one inch
  • overexposure
  • overpowering sun
  • panasonic
  • panasonic leica 25 14
  • pancake
  • party
  • passport
  • pastries
  • pastry
  • pc
  • pentax
  • peter
  • phone
  • phone photography
  • photo
  • photo tips
  • photography
  • photokina
  • photomerge
  • photoshop
  • photoshop elements
  • planning
  • pocketwizard
  • point and shoot
  • poland
  • polarizer
  • popup
  • popup flash
  • portrait
  • post processing
  • post-processing
  • postprocessing
  • product
  • product shots
  • profile
  • protection
  • protector
  • quad-flash
  • quantum
  • radiopopper
  • raid 0
  • Range finder
  • raw
  • raw editing
  • raw+jpeg
  • rays
  • real
  • recovery
  • reflection
  • reflector
  • resources
  • restaurant
  • review
  • rf-603
  • rf603
  • ricoh
  • ring
  • ringflash
  • robin wong
  • roger cicala
  • rogue
  • rokinon
  • roll off
  • roll-off
  • rolloff
  • rs-5
  • rs-7
  • rumors
  • s5
  • s5 pro
  • s5pro
  • samples
  • samsung
  • samyang
  • sb-26
  • sb-80
  • sb26
  • sb800
  • screen protector
  • sensor
  • sensor swab
  • sensorclear
  • sensorklean
  • sensorklear
  • separation
  • shadow
  • shadow pulling
  • shadows
  • shards
  • sharpening
  • sharpness
  • shoot through
  • shoot-through
  • shoot-thru
  • shooting technique
  • shootout
  • short
  • sigma
  • sigma 50-150
  • skin tones
  • skylight
  • Slik Mini Tripod
  • slingshot
  • slow
  • small
  • smooth
  • soft
  • softbox
  • sony
  • sony a99
  • sony rx100
  • sony t10
  • specular
  • speed
  • speedlight
  • speedlite
  • spinlight
  • spots
  • standard
  • stockholm
  • story
  • strap
  • strobe
  • strobist
  • studio
  • studio strobe
  • subject
  • substitute
  • sudden
  • summilux
  • sunrise
  • sunset
  • sweden
  • swivel
  • sync speed
  • t2i
  • t3i
  • Table top tripod
  • tamron
  • technique
  • techniques
  • tele
  • telephoto
  • thinktank retrospective 5
  • third party
  • tips
  • tokina
  • tonal
  • tonality
  • tone curve
  • toploader
  • toys
  • translucent
  • travel photography
  • tri-flash
  • Tribute
  • trifold
  • trigger
  • tripod
  • truth
  • ttl
  • TTL Cord
  • u43
  • ultra-wide
  • ultrawide
  • umbrella
  • underexposure
  • unlimited sync speed
  • up-rise
  • up-rise 15z
  • update
  • uprise
  • USM
  • uv
  • uwa
  • vanguard
  • versus
  • vertical
  • video
  • view nx2
  • visual science lab
  • vs
  • wadi rayan
  • wd caviar black
  • web
  • weekend
  • westin
  • white balance
  • white lightning
  • wide
  • wide angle
  • window
  • wireless
  • wireless flash
  • wireless release
  • wireless trigger
  • workflow
  • Yashica
  • yashica gtn
  • yashica st-7
  • yn-560
  • yn-560ex
  • yn-ex600
  • yn560
  • yong nuo
  • yongnuo
  • zack arias
  • zoom
  • zoom toploader
  • zuiko

Blog Archive

  • ►  2013 (165)
    • ►  December (5)
    • ►  November (10)
    • ►  October (8)
    • ►  September (7)
    • ►  August (3)
    • ►  July (11)
    • ►  June (10)
    • ►  May (15)
    • ►  April (19)
    • ►  March (33)
    • ►  February (24)
    • ►  January (20)
  • ▼  2012 (193)
    • ►  December (17)
    • ►  November (22)
    • ►  October (34)
    • ►  September (47)
    • ►  August (12)
    • ▼  July (11)
      • Capturing Epic Sunrises and Sunsets
      • Updated Status of D600 Preorder
      • Formal Portraits with a Flashmeter
      • Controlling Depth of Field
      • Fayoum Desert Trip - Part 3
      • How I preordered a Nikon D600
      • Fayoum Desert Trip - Part 2
      • Testing the DIY Spinlight
      • Nikon SB-800 head modification - live!
      • Thank goodness
      • FlashRight Pro as Spinlight 360 Substitute (Part 1)
    • ►  June (10)
    • ►  May (13)
    • ►  April (13)
    • ►  March (8)
    • ►  February (1)
    • ►  January (5)
  • ►  2011 (141)
    • ►  December (8)
    • ►  November (8)
    • ►  October (7)
    • ►  September (9)
    • ►  August (13)
    • ►  July (13)
    • ►  June (19)
    • ►  May (17)
    • ►  April (25)
    • ►  March (22)
Powered by Blogger.

About Me

Unknown
View my complete profile